Import/Export Variant Rules
Export Variant Rules
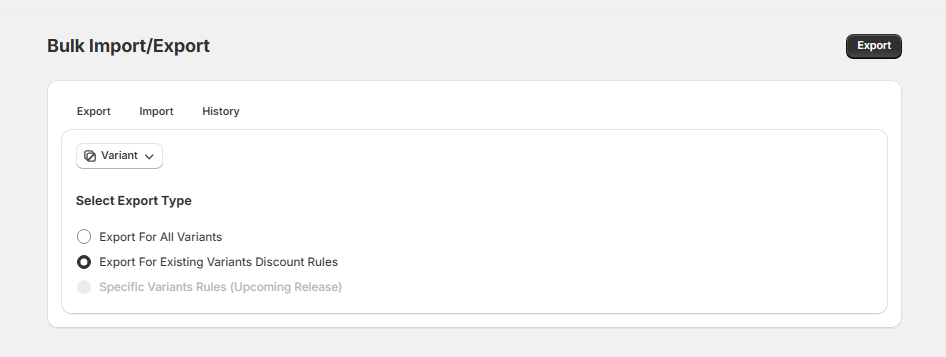
Step 1: Access Export Page
- Go to the Bulk Import/Export page from the left-hand menu in your app dashboard.
Step 2: Choose Export Option
You’ll be presented with two export options:
- Option A: Export for All Variants
- Select this if you want to export all product variants (including those with and without any discount rules).
- Option B: Export for Existing Variant Discount Rules
- Select this if you only want to export variants that already have discount rules applied.
Step 3: Click on Export
Under the Variant Rules section, click the Export button.
Step 4: Download Exported File
- After clicking the Export button:
- You will receive a notification confirming the export.
- A CSV file will be sent to your store’s registered email address.
Import Variant Rules
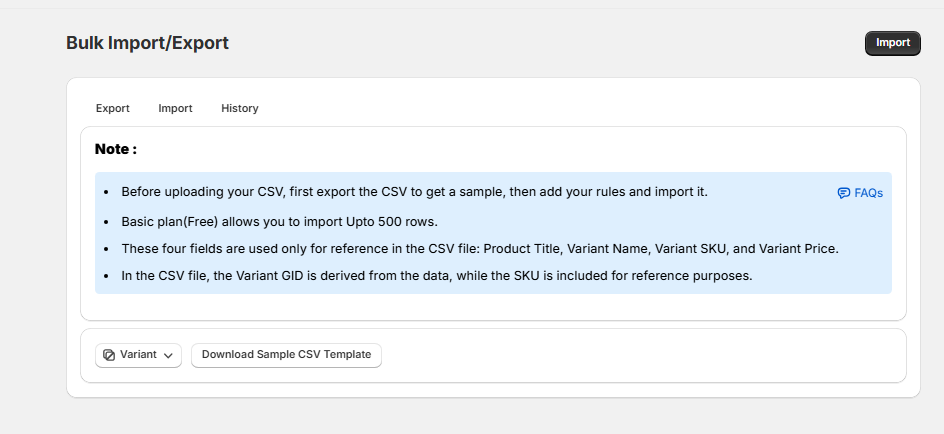
Step 1: Download Sample CSV
- Click on Download Sample CSV Template to understand the correct format for your data.
Step 2: Export First (Recommended)
- It’s recommended to export your current variant rules first. This gives you a sample file with existing data, which you can modify and re-import.
Step 3: Prepare Your CSV File
- Use the exported or sample file to enter your new or updated discount rules.
- Keep in mind:
- The following fields are for reference only and do not affect the import:
- Product Title
- Variant Name
- Variant SKU
- Variant Price
- Variant GID is a required field and used to identify each variant.
- SKU is optional and used for reference only.
- The following fields are for reference only and do not affect the import:
Step 4: Import the File
- Upload the edited CSV file using the Import function.
Note: If you are on the Basic (Free) plan, you can import up to 500 rows per file.
Import History
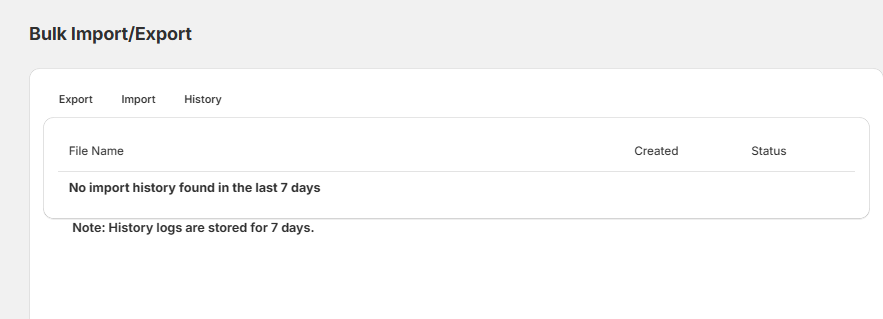
Step 1: Open History Tab
- Navigate to the History tab from the Bulk Import/Export page.
Step 2: Review Past Imports
- You can view details of your past imports.
- Only imports from the last 7 days will be visible.
Bulk Delete Variants Rules(Using Variant ID)
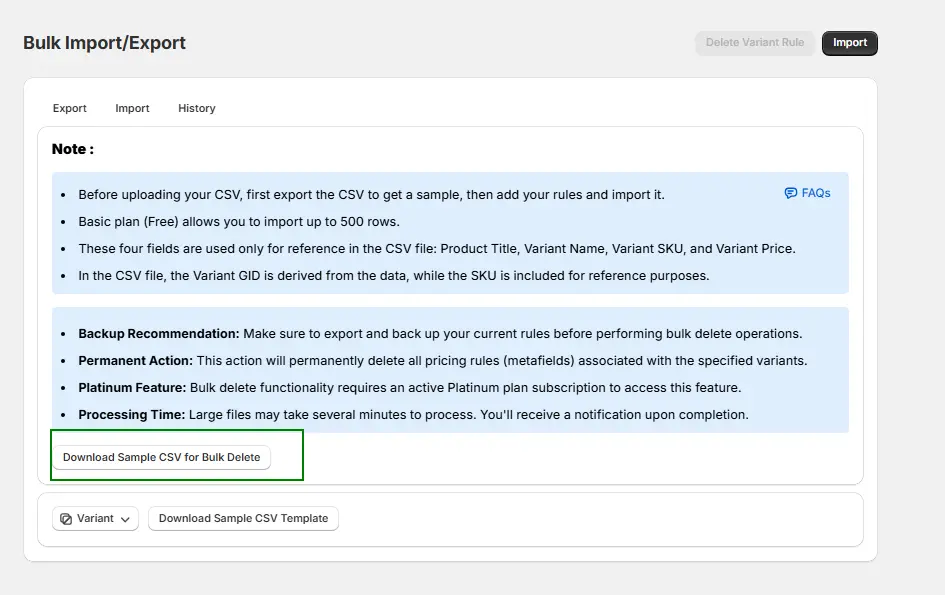
Note: The Bulk Delete Variant feature is available only on the Platinum Plan. Once subscribed, the button will be enabled in your admin.
Step 1: Export Variant Rules
-
- Go to OSCP Wholesale App > Bulk Import/Export > Export.
- Export the existing Variant Rules file.
Step 2: Prepare the File
- Open the exported file.
- Remove all columns except:
- Variant ID
- SKU (for reference only).
- (Optional) You can also download the sample CSV for Bulk Delete for reference.
Step 3: Mark Variants for Deletion
- Add a new column named Delete action.
- For each variant you want to delete, enter Yes in the Delete column.
- Remove rows for variants you do not want to delete.
Step 4: Upload the File for Bulk Deletion
- Save the updated file.
- Important: Take a backup before uploading the file.
- Go to OSCP Wholesale App > Bulk Import/Export > Import > Delete Variant Rule.
- Upload the updated file.
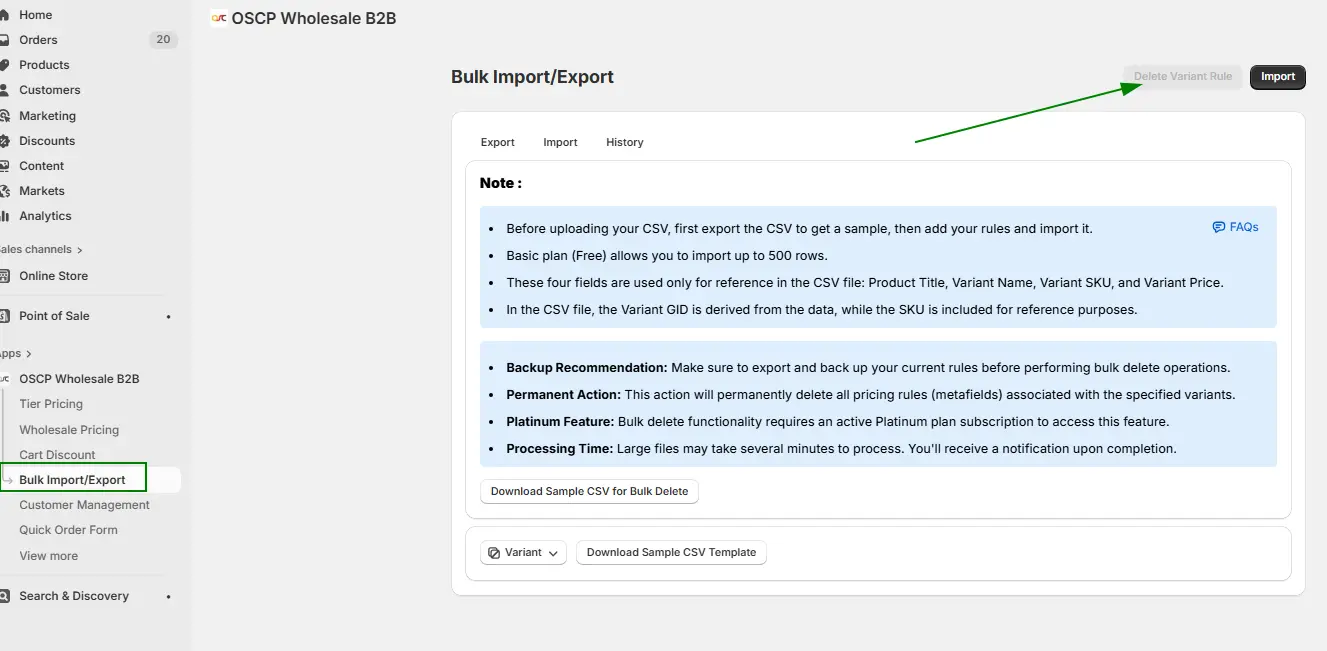
Step 5: Verify in Shopify Admin
- After the import, go to your Shopify Admin.
- Cross-check that the selected variants have been successfully deleted.
Import/Export Variant Rules for Active Dates
Exporting Variant Rules for Active Dates
1. Navigate to Bulk Import/Export
-
- Go to the Bulk Import/Export.
2. Select “Date Range Rules”

3. Choose “Export Date Range for Variant”
-
- Go to the Bulk Import/Export.
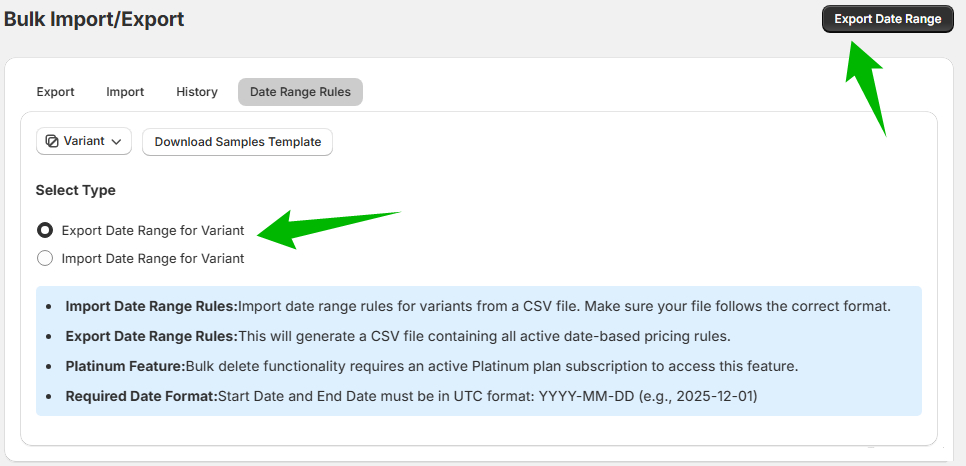
4. (Optional) Download Sample File
-
- If you want to understand the required format, download the Sample CSV file.
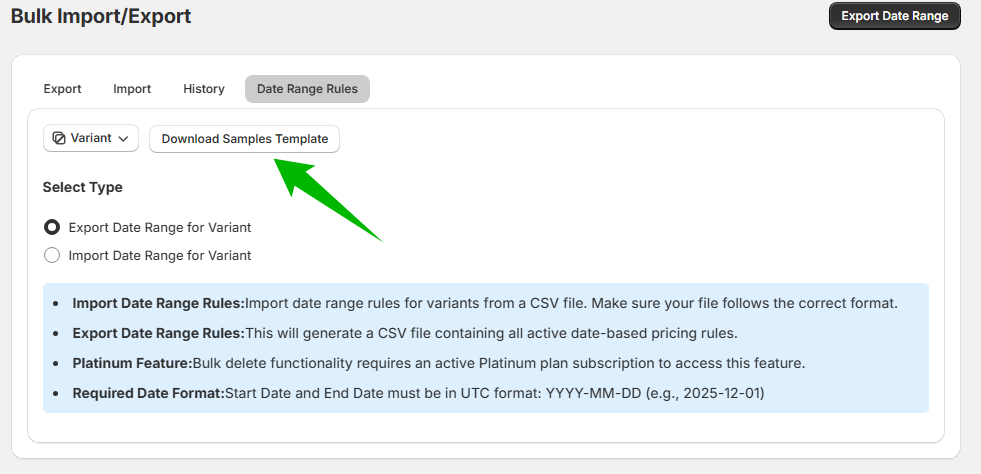
5. Add/Edit Date Ranges
-
- Open the exported or sample CSV file.
- Add or update the variant rules with desired date ranges.
Note:
-
- In one CSV file, and for one variant, you should add only one date range.
- Multiple date range rules for a single variant are not allowed.
Importing Variant Rules for Active Dates
1. Navigate to Bulk Import/Export
-
- Go to the Bulk Import/Export section in your system.
2. Select “Date Range Rules”
-
- Choose the Date Range Rules option from the available list.
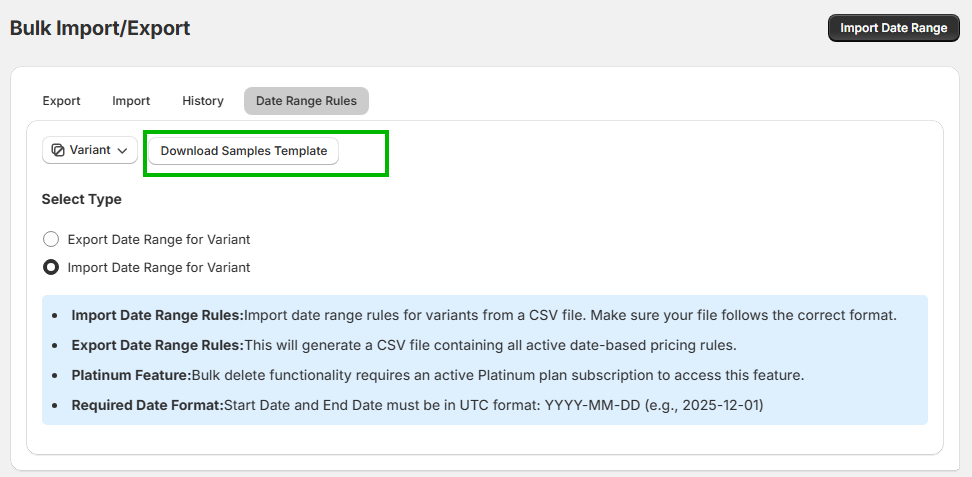
3. Choose “Import Date Range for Variant”
-
- Click on the Import option for variant date range rules.
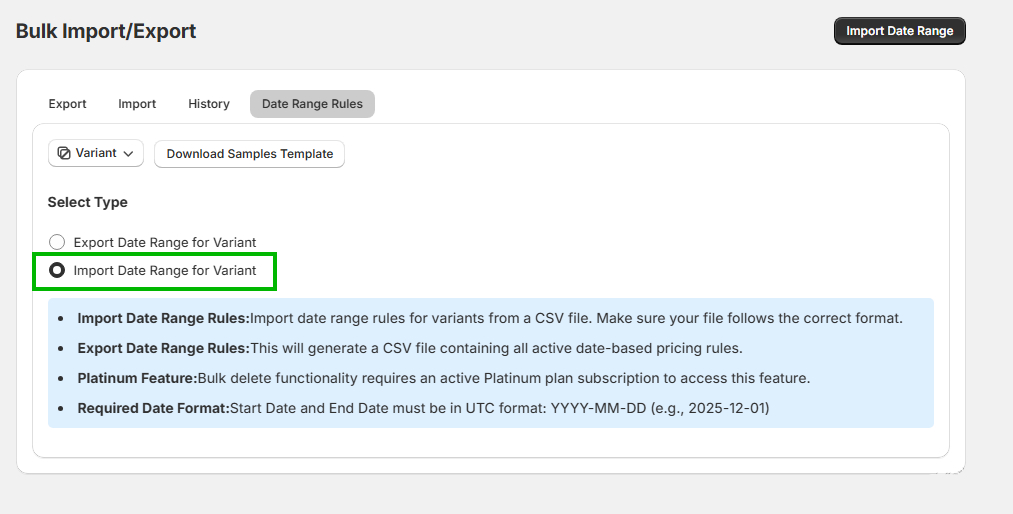
4. (Optional) Download Sample File
-
- If you need a reference for formatting, download the Sample Template.
5. Upload the Updated CSV File
-
- Select the modified CSV file (with the correct format) and upload it.
- Note: Only one date range is allowed per variant in a single file.
6. Verify Imported Rules
-
- After the import, review the system to confirm that the variant rules reflect the correct date ranges.
