 Skip to content
How to Set up Auto Order Tag
Step 1: Navigate to Order Management
- Select Order Management from the app navigation.
Step 2: Access Auto Order Tag Section
Enter Offer Name:
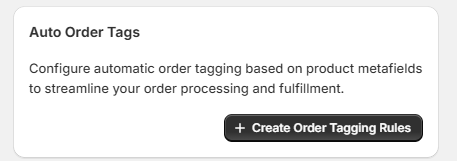
- In the Order Management page, click Create Order Tagging Rules under the Auto Order tag section.
Step 3: Enable the Auto Order Tag Block
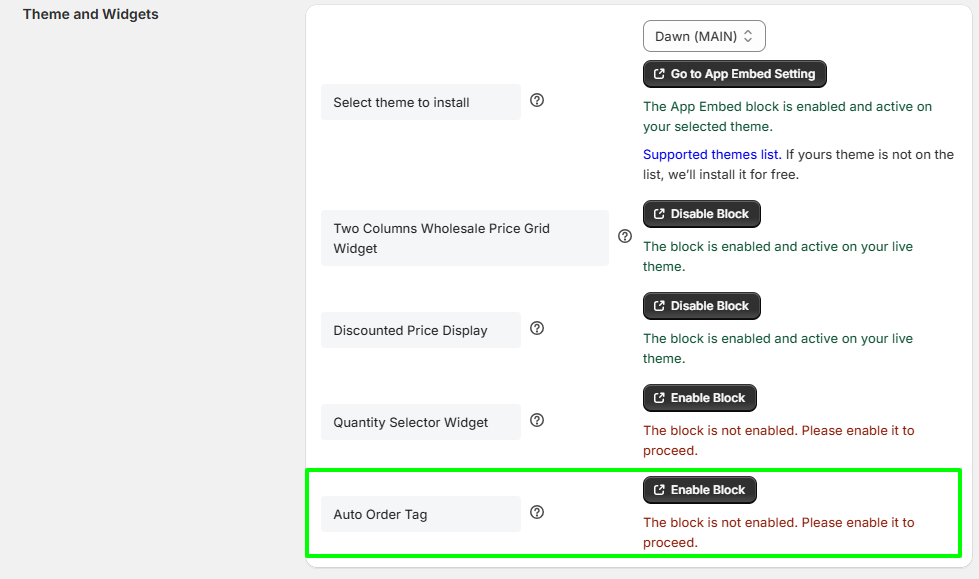
The app shows a notice: “You need to enable the Widget in your Theme Editor for the Auto Order Tag to be displayed on the product page.” — follow these steps:
- click Additional Settings.

This will redirect you to the Additional Settings page.
- Scroll to the Theme and Widgets section.
- Select your theme from the dropdown (example: Dawn (MAIN)).
- Find the block named Auto Order Tag at the bottom of the widget list.
- Click Enable Block
(This activates the Auto Order Tag feature in your selected theme
Step 4: Create Auto Order Tagging
- In the Create Order Tagging Rules area check Enable Auto Tag.
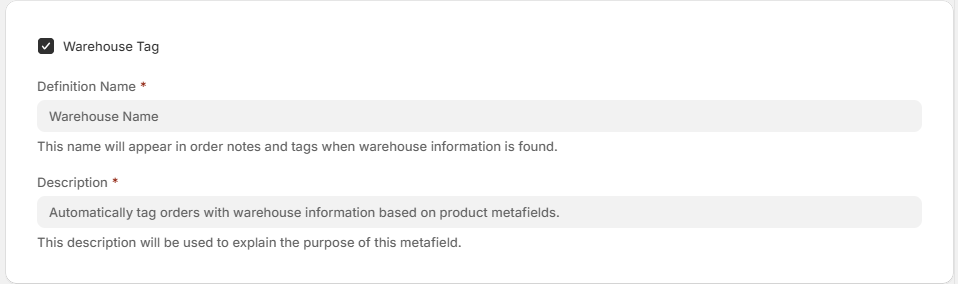
- Under Warehouse Tag (if you want orders to be tagged by warehouse):
- Tick Warehouse Tag.
- Definition Name is automatically set to “Warehouse”.
- Description is automatically generated
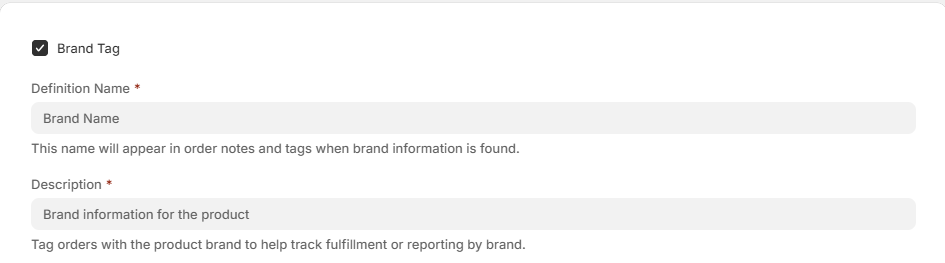
- Under Brand Tag (if you want orders tagged by brand):
- Tick Brand Tag.
- Definition Name is automatically set to “Brand”.
- Description is automatically generated
- Save changes.
Info: These settings instruct the app which product metafields to read and what tag names to create on orders.
