Set Up and Manage OSCP Swatches App
Follow the steps below to enable and configure OSCP Swatches in your Shopify store.
Step 1: Enable the OSCP Swatch Widget Block
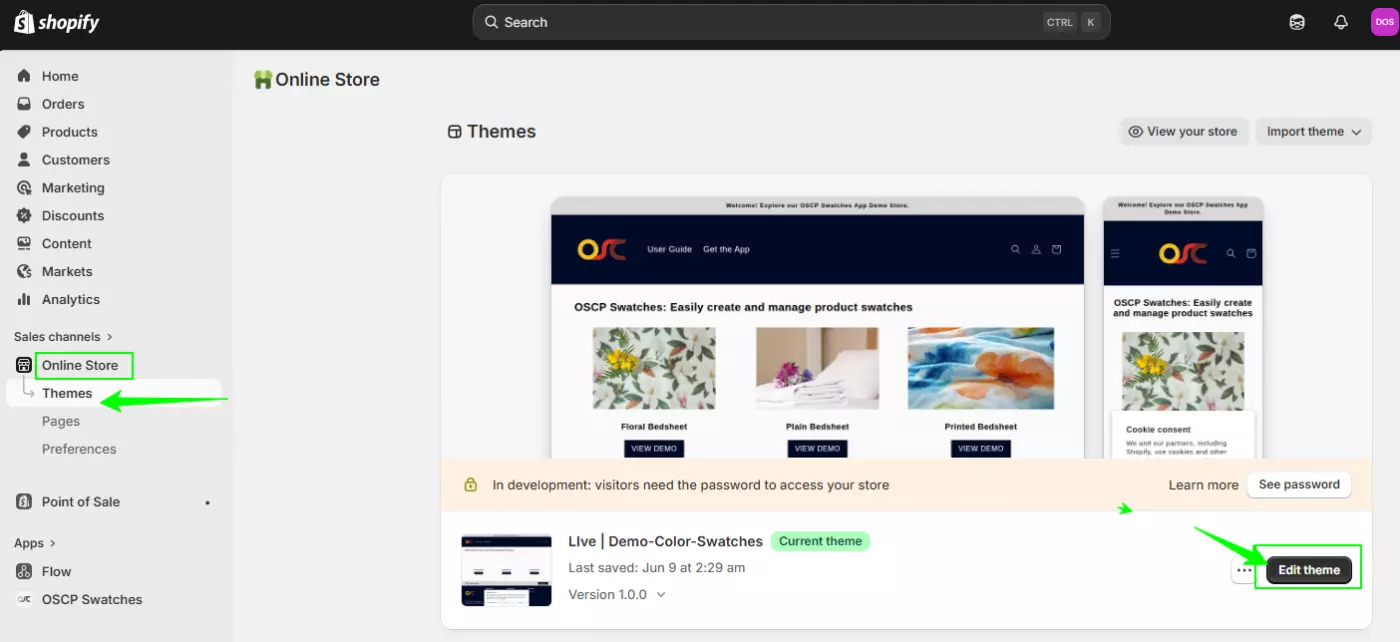
Go to Shopify Admin → Online Store → Themes.
Click Edit Theme.
From the top dropdown, select the Default Product template.
In the product section, click Add Block.
Select OSCP Swatches App from the block list.
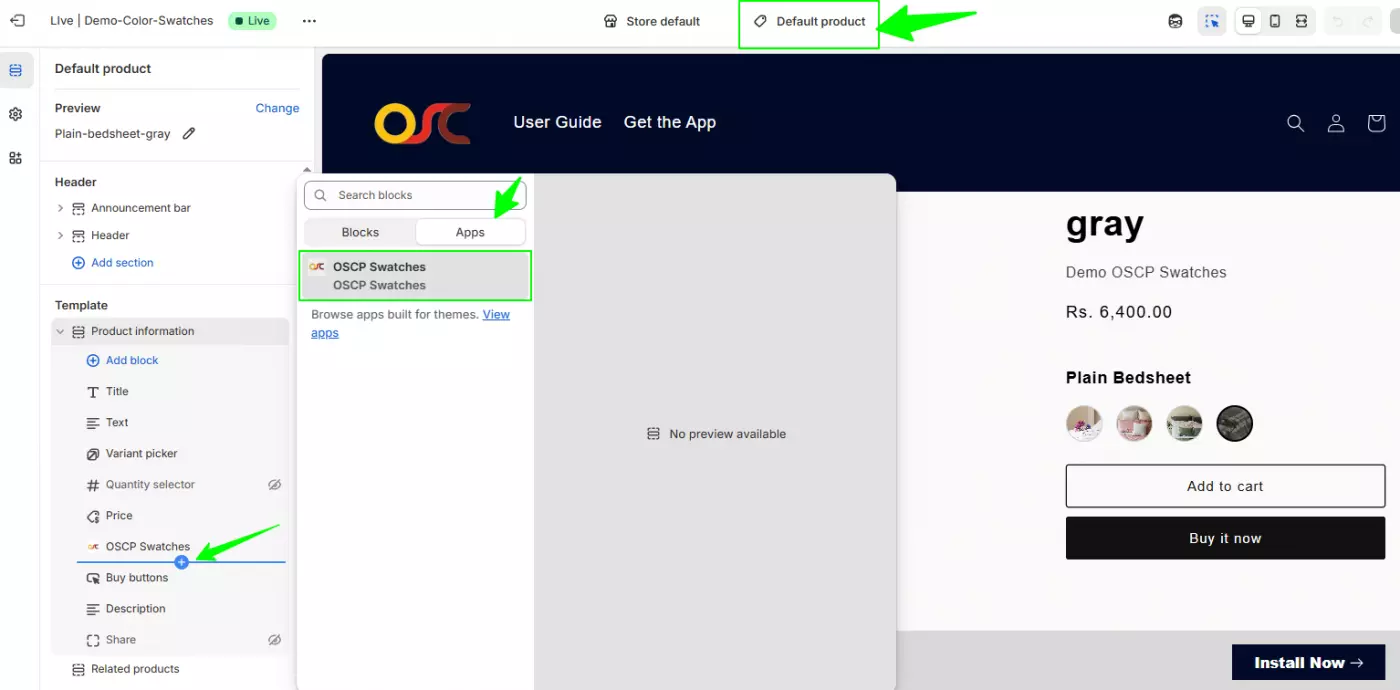
The swatch widget is now added to your product template.
Step 2: Create a Swatch
Follow the steps below to create a new swatch entry in your store.
1. Open the OSCP Swatches App
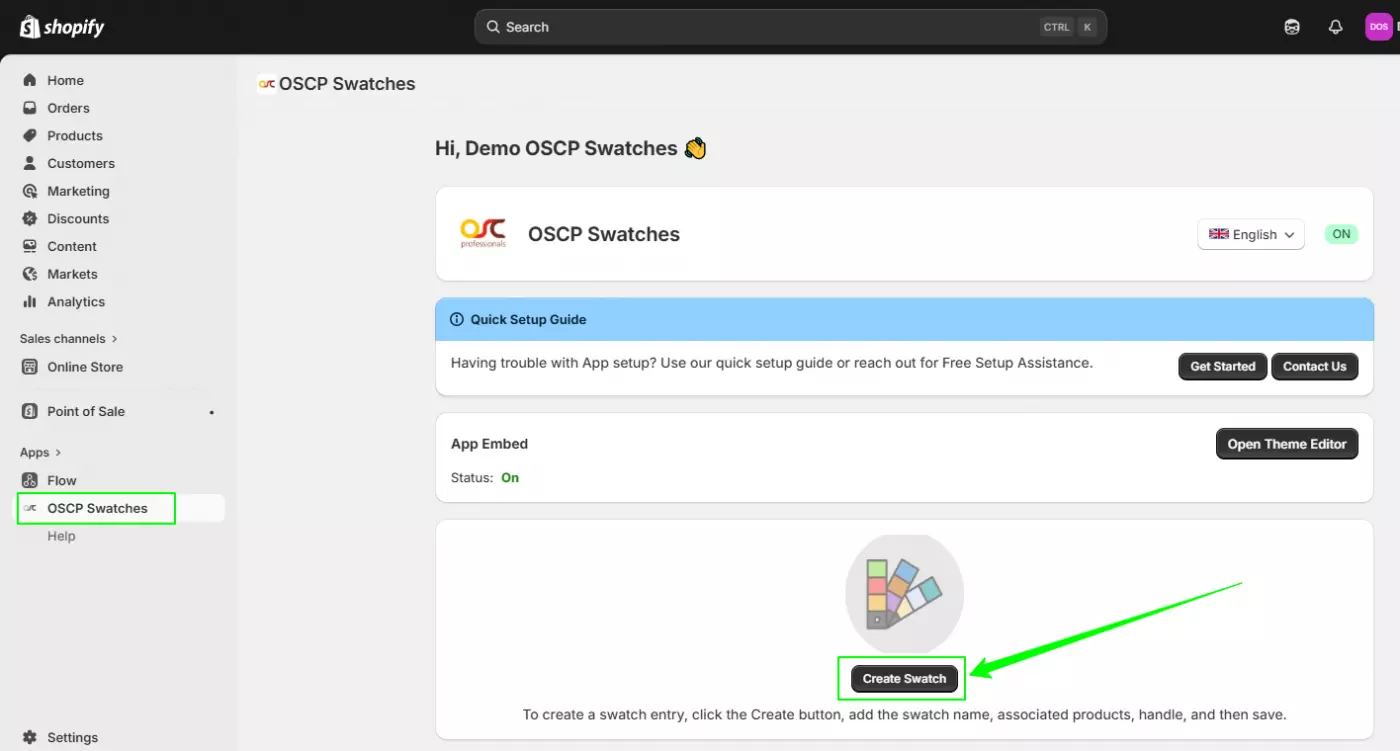
Go to Apps → OSCP Swatches
2. Click “Create Swatch”
On the dashboard, click the Create Swatch button.
3. Add a New Entry
You will be redirected to the Metaobjects page.
Click Add entry.

4. Fill Swatch Details
Enter the required information:
- Swatch Name – Add the swatch title (e.g., Floral Bedsheet).
- Associated Product – Click Select products and choose the products you want to connect.
Handle – Auto-generated (can be edited if needed).

5. Save the Swatch
Click Save to complete the process.
✅ Your swatch will now appear in the Entries list and will be linked to the selected products.
Step 3 : Assign Swatch to a Product
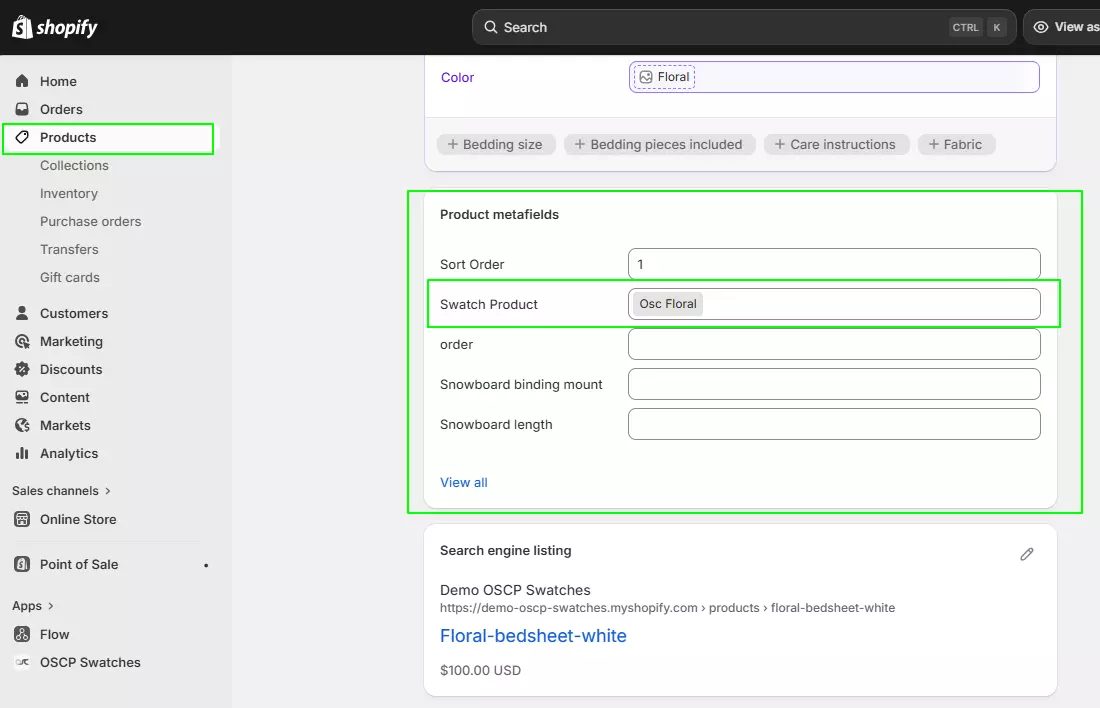
Go to Shopify Admin → Products.
Open the product where you want to show the swatch.
Scroll down to the Metafields section.
In Swatch Product, select the swatch you created.
Click Save.
✅ Swatch is now linked to the product.
Step 4: Set Swatch Item Sort Order (Optional)
Open each associated product.
Scroll to Metafields.
In the Sort Order field, enter a number.
Smaller number = appears first.
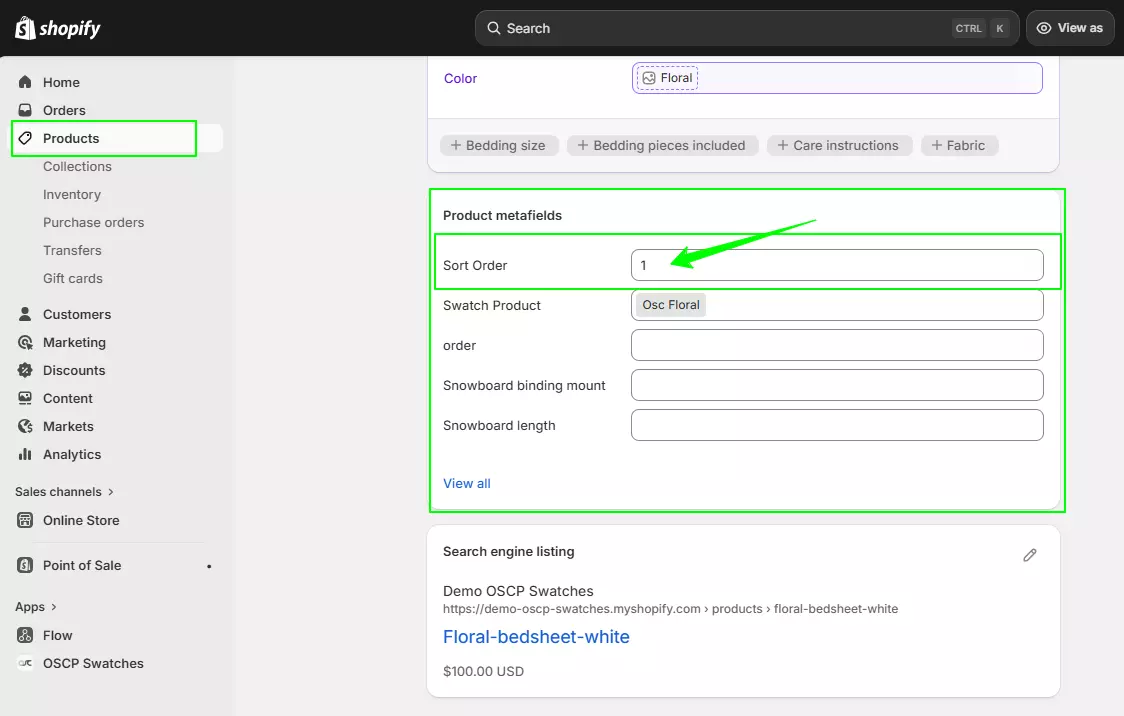
Click Save.
Step 5: Test on Storefront
Open the product page on your storefront.
Check:
- Swatches are visible
- Clicking switches products correctly
- Sort order is correct

