Skip to content

How to Manage Quote Requests .
1. Set Up Request for Quote Pages
Before customers can submit quote requests, configure the required storefront pages from the OSCP Wholesale app.
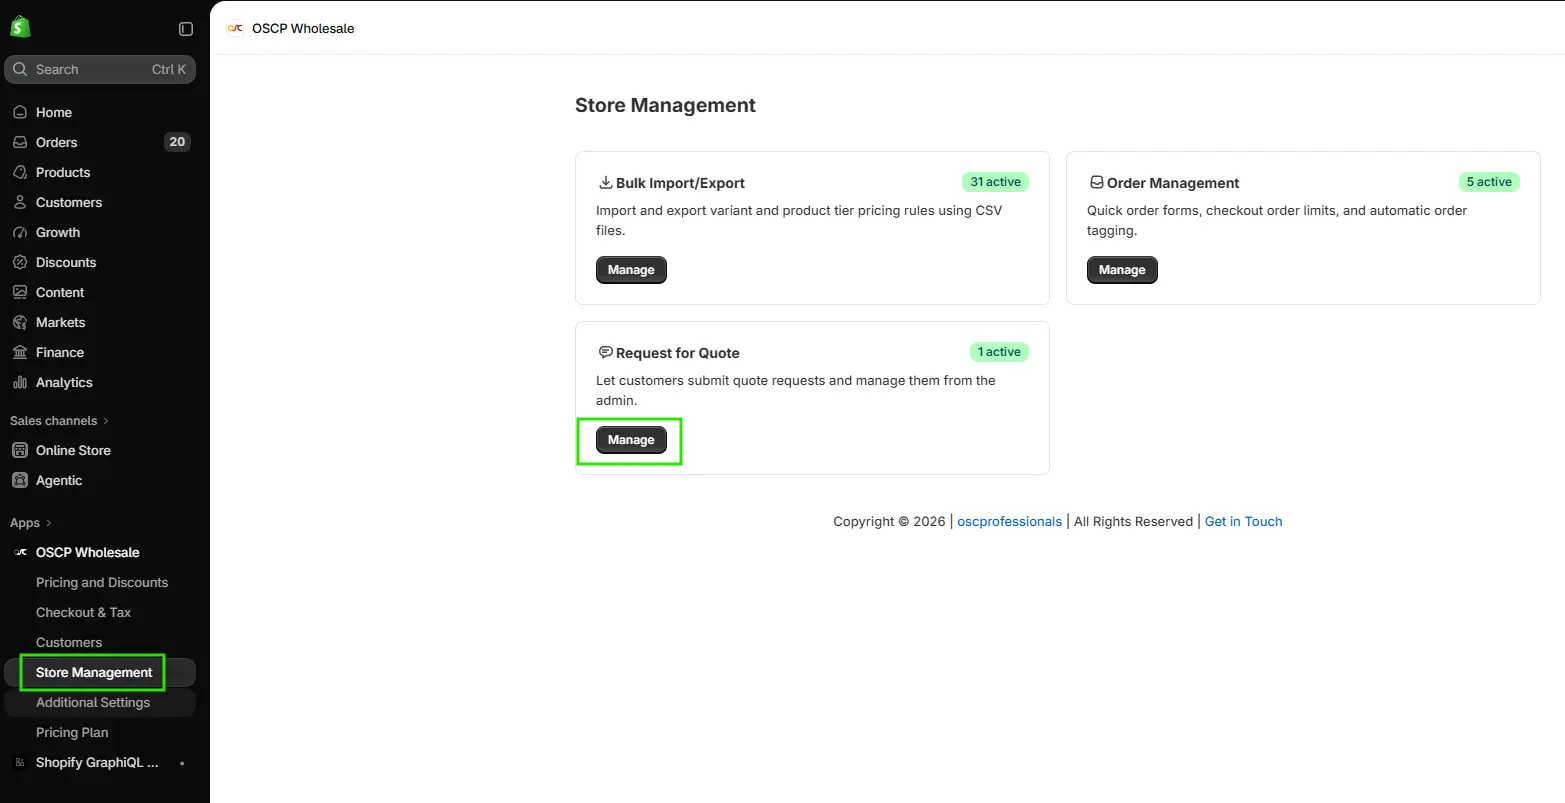
Step 1: Open Request for Quote
From your Shopify Admin, go to:
Apps → OSCP Wholesale → Store Management → Request for Quote
Click Manage.
You will be redirected to the Request for Quote page.
Step 2: Open Page Settings
Click Manage Page Settings.
You will see two pages:
- Quote History Page
- Request for Quote Page
A. Configure Quote History Page
The Quote History Page allows customers to view their previously submitted quote requests.
Step 1: Set the Page URL Handle
Enter a URL handle for the Quote History page.
For example:
quote-history
The page can then be accessed using a URL similar to:
/pages/quote-history
Step 2: Set Page Visibility
Choose the required page visibility:
- Visible – Customers can access the page.
- Hidden – Customers cannot access the page.
For normal operation, we recommend keeping the page Visible.
Step 3: Preview the Page
Click View Page to open the Quote History page on your storefront.
Step 4: Add Quote History to Store Menu
To allow customers to easily access their quote history from the storefront:
- Go to Shopify Admin → Content → Menus.
- Open your store’s Main menu.
- Click Add menu item.
- Enter the menu name, for example, Quote History.
- Under Link, select the Quote History page.
- Click Add.
- Click Save.
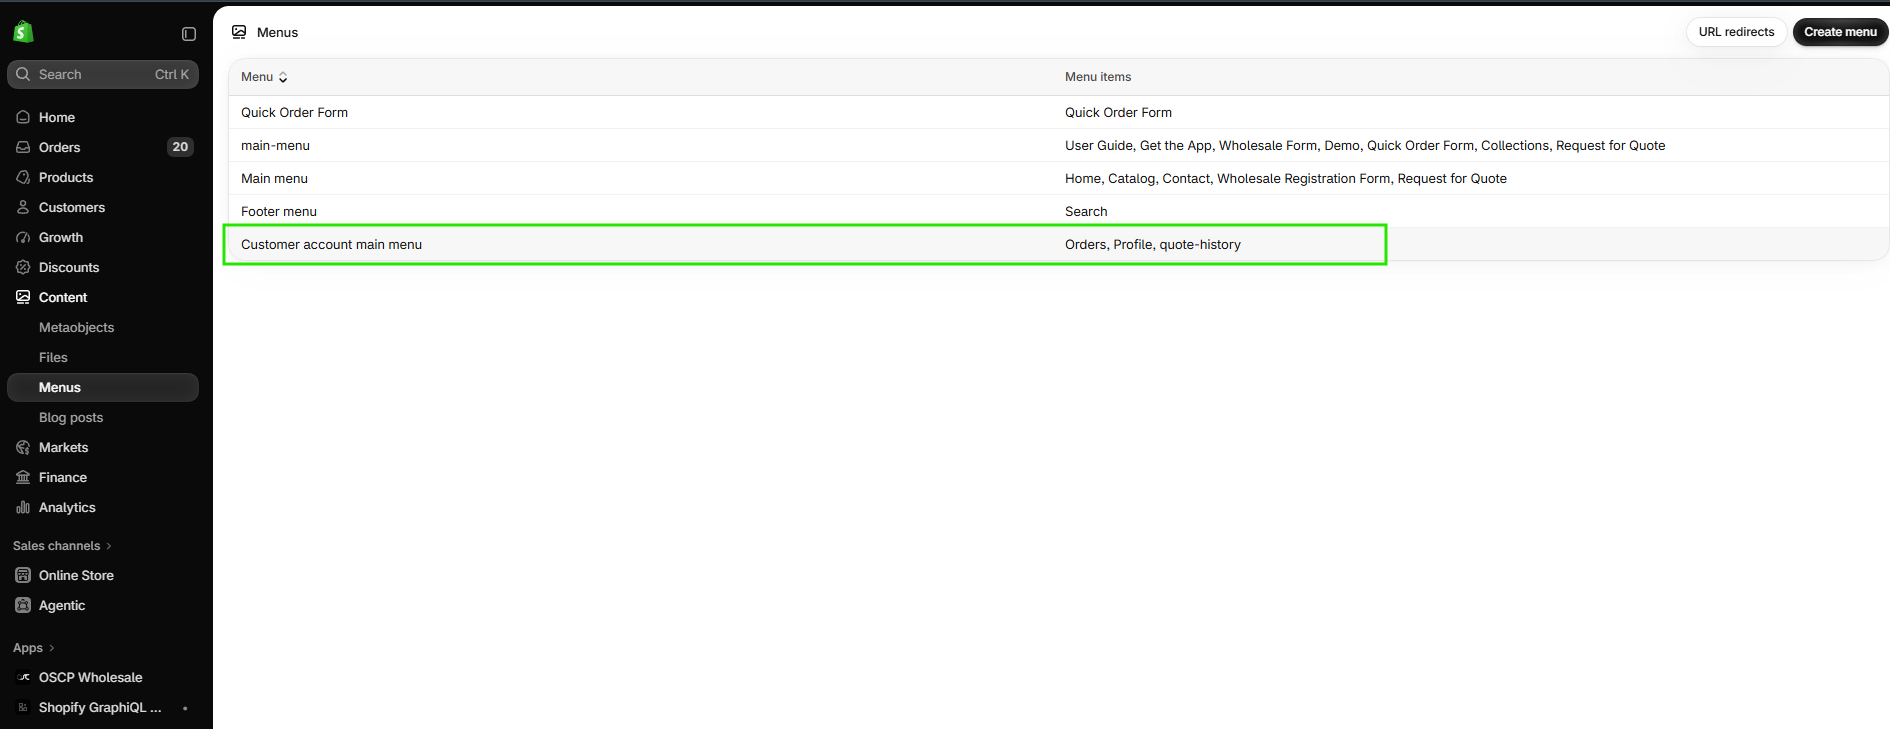
The Quote History option will now appear in your store navigation.
Note: Customers should be logged in to view their quote history and access quote requests associated with their customer account.
B. Configure Request for Quote Page
The Request for Quote Page allows customers to submit new quote requests.
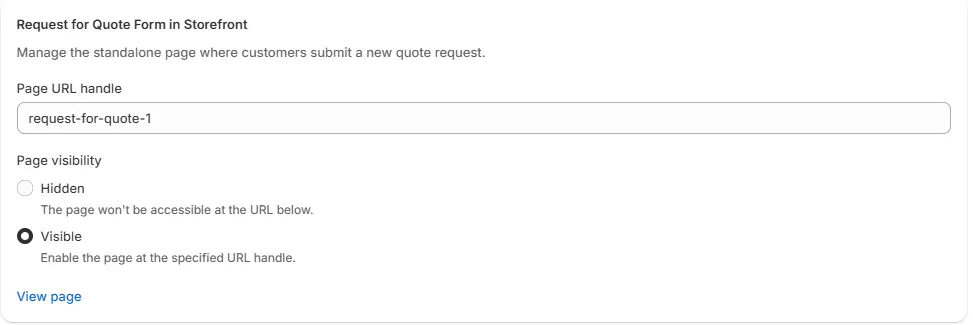
Step 1: Set the Page URL Handle
Enter a URL handle for the Request for Quote page.
For example:
request-for-quote
The page can then be accessed using a URL similar to:
/pages/request-for-quote
Step 2: Set Page Visibility
Choose the required page visibility:
Visible – Customers can access and submit quote requests.
Hidden – Customers cannot access the page.
For normal operation, we recommend keeping the page Visible.
Step 3: Preview the Page
Click View Page to preview the Request for Quote page on your storefront.
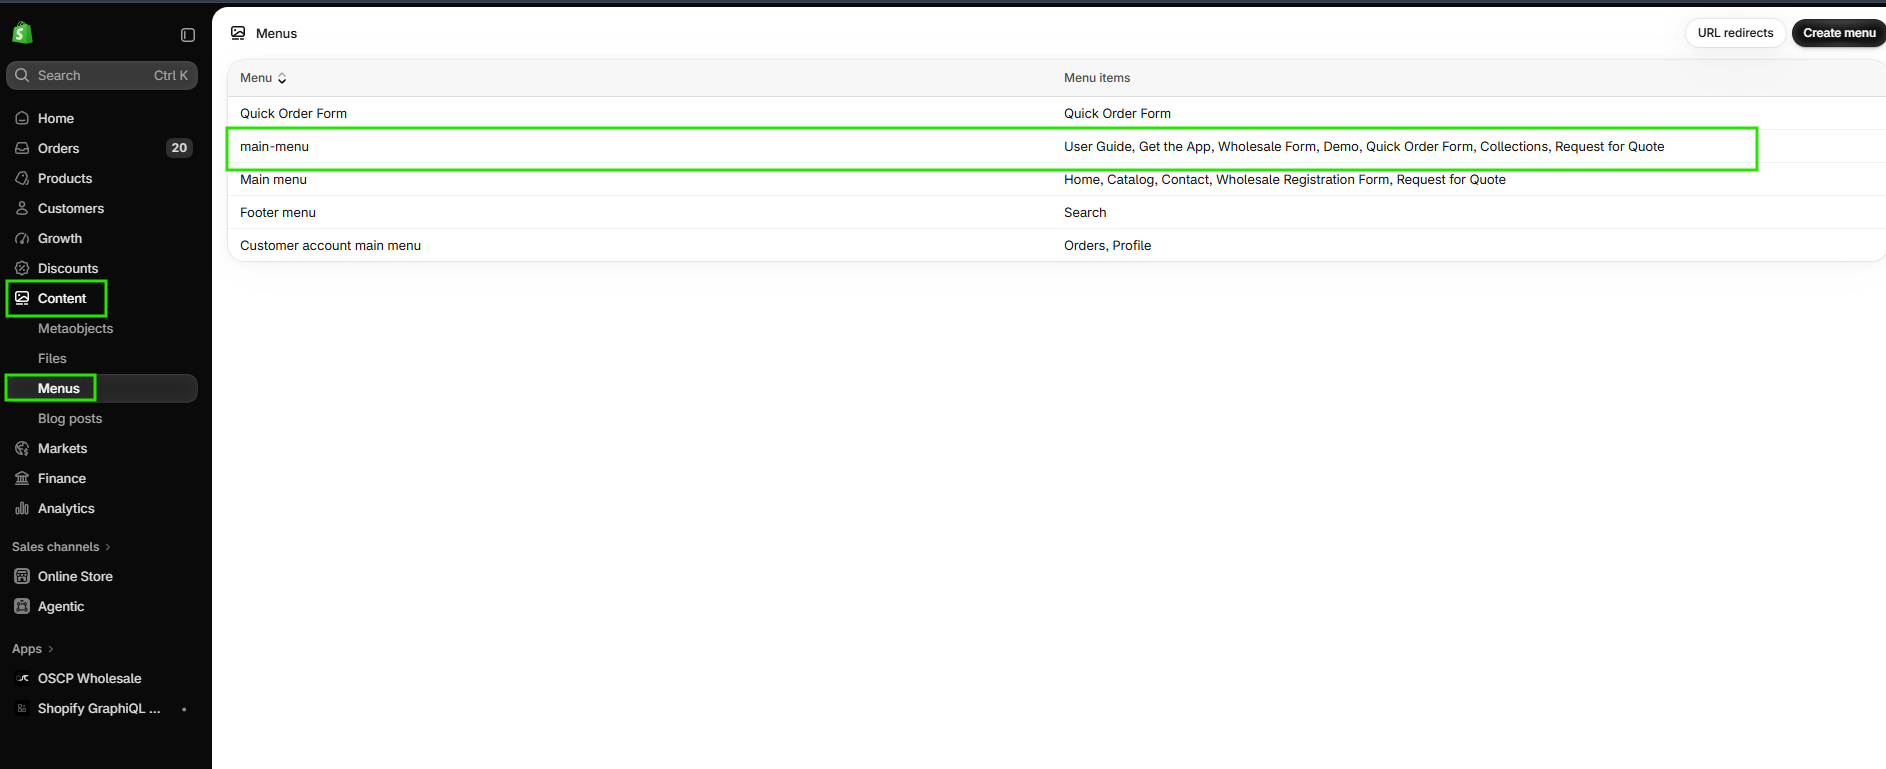
Step 4: Add Request for Quote to Store Menu
To allow customers to easily access the quote request form:
- Go to Shopify Admin → Content → Menus.
- Open your store’s Main menu.
- Click Add menu item.
- Enter the menu name, for example, Request for Quote.
- Under Link, select the Request for Quote page.
- Click Add.
- Click Save.
The Request for Quote option will now appear in your store navigation.
Step 5: Save the Settings
After configuring both pages:
- Review the Quote History Page settings.
- Review the Request for Quote Page settings.
- Confirm the URL handles.
- Confirm the page visibility.
- Click Save.
2. Submit a Quote Request from Storefront
Once the Request for Quote page has been configured and added to the store menu, customers can submit quote requests from the storefront.
Step 1: Open Request for Quote
From the storefront, click Request for Quote from the store navigation.
Step 2: Enter Quote Information
Complete the required information in the quote request form.
Step 3: Submit the Request
Review the information and submit the quote request.
Once submitted, the request will be available in the Request for Quote section of the OSCP Wholesale app.
3. View Quote History
Customers can use the Quote History page to view their previously submitted quote requests.
Step 1: Open Quote History
From the storefront navigation, click Quote History.
Step 2: Review Previous Requests
Customers can review their previously submitted quote requests.
Note: Customers should be logged in when accessing their quote history so that their requests can be associated with their customer account.
4. Manage Quote Requests
Store administrators can review and manage submitted quote requests from the OSCP Wholesale app.
Step 1: Open Quote Requests
Go to:
Shopify Admin → Apps → OSCP Wholesale → Store Management → Request for Quote → Manage
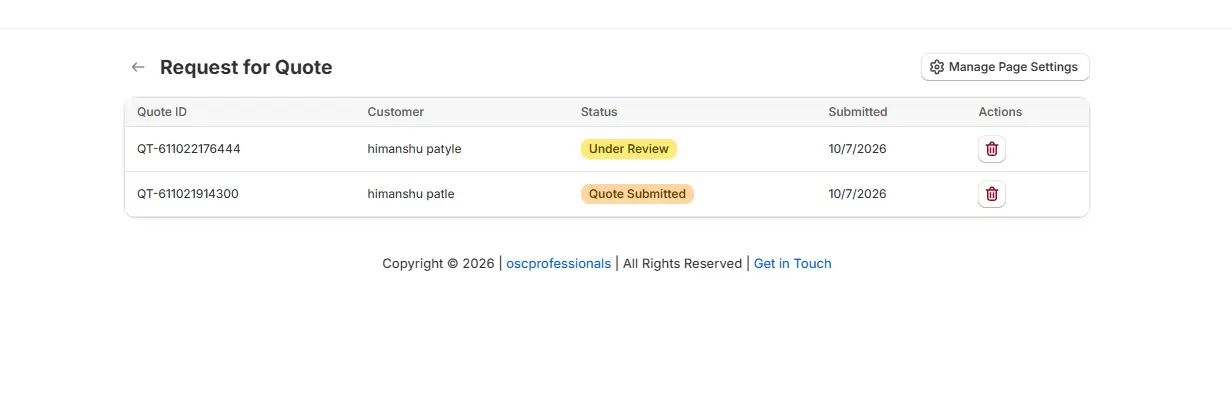
Submitted requests will be displayed with their Quote ID, Customer, Status, and Submission Date.
Step 2: Open a Quote
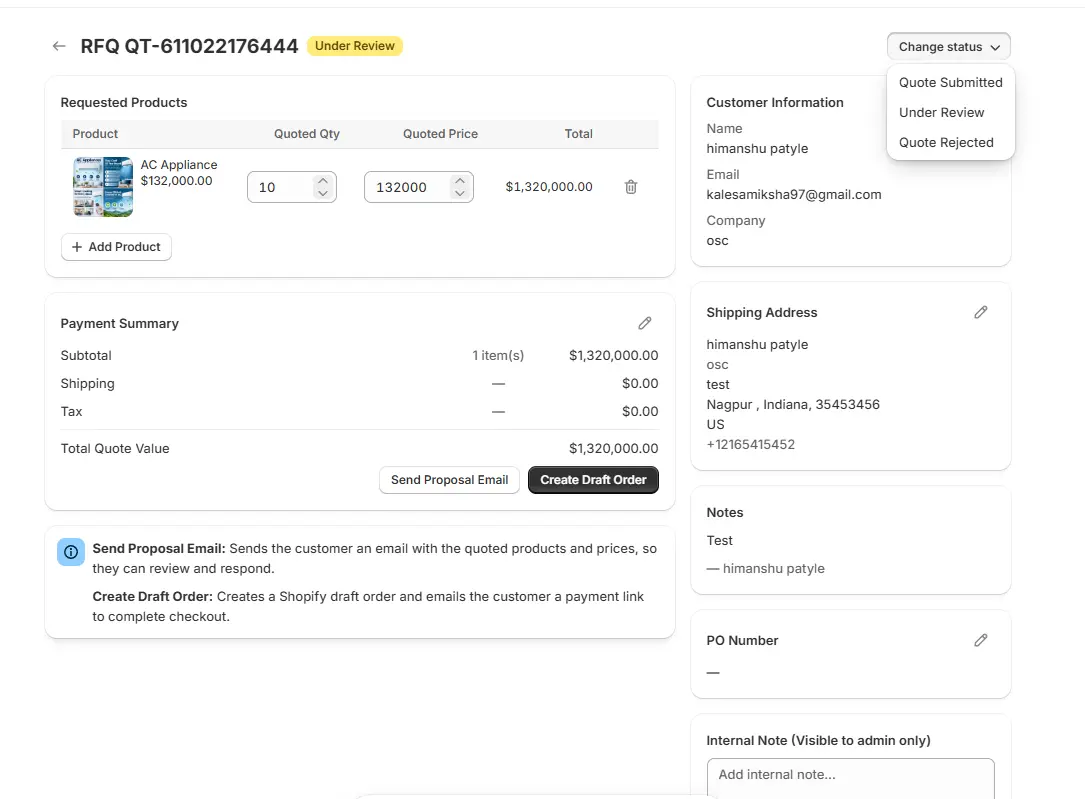
Click the Quote ID to view the quote details.
Administrators can:
- Review or update products, quantity, and quoted price.
- Add or remove products.
- Review customer and shipping information.
- Add or update the PO Number.
- Add internal notes.
- Update the quote Status: Quote Submitted, Under Review, or Quote Rejected.
- Click Send Proposal Email to send the quote to the customer.
- Click Create Draft Order to create a Shopify draft order and send the customer a payment link.
5. Need Assistance?
If you have questions or need help configuring the Request for Quote feature, contact our support team — we’re here to help!
Support: apps@oscprofessionals.com