 Skip to content
Migrating your e-Commerce Site for one Server to Another
Jan 05, 2021 | 07 min read
1. QuickRead
As time passes and your company expands, there might be a need to switch your Magento store to another server. For example, you need an updated server, or you just don’t like your hosting company’s level of operation, or you want to expand your platform functionality with endless scrolling and other add-ons to ensure that it runs smoothly. Whatever the reasons for Magento’s migration, moving a working store is not the easiest thing to do, and you may face a number of challenges when doing so.
This article explains this process in depth, and I really hope it will help you avoid any of the usual Magento migration errors.
2. PREPARE TO Switch MAGENTO STORE
Before doing something, go and check if the new server meets Magento’s minimum requirements. You may need to set up your PHP, or add the missing extensions. Also, make sure you have enough storage space on your new server; it should be all right to store the entire store plus some extra space.
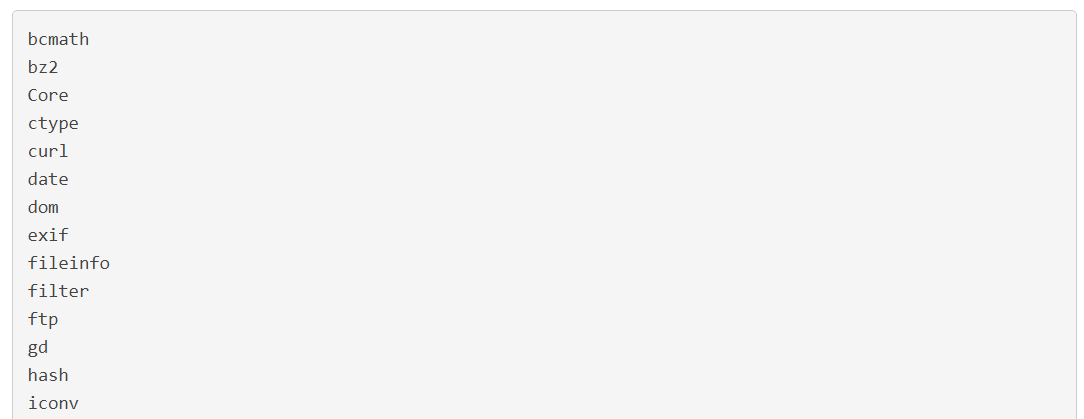
3. Check all PHP modules installed on current server
Single version of PHP
If your server only has a single PHP version loaded, you can run this PHP command anywhere, and you will be given the same set of modules. The general command we’re going to use is php-m. This command will provide you with a complete list of installed PHP modules/extensions.

This command will give you an output similar to the following information.
Multiple variants of PHP
If your server has several PHP versions installed, such as a newer cPanel or an InterWorx server, you can have separate PHP modules for each PHP version. You can verify which modules are available for different versions by calling the different versions of PHP directly.

So, if I run that command with the -m flag, it then provides us will all the modules specifically for PHP 7.3. If you switch the path to ea-php72 or 56, then it would give the modules for that PHP version.
Or, you can use the built-in shortcut commands.

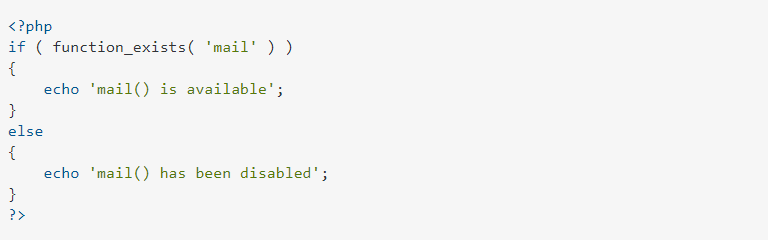
4. Checking server mail configurations
Check how your current server is sending emails. To check if the mail function is enabled on your server or PHP install, use
Check if your server is sending mails from postfix.
To check if your server is ending mails from default postfix use;
echo “Test mail from postfix” | mail -s “Test Postfix”
admin@something.com
admin@something.com
Please replace admin@something.com. It’s better to run a test with your free email id with gmail, yahoo, etc first. If you can receive test mail sent above then that means postfix is able to send emails.
If your server sending emails from default postfix, switch it on SMTP by using Magento module or Postfix Relay on new server
5. Check Webserver Rewrite rules and update same on new server
How to check if mod_rewrite is enabled on your server. Many problems with SEO arise from the fact that a host has not enabled mod_rewrite (Apache setting) on the servers. They often tell you they have (while they have not). You can verify if this is correct or not and if this is causing your server to issue HTTP Error 500.
Here is how to check if mod_rewrite is really enabled!
Enable SEO in your administrator:
Site -> Global Configuration -> SEO Settings: Search Engine Friendly URLs to Yes, Use URL Rewriting to Yes. (Setting Add suffix to URLs is optional).
Enable SEO in your administrator:
Site -> Global Configuration -> SEO Settings: Search Engine Friendly URLs to Yes, Use URL Rewriting to Yes. (Setting Add suffix to URLs is optional).
Rename your htaccess.txt to .htaccess:
Next place ONLY the following lines in your .htaccess:
Next place ONLY the following lines in your .htaccess:

Now point your browser to: http://www.example.com/joomla.html
(Replace www.example.com with your own domain name in the URL above.)
If it redirects you to joomla.org then mod_rewrite is working. If it gives you an error then mod_rewrite is not working.
If it redirects you to joomla.org then mod_rewrite is working. If it gives you an error then mod_rewrite is not working.
Note: if your site is located in a folder such as “/test/” you need to insert the code in the root .htaccess file as follows:

6. Take a full mysql backup and compare from current server
Back Up from the Command-Line with mysqldump
The mysqldump client utility can dump a database including the SQL statements required to rebuild the database.
By default, the dump file includes the SQL commands to restore the tables and data.
To back up your MySQL database, the general syntax is:
To back up your MySQL database, the general syntax is:
sudo mysqldump -u [user] -p [database_name] > [filename].sql
- Replace [user] with your username and password (if needed).
- The [database_name] is the path and filename of the database.
- The > command specifies the output.
- [filename] is the path and filename you want to save the dump file as.
Other examples:
To back up of an entire Database Management System:
mysqldump –all-databases –single-transaction –quick –lock-tables=false >
full-backup-$(date +%F).sql -u root -p
full-backup-$(date +%F).sql -u root -p
To include more than one database in the backup dump file:
sudo mysqldump -u [user] -p [database_1] [database_2] [database_etc] > [filename].sql
How to Restore MySQL with mysqldump
Step 1: Create New Database
On the system that hosts the database, use MySQL to create a new database.
Make sure you’ve named it the same as the database you lost. This creates the foundation file that mysqldump will import the data into. Since the dump file has the commands to rebuild the database, you only need to create the empty database.
Make sure you’ve named it the same as the database you lost. This creates the foundation file that mysqldump will import the data into. Since the dump file has the commands to rebuild the database, you only need to create the empty database.
Step 2: Restore MySQL Dump
To restore a MySQL backup, enter:
mysql -u [user] -p [database_name] < [filename].sql
Make sure to include [database_name] and [filename] in the path.
It’s likely that on the host machine, [database_name]can be in a root directory, so you may not need to add the path. Make sure that you specify the exact path for the dump file you’re restoring, including server name (if needed).
It’s likely that on the host machine, [database_name]can be in a root directory, so you may not need to add the path. Make sure that you specify the exact path for the dump file you’re restoring, including server name (if needed).
Using phpMyAdmin to Back Up or Restore MySQL
If you’re running phpMyAdmin backing up and restoring your MySQL database is simple.
The export function is used as a backup, and the import function is used to restore.
The export function is used as a backup, and the import function is used to restore.
Step 1: Create a MySQL Database Backup
- Open phpMyAdmin. On the directory tree on the left, click the database you want to back up.
This should open the directory structure in the right-hand window. You’ll also notice that, in the directory tree on the left, all the assets under the main database are highlighted. - Click Export on the menu across the top of the display.
You’ll see a section called “Export Method.” Use Quick to save a copy of the whole database. Choose Custom to select individual tables or other special options.
Leave the Format field set to SQL, unless you have a good reason to change it. - Click Go. If you select Quick, your web browser will download a copy of the database into your specified downloads folder. You can copy that to a safe location.
- [filename] is the path and filename you want to save the dump file as.
Step 2: Clear the Old Database Information
It’s important to clear out old data before restoring a backup. If there’s any old data, it isn’t overwritten when you restore. This can create duplicate tables, causing errors and conflicts.
- Open phpMyAdmin, on the navigation pane on the left, choose the database you want to restore.
- Click the check all box near the bottom. Then, use the drop-down menu labeled With selected to select Drop.
- The tool should prompt you to confirm that you want to go forward. Click yes.
This will get rid of all the existing data, clearing the way for your restoration.
Step 3: Restore Your Backed up MySQL Database
In phpMyAdmin, the Import tool is used to restore a database.
- On the menu across the top, click Import.
- The first section is labeled File to import. A couple of lines down, there’s a line that starts with “Browse your computer,” with a button labeled Choose File. Click that button.
- Use the dialog box to navigate to the location where you’ve saved the export file that you want to restore. Leave all the options set to default. (If you created your backup with different options, you can select those here.)
- Click Go.
Note:-
(Make sure to remove definer from dump otherwise it can create dump issues)
remove definer from sql by using following command
remove definer from sql by using following command
sed ‘s/\sDEFINER=`[^`]*`@`[^`]*`//g’ -i file.sql
Make sure that you have same mysql version on both servers


