 Skip to content
A Detailed Guide on Shopify Image Optimization
1. QuickRead
You may have hundreds, or even thousands, of product and collection images, as well as homepage banners and blog images in your store. If your photos are big and unoptimized, they will likely trigger the slow loading of your Shopify website. This can hinder your efforts to get visitors to browse your store, and in turn, can have a massive impact on your conversion rates and efforts to retarget them.
Nobody wants a slow-loading website. Even the most patient of web visitors are not prepared to wait more than three seconds for the website to load. When you don’t want your site guests to step away in disappointment and move over to a rival shop, high site speed is what you need to keep up to.
And what are the conversions? Are your site results going to suffer because you haven’t configured your images? Images that are not optimized can negatively affect the performance of the site and therefore the conversions.
And what about the retention of customers? Boosting customer retention by only 5 percent can increase profits by 95 percent. And it’s five to twenty-five times more expensive to get a new customer than to keep a current one!
Most marketers are not coders or designers. But, that doesn’t mean you’re not supposed to understand the basics of technology that plays such a huge role in your conversions and retention.
This means that you should know exactly how to optimize the image.
2. Here’s how to understand what image optimization is, and why is it so important?
What exactly is the optimization of images?
High-resolution images during loading can take up a lot of bandwidth, which makes them load slowly. Image optimization is about reducing the size of your images, without reducing their visual quality, to make loading of your web pages faster. It’s also about ensuring search engines can find your images easily and return them in search results.
Why image optimization should be important for you?
Because photos account for more bytes than any other aspect of the website, in particular e-commerce websites, their size and complexity will make or break the web output. And this has an effect on the acquisition and conversion of the consumers. That’s why image optimization is one of the easiest ways to boost website efficiency and SERP rating.
A one-second delay in loading the website results in an 11 percent decrease in page visits, and 7 percent fewer conversions. And that is just for a second! But it is also annoying for the existing customers, and lower customer satisfaction could push them elsewhere.
It’s going to hurt your Google search rankings. One of the variables Google’s rank pages algorithm uses is page load time – it’s also developed a free resource for you to test it. Worse yet, if your page load is slower, the bots Google uses to crawl your website to assess what it’s all about will go slower. And finally, we mentioned that an 11 percent drop – Google will notice that. If 11 percent of people who clicked on your website immediately click back after entering a search, this will inform Google that it’s not a good place to send users.
You’ll hear about the best eight ways to optimize the images in this blog. Such techniques of optimization can improve sales, SEO scores, customer retention, and more.
3. Image creation
Before you take a single photo, it is important to have a good idea of what kind of image you need and how you’ll use it on your site. Is it mainly decorative or used to explore the details of the products?
Your image can be up to 4472 x 4472 px, and up to 20 megapixels to upload to Shopify. Shopify suggests 2048 x 2048 px for square photos. For zoom functionality, you’ll need to have over 800 x 800 px to work.
You Might Be Interested In: Shopify Speed Optimization Services
4. Naming files for images
The most significant thing in the naming of image files is to assign the picture file a real name, not just IMG 79865.PNG. Aim to be succinct, and use appropriate keywords. Don’t forget that Google will look at image file names to work out the search terms for which your page would be a good result.
Remember, Google images are a more common search tool than you might think. SEO gurus Moz reports that 1/3 of all requests are for photos and that the findings of the search engine rankings are seen on 12.5 sites (or SERPs). So your new image file name could be the result of a search.
5. Get to know different types of files.
You can’t decide which type of file to use if you don’t understand what type of file it is, right?
PNG, GIFs, JPEGs,
Marketers know that these types of files do exist. And everyone likes a nice GIF.
Yet again, advertisers are still not developers or specialists in architecture. And the more tech-driven marketing is, the more important a familiarization with some of the fundamentals becomes.
Since it’s all about reducing load time for your customers, you need to know which types of files will work best for the images on your website.
Let’s take a look at some pros and cons of the three main file types.
JPEG or JPG (Joint Photographic Experts Group)
JPEGs are often the file type of choice for pictures and images because they mix blue, red, and green light-allowing millions of colors to be displayed.
Other types of files often don’t let all colors appear in an image.
Another huge advantage of a JPEG file is you can adjust the size of the file.
When adjusting a JPEG file size, you’ll also adjust the quality. The superior output is equal to a higher file size. However, you can often find a nice image quality balance to the size.
It is important that the file sizes are not too large. This causes slow loading times, sending away your customers, and raising the bounce rate.
When to use a JPEG?
- Most definitely, on all images of the product
- Photographic images
- Images of many colors
GIF (Graphic Interchange Format)
When Apple and Android incorporated GIFs into phone keyboards a couple of years ago, the tiny videos became a favorite way for everyone to express themselves.
But GIFs are more than just fun little videos — they’re a compressed photo or video versions. These small, compressed videos only allow the image to display 256 colors.
An image of high quality could contain thousands of colors.
This means GIFs are not the best choice for images with lots of variation in color. But, GIFs are the only animation choice as they allow animation without the enormous size of the file
When do you need a GIF?
- For all things animated
- Small images (for example thumbnails or icons)
- An image with just a few colors (such as your logo)
.
PNG (Portable Network Graphics)
PNGs are newer than the GIFs and JPEGs. They are typically bigger than JPEGs in file size but better in quality. They also require some versatility, because they have two separate file types:
PNG-8: A smaller file allowing the same 256 colors as the GIFs do.
PNG-24: This type enables millions of colors. This is also the best image format, where quality is significantly important than file size.
When do you use PNG files?
- When image quality is bigger than file size
Pro tip: Use JPEG for robust and colorful images, use PNG for simple images. Use GIF when you need to animate something.
E-commerce marketers should be using JPEGs for photos of products almost always.
6. Get the image file size right to increase conversions
The disparity between “image size” and “file size” is immense.
When we say “image size” we mean the picture measurements, like 852 x 852.
When we say file size, we ‘re talking about the amount of space needed for the image to be stored on your server.
The bigger the size of the file, the longer it takes to load an image.
A picture can have broad dimensions and can only be 2MB or less.
The size of the file is a real deal. It can make or break your site ‘s performance because every single image must be downloaded every time you visit your site.
The aim is to keep your images in size from 30kb to 70 kb.
How to resize an image file so web performance is optimized:- Refer our blog https://www.oscprofessionals.com/blog/tips-and-tricks-to-optimize-images-on-shopify/
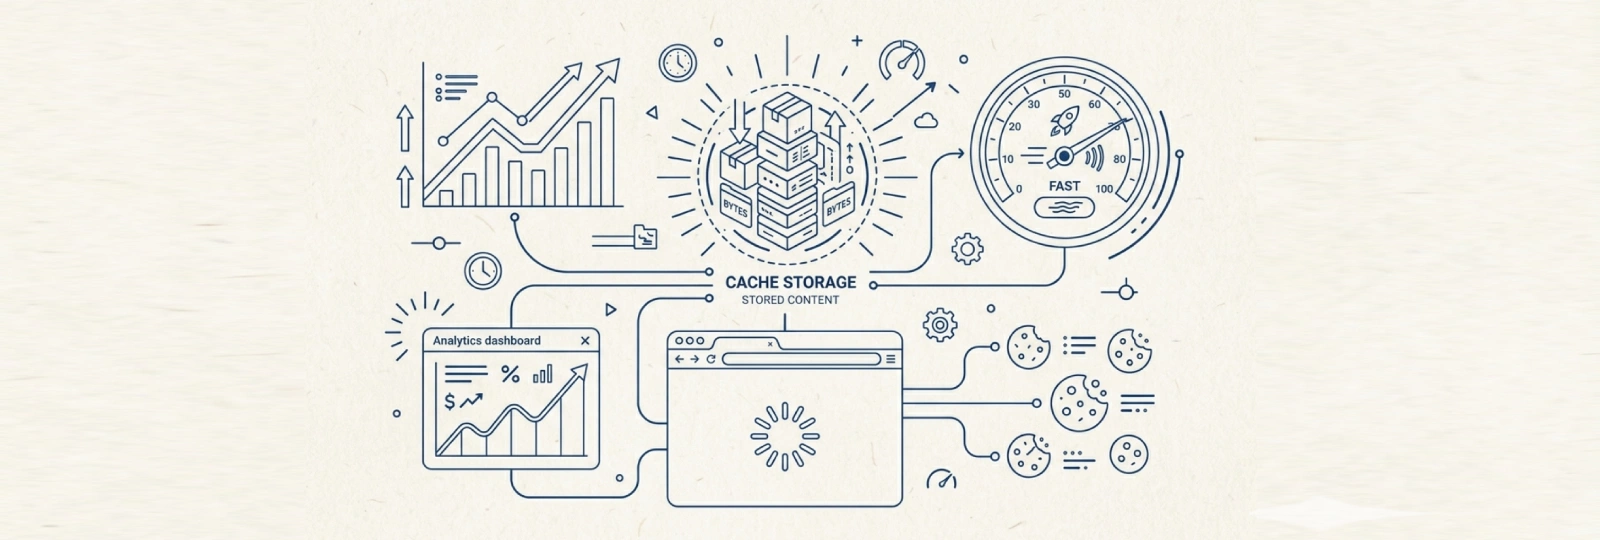
7. Reducing the size of files
Shopify will already somewhat compress your images or convert them to WEBP files so they load more quickly. Even Shopify looks for thumbnails on the checkout sites.
This is a helpful start, but you should always look to compress your images further in order to get your load speed as quickly as possible. Don’t forget that slow load speed will hurt your sales as well as your SEO-a double whammy. On the other side, it would boost overall consumer service by providing a fast and seamless online experience.
Aiming for 70 KB or lower file sizes is a good general target, though this may depend on the image quality you need.
And how can you raise the scale of image files?
You can do it Manually
Your first option is to use Photoshop or a similar program to manually reduce the file sizes. This method includes increasing the sum of usable image data, either by the number of pixels or by adjusting the pixel measurements of a picture using the Image Size dialog. If you’ve popular the pixel count, there’s a number of resources to refocus the image so it doesn’t look pixelated. You will find details of those tools for photoshop, plus a guide to reducing the image size here.
Choose Apps from Shopify Store
There are a lot of tools for compressing images out there. You should select one that was developed specifically for Shopify to ensure that it follows Shopify’s best practice in terms of image quality and file type. Then simply install the app you have selected and it will optimize your photos automatically, then upload them to your Shopify website.
Marketer’s tip: Placing large images onto your site and then adjusting their size manually using source code will not reduce the size of the file. This can really damage the speed of loading your page. Place them as pop-ups for big photos, or also on a different page when users click on a smaller version of your website.
8. Allow the website accessible to all consumers with alt tags
This step is critical for SEO purposes. Along with the name of the file, the alt attributes are what Google uses to understand what is shown in the image. These texts can also be used as Google Image search results are retrieved.
So, what are the old attributes? These are texts that serve as a substitute for the image itself, either because it has not yet been loaded or because of visually impaired internet users. There is an alt suffix, which must be used for SEO, and an alt title.
Alt tags will show if the image has not yet been loaded and will also be read out loud by the accessibility software used by visually impaired people. These are also going to be read by Google.
The alt titles are not essential. They will only be visible to people using a mouse or pointing device – the title text will appear if the cursor is floating across the image.
So, how are you supposed to write you alt tags? There are a few important practices to follow:
- No keyword stuffing — Google might even penalize you if you think you ‘re using the alt tag just to click.
- Include templates or SKUs – Searching can also be very precise, and providing this level of specificity will help you rank well.
- Write Regularly – While file names can just be a set of individual words (for our image, it’s “Baby swimwear set Olli Ella Liewood”), we want our alt text to make sense as a sentence.
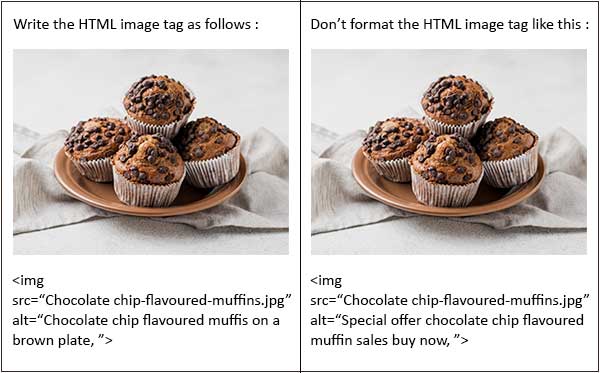
In the version of best practice:
- We have a meaningful text that describes the picture, not just random words that are linked to it.
- Reference is made to specific models of the products shown: “Vanilla flavored muffins,” “blue T-shirt.” This image should now be found applicable to image searches for these items.
In the edition of bad practice:
- No particular products or models are listed, which decreases the likelihood of a successful search result.
- Generic terms such as “exclusive deal” and “selling” are included. Google is likely to penalize this kind of email.
- The text itself is not meaningful – for visually impaired users (or if the image is not loaded for some reason) this text won’t tell them much.
Here are a few final things that you need to be sure of:
1. You do not write alt tags for merely decorative pictures. You may be penalized by Google for this. What’s more, when it comes to page loading best practice, decorative images like borders and logos should be in your CSS, not your HTML code (here’s Shopify theme code editing guide in CSS or HTML).
2. Google may also use the image captions and keywords in the text surrounding the image to explain what the image displays. So, for text like forums, look to explain any photos you want to work well in your search text.
9. Using the site maps to get your images seen by Google
This is a more technological issue, but it is important for you to use a lot of carousels, photo pop-ups, or galleries on your blog. The concern is that while it’s perfect for the user service, photos seen in this manner will quickly be overlooked by Google.
A good workaround for this is to construct a separate sitemap for your images. Sitemaps are like web sites, telling Google what is on your site, and helping to guarantee that any aspect of the site is “crawled”-in other words, they can all contribute against the SEO.
Use this Google guide to create a special site map for your images. Don’t forget to add descriptive tags to your HTML. Sitemaps do not guarantee that more of your site will be checked by Google, but they certainly give it a helping hand.
10. Optimize the thumbnails to accelerate upsells
Remember when you bought that awesome cell phone case just after you upgraded it?
You probably found that case at the bottom of the purchase confirmation page right after your payment went through.
You’ve sold the thumbnail pic! Such photos are a perfect way to sell other items to your clients, particularly after they have made a purchase or when they’re browsing certain goods.
Upsell is an add-on, upgrade, or additional product that the seller will introduce to you after the initial purchase.
Thumbnail pictures are always seen, many at a time, at the bottom of the page.
The target is usually an upsell. You should absolutely display the related products below or above the cart or purchase page and encourage your customers to click.
But if you don’t load the thumbnail pictures, you ‘re losing out on a lot of potential sales.
If a customer has appeared at your site, say, with a Google ad, you’ve already charged to get them there. So, the more they buy, the lower the cost of purchasing a customer.
So, just because they’re tiny, don’t ignore your thumbnail images as being less important to your business profitability.
They ‘re going to have to be super tiny in file size. Less than 70 KB of it is ideal.
They ‘re great in JPEG or GIF formats. Using Pixlr if the files need to be resized.
And don’t forget to label any of your thumbnail photos. We need a strong name and an alt attribute much like the product pics.
Having these thumbnail images optimized will help you boost SEO and potentially maximize your income from any web conversion.
11. Capture both the technological and esthetic dimensions of the images
It is important to consider both the technological and esthetic facets of images on the e-commerce website.
Technical images: These are all images that you want to concentrate on size, file type, resolution, etc. That is something like this:
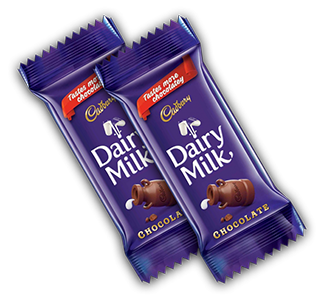
You want the product images to be JPEGs of consistency that are not too large in file size.
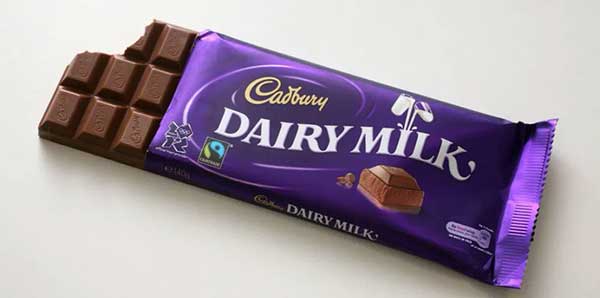
Esthetic images: These are photos where you need to concentrate on product design, background color, etc. Take this picture, for example:
12. Check images to improve migration and retention
For any approach, checking should be the answer. And here, the situation is a little complicated, since you need to think about several factors when checking the optimization of the picture.
Let me clarify that. You need to think carefully about website loading speeds vs conversions (or purchases) on your website because improving one will damage the other. For eg, you may want to reduce the number of photos on your web to make it easier to load. This could lead to more users landing on your website. Yet lack of eye-catching graphics can deter them from converting. On the other hand, you could jam your page full of stunning photos that your customers would enjoy while they’re on the web. But several of them will never hit your site in the first place because loading time is going to be too long.
Of course, our goal is to achieve both fast page loading speeds and fantastic conversions.
Think specifically of the goals and expectations for research. What of these is most important to you – page load speed, better SEO SERP efficiency, or higher overall conversions on your website? Then take a look at these various elements while you make adjustments to the pictures.
SEO testing:
You can’t actually measure how enhancing the SEO picture can impact the overall search results, even if there are useful SEO resources to verify if you’re practicing best practice (don’t forget if usually increasing load time can improve the search rankings, because Google can kill you if users click a connection and then bounce.) Make sure you check frequently if all the photos have alt tags.
Checking page speed:
It’s a very easy one. Only type your web address in Pagespeed Insights to see how fast or sluggish your site is.
Testing for conversion:
How you check for this would mostly rely on what your conversions are and what resources you ‘re already using, so I don’t want to be too prescriptive here. The most critical thing, though, is that you need to explicitly describe what conversion is, and explain that you have the metric. Good transactions for research include time spent on a website, text, push notification, or Messenger marketing sign up, or products added to a list. So don’t adjust the metrics until you start checking.
Following these steps will help you to see in concrete terms how the optimization of your images affects the overall performance of your sites.
Some of our Shopify optimization Blogs


