Skip to content

How to Set Up Smart Access Control
Table of Contents
-
- Step 1: Install Theme Protection
- Step 2: Create Your First Lock
- Step 2.1: Configure Lock Details
- Step 2.2: Select the Resources to Protect
- Step 2.3: Configure Customer Access
- Step 3: (Optional) Hide Locked Products Grid and Collections Across Your Store
- Before You Uninstall the App (Important)
- Manual Cleanup (If Theme Protection Was Not Removed)
Step 1: Install Theme Protection (One-Time Setup)
Before creating your first lock, install Theme Protection.
Theme Protection installs a lightweight server-side access layer into your Shopify theme. Every visitor is checked against your Smart Access Control rules before protected products or collections are displayed.
No manual theme code changes are required.
Install Theme Protection
From the Smart Access Control page:
1.Click Manage Theme Settings.
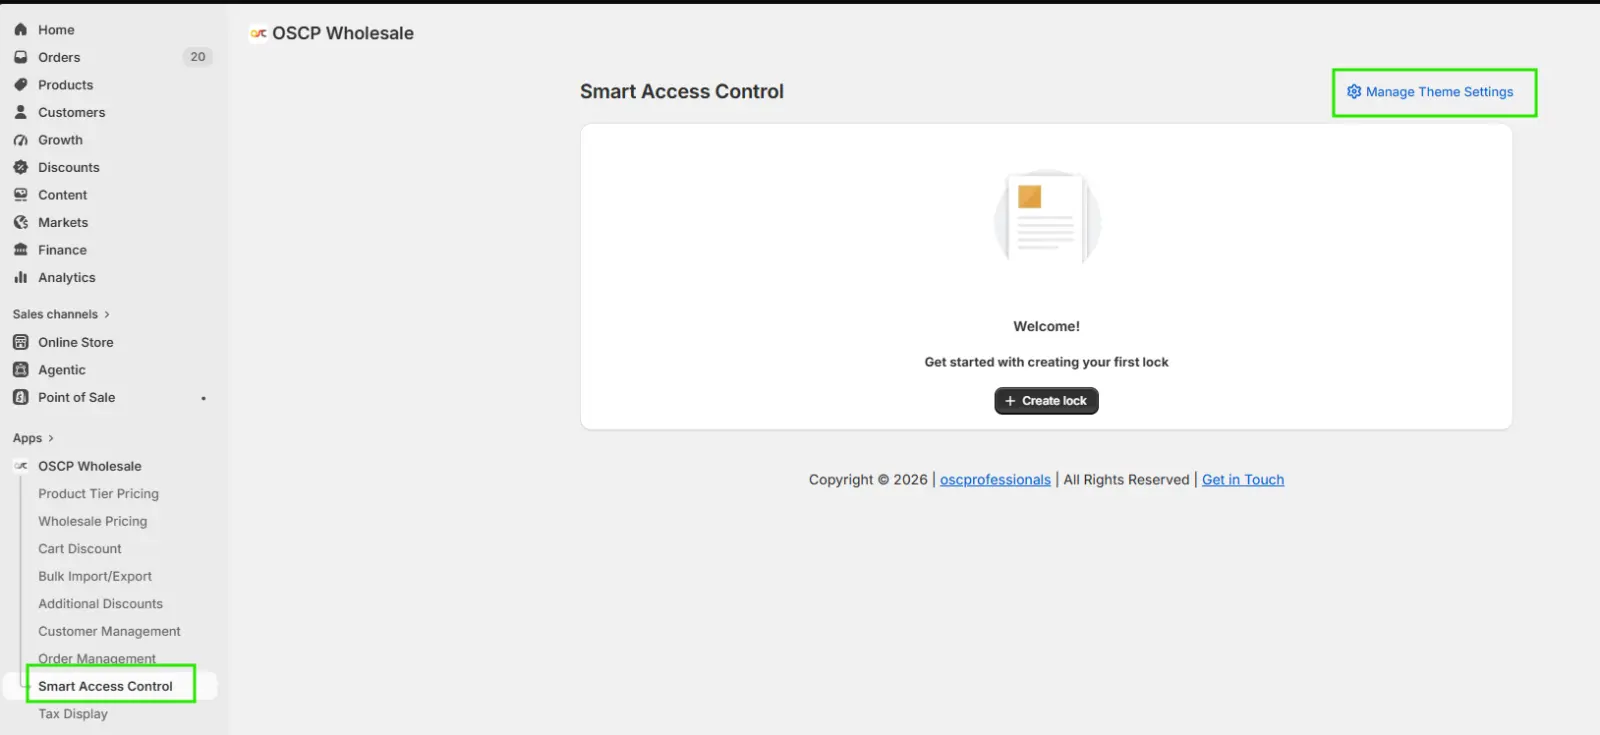
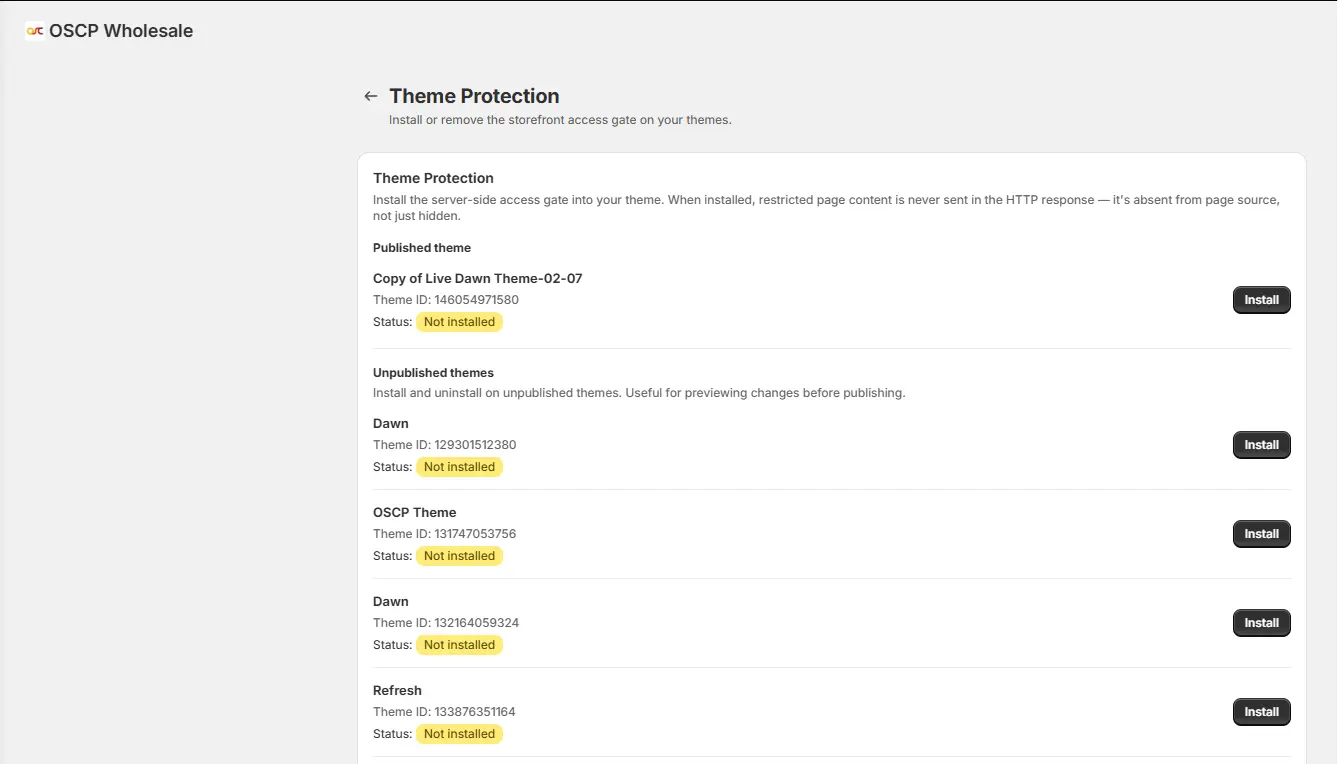
2.The Theme Protection page displays all themes in your Shopify store, including:
- Published Theme
- Draft Themes
- Unpublished Themes
3.Locate the theme you want to protect.
4.Click Install beside the theme.
Recommendation
Install Theme Protection on your published (live) theme.
If you plan to publish a draft theme later, install Theme Protection there in advance so access control becomes active immediately after publishing.
Verify Installation
Once installation is complete, the selected theme displays:
- Status: Install Complete
- Protecting Your Store
This confirms that Theme Protection has been successfully enabled.
Note: Theme Protection is installed per Shopify theme. If you publish a new theme in the future, return to Manage Theme Settings and install protection on the new theme. Protection does not automatically carry over.
Step 2: Create Your First Lock
After Theme Protection has been installed, return to:
Apps → OSCP Wholesale → Smart Access Control
Click Create Lock.
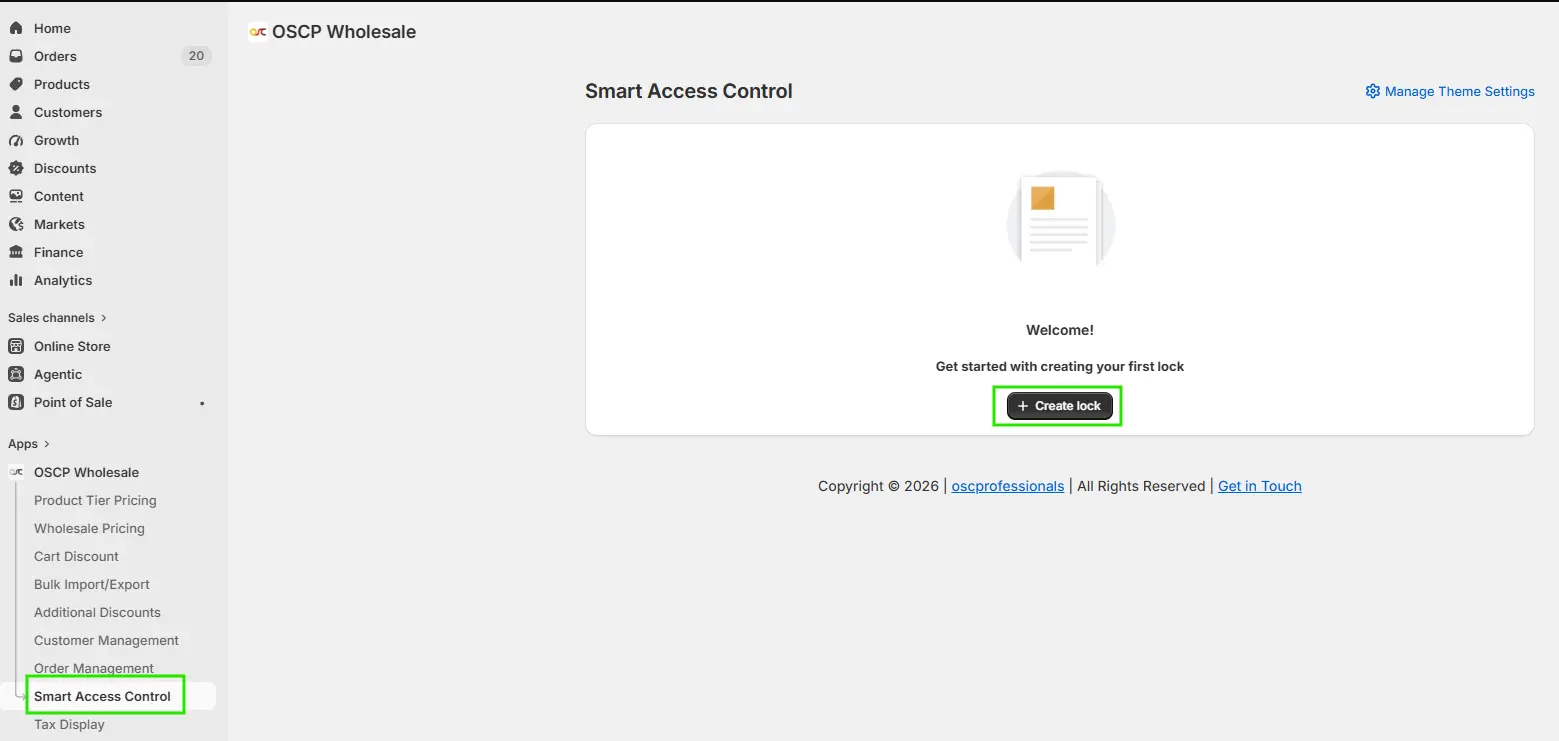
The Create Lock page contains three sections:
- Lock Details
- Locked Resources
- Key (Who Can Access)
Step 2.1: Configure Lock Details
The first section defines the basic information for your access rule.
Status
Choose one of the following:
Active
The lock is enforced immediately after saving.
Inactive
The lock is saved but not applied until activated.
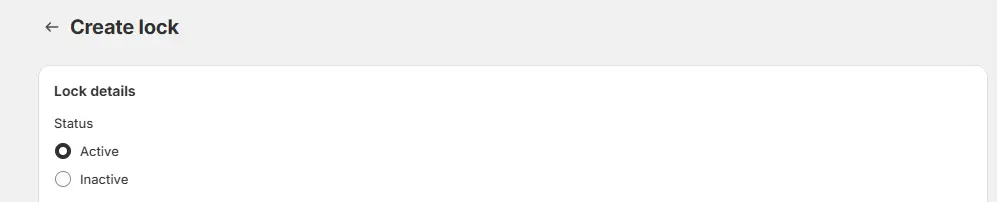
Recommendation: Keep the status Active if you want the restriction to take effect immediately.
Lock Name
Enter a descriptive name that helps identify the purpose of the lock.

Examples:
- Wholesale Products
- Dealer Collection
- VIP Members
- Trade Customers
Best Practice: Use meaningful names if you manage multiple locks.
Step 2.2: Select the Resources to Protect
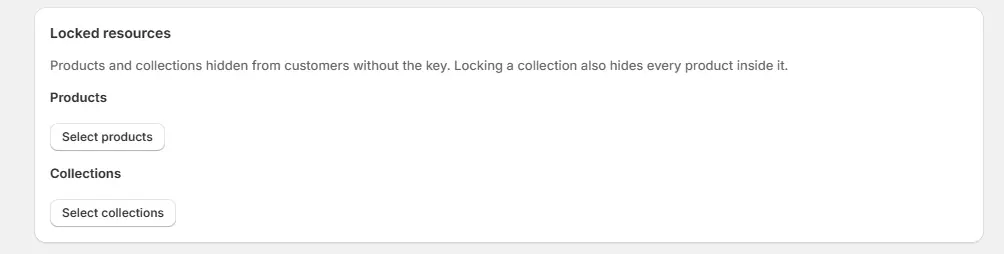
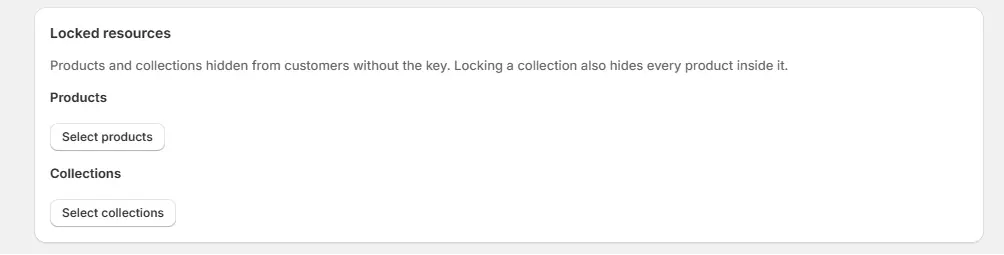
The Locked Resources section determines which products or collections are restricted.
Lock Individual Products
- Click Select Products.
- Search for the desired product(s).
- Select one or multiple products.
- Save your selection.
The selected products are now protected by this lock.
Lock Entire Collections
- Click Select Collections.
- Choose one or more collections.
- Save your selection.
Note: Locking a collection automatically protects every product within that collection.
Step 2.3: Configure Customer Access
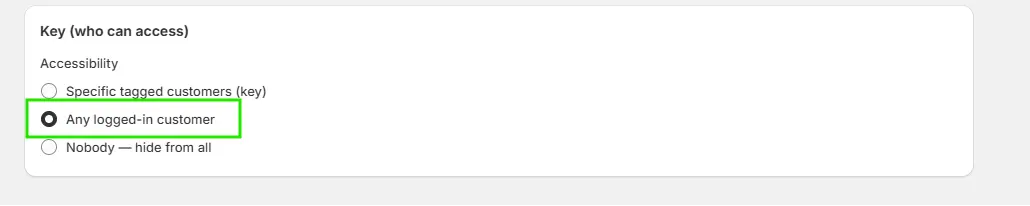
The Key (Who Can Access) section determines who can view the protected products or collections.
There are three available access methods.
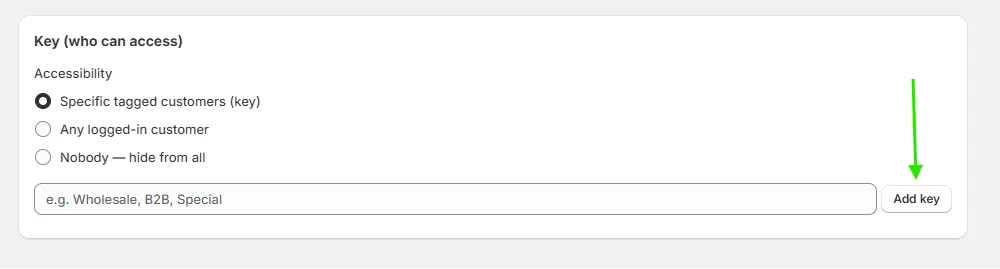
Option 1: Specific Tagged Customers (Recommended)
Choose Specific Tagged Customers (Key).
Only customers with matching Shopify customer tags can access the protected resources.
Example Customer Tags
- Wholesale
- B2B
- Dealer
- VIP
- Distributor
To Add Tags
- Enter a customer tag.
- Click Add Key.
- Repeat for additional tags if needed.
A customer only needs one matching tag to gain access.
Customer tag matching is not case-sensitive.
Option 2: Any Logged-in Customer
Choose Any Logged-in Customer if every registered customer should have access.
No customer tags are required.
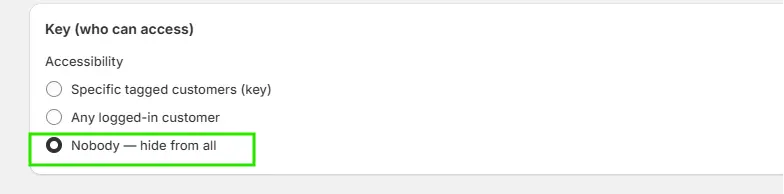
Option 3: Nobody (Hide from All)
Choose Nobody if you want to completely hide the selected products or collections from all customers.
Common use cases include:
- Upcoming product launches
- Temporary maintenance
- Seasonal collections
- Hidden inventory
Step 2.4: Save the Lock
After completing all sections:
Review your configuration.
Click Save.
The lock becomes active immediately on every Shopify theme where Theme Protection is installed.
Step 3: (Optional) Hide Locked Products grid and Collections Across Your Store
By default, Smart Access Control prevents customers from accessing the protected product or collection pages.
If you also want locked products or collections grid to disappear completely from storefront listings—such as collection pages, search results, predictive search, product recommendations, or other product grids—you’ll need to make a small one-time update to your Shopify theme.
Why is this required?
Every Shopify theme renders product and collection cards differently, so the app cannot automatically identify every location where products or collections are displayed. This one-time update ensures locked items are skipped during page rendering.
Note: This update only needs to be completed once for each section where products or collections are displayed.
Helper Snippet
When Theme Protection is installed, the app automatically creates the helper snippet required for this feature.
oscp-lock-check
You do not need to create this snippet manually.
Likewise, when Theme Protection is properly removed using Manage Theme Settings, the helper snippet is removed automatically.
Update Your Theme
1. Navigate to:
Online Store → Themes → Edit Code
2. Open the section file that renders the products or collections you want to protect.
3. Locate the Liquid loop that outputs each product or collection card.
For example:
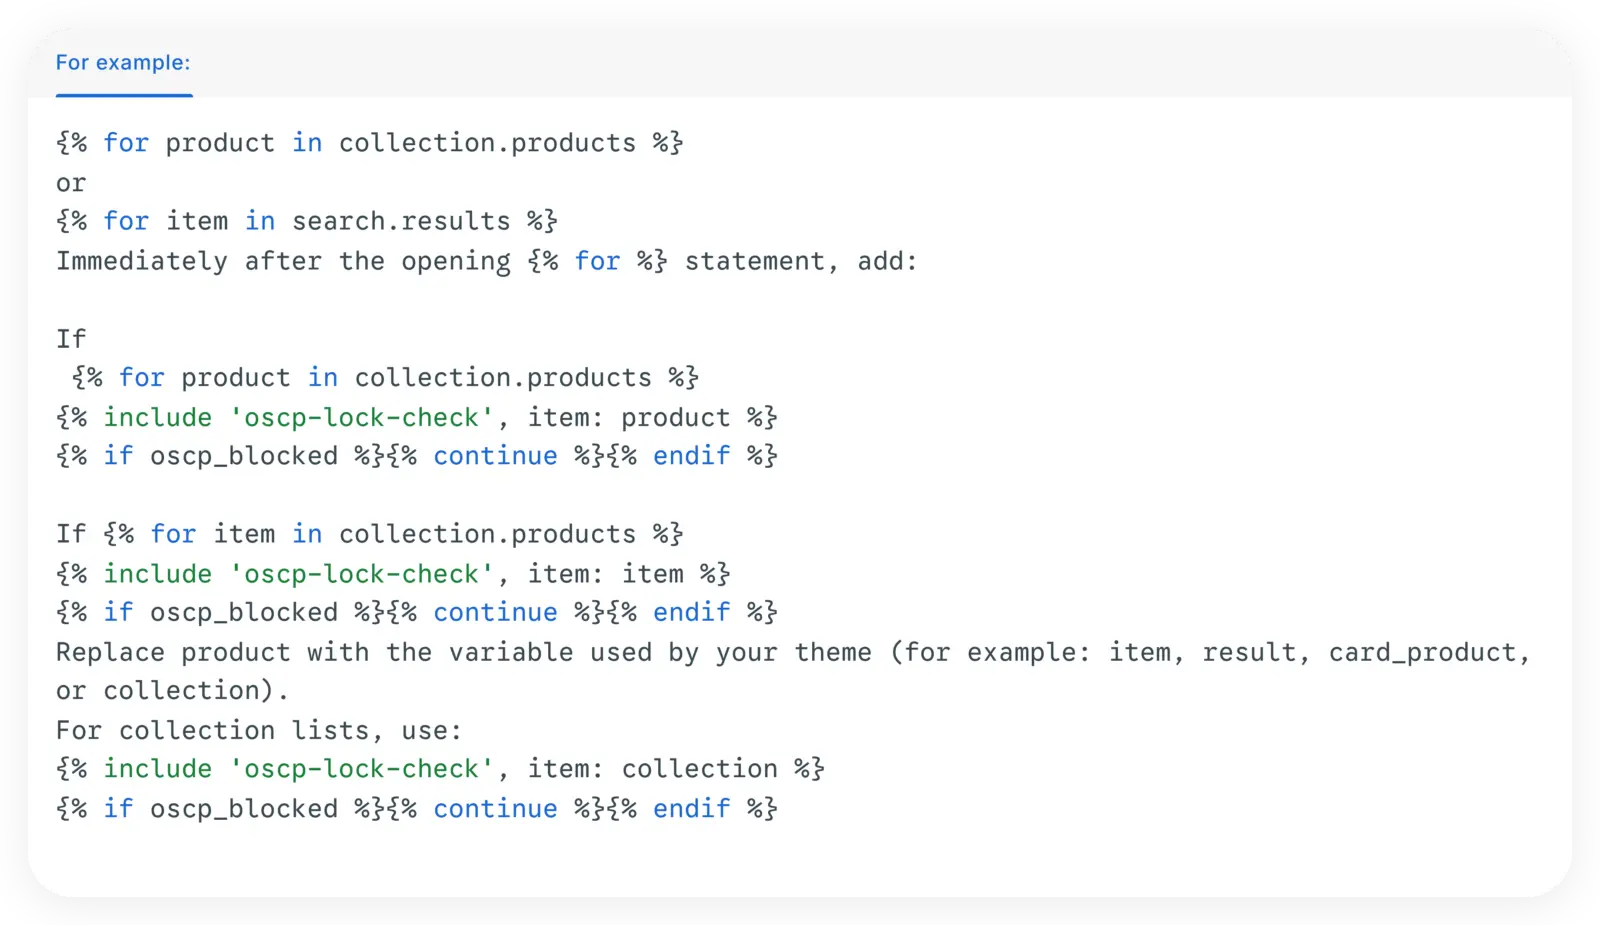
Once added, locked products or collections will be skipped entirely and will no longer appear in that section.
Common Theme Sections
Depending on your Shopify theme, you may want to apply this change to the following sections:
| Storefront Section | Common Theme File |
|---|---|
| Collection Product Grid | sections/main-collection-product-grid.liquid |
| Search Results | sections/main-search.liquid |
| Predictive Search | sections/predictive-search.liquid |
| Product Recommendations | sections/product-recommendations.liquid |
| Collection List | sections/collection-list.liquid or sections/featured-collections.liquid |
| Related Products / Upsells | Theme-specific section |
Note: Some Shopify themes render Predictive Search using JavaScript instead of Liquid. In those cases, this Liquid snippet cannot be used and a JavaScript customization is required.
Before You Uninstall the App (Important)
Before uninstalling OSCP Wholesale, always remove Theme Protection from every protected Shopify theme.
Navigate to:
Apps → OSCP Wholesale → Smart Access Control → Manage Theme Settings
Click Uninstall for each protected theme before removing the app from Shopify.
Important: After the app is uninstalled, Shopify immediately revokes the app’s access to your store. The app can no longer remove its protection code from your theme.
If Theme Protection is not removed first:
- The protection code remains in your theme.
- Locked products or collections may continue to stay hidden.
- The app will no longer be available to remove the code automatically.
Manual Cleanup (If Theme Protection Was Not Removed)
If the app has already been uninstalled without first removing Theme Protection, you’ll need to manually clean up each affected theme.
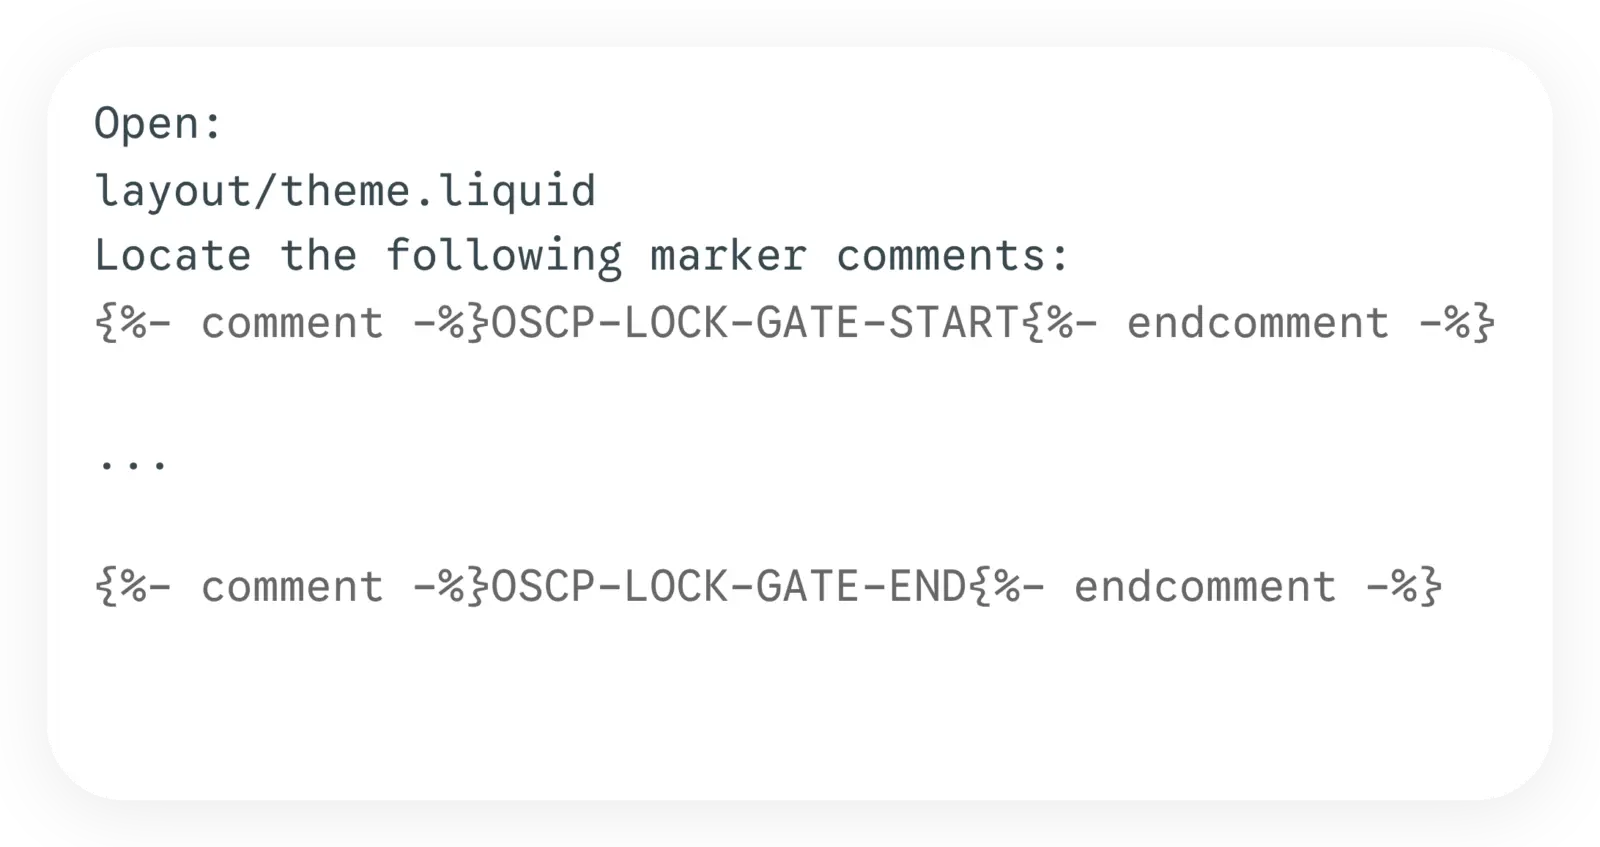
Step 1: Remove the Theme Protection Code
Navigate to:
Online Store → Themes → Edit Code
Step 2: Remove Helper Snippets
Under the Snippets folder, delete the following files if they exist:
snippets/oscp-lock-screen.liquid
snippets/oscp-lock-check.liquid
Step 3: Save the Theme
Save your changes and repeat these steps for every Shopify theme where Theme Protection had previously been installed.
Need help? If you’re not comfortable editing Shopify theme code, ask your Shopify theme developer to perform these steps. This is a quick, one-time cleanup process.