Ultimate Shopify API Essential
The term “Shopify API” refers to the Application Programming Interface offered by the well-known e-commerce platform Shopify. A set of guidelines and procedures known as an API enables interaction and communication between various software programmes.
Developers can create plugins, integrations, and applications that can communicate with a Shopify store using the Shopify API. It offers a way to access and work with various Shopify store data, including items, orders, clients, inventory, and more. Developers can build unique solutions, automate processes, and increase the functionality of a Shopify store using the Shopify API.
Key Benefits of Shopify API
Utilizing Shopify API offers several advantages for your business:
- Custom Integrations: Shopify API allows you to integrate your store with third-party applications, payment gateways, and other services, enabling you to streamline operations and enhance the customer experience.
- Automated Processes: By leveraging the power of Shopify API, you can automate various processes such as inventory management, order fulfillment, and customer support, saving time and reducing manual errors.
Data Accessibility: The API provides access to a wealth of data from your Shopify store, including products, orders, customers, and more. This data can be leveraged for reporting, analysis, and building personalized experiences for your customers.
API Versions
Shopify regularly updates its API, introducing new features and improvements. Developers should pay attention to the API version they are using. The current version is always mentioned in the API documentation. When developing new applications, it’s recommended to use the latest stable version of the API.
Shopify regularly updates its API to introduce new features, improvements, and bug fixes. These updates are released as different versions of the API.
By keeping track of API versions and updates, developers can leverage the latest features and improvements in the Shopify platform while ensuring their integrations remain stable and compatible with future changes.
Release Schedule
Shopify releases a new API version every 3 months at the beginning of the quarter. Version names are date-based to be meaningful and semantically unambiguous (for example, 2023-01).
| Stable version | Release date | Date stable version is supported until |
| 2023-01 | January 1, 2023 | January 1, 2024 |
| 2023-04 | April 1, 2023 | April 1, 2024 |
| 2023-07 | July 1, 2023 | July 1, 2024 |
| 2023-10 | October 1, 2023 | October 1, 2024 |
Types of Shopify APIs
- Admin API
- REST Admin API
- Storefront API
- Shopify Ajax API
Admin API
You can create integrations and apps that improve and expand the Shopify admin with the use of the Admin API.
Authentication
A valid Shopify access token is required for all GraphQL Admin API queries.
Custom apps made in the Shopify admin are authorized in the Shopify admin; public and custom apps made in the Partner Dashboard generate tokens using OAuth.
Apps must request certain access scopes during install in order to maintain platform security. Request only the amount of data access necessary for your app to work properly.
GraphQL Admin API
Endpoint and queries
To run GraphQL queries, make POST HTTP requests to the following endpoint:
https://{store_name}.myshopify.com/admin/api/2024-04/graphql.json
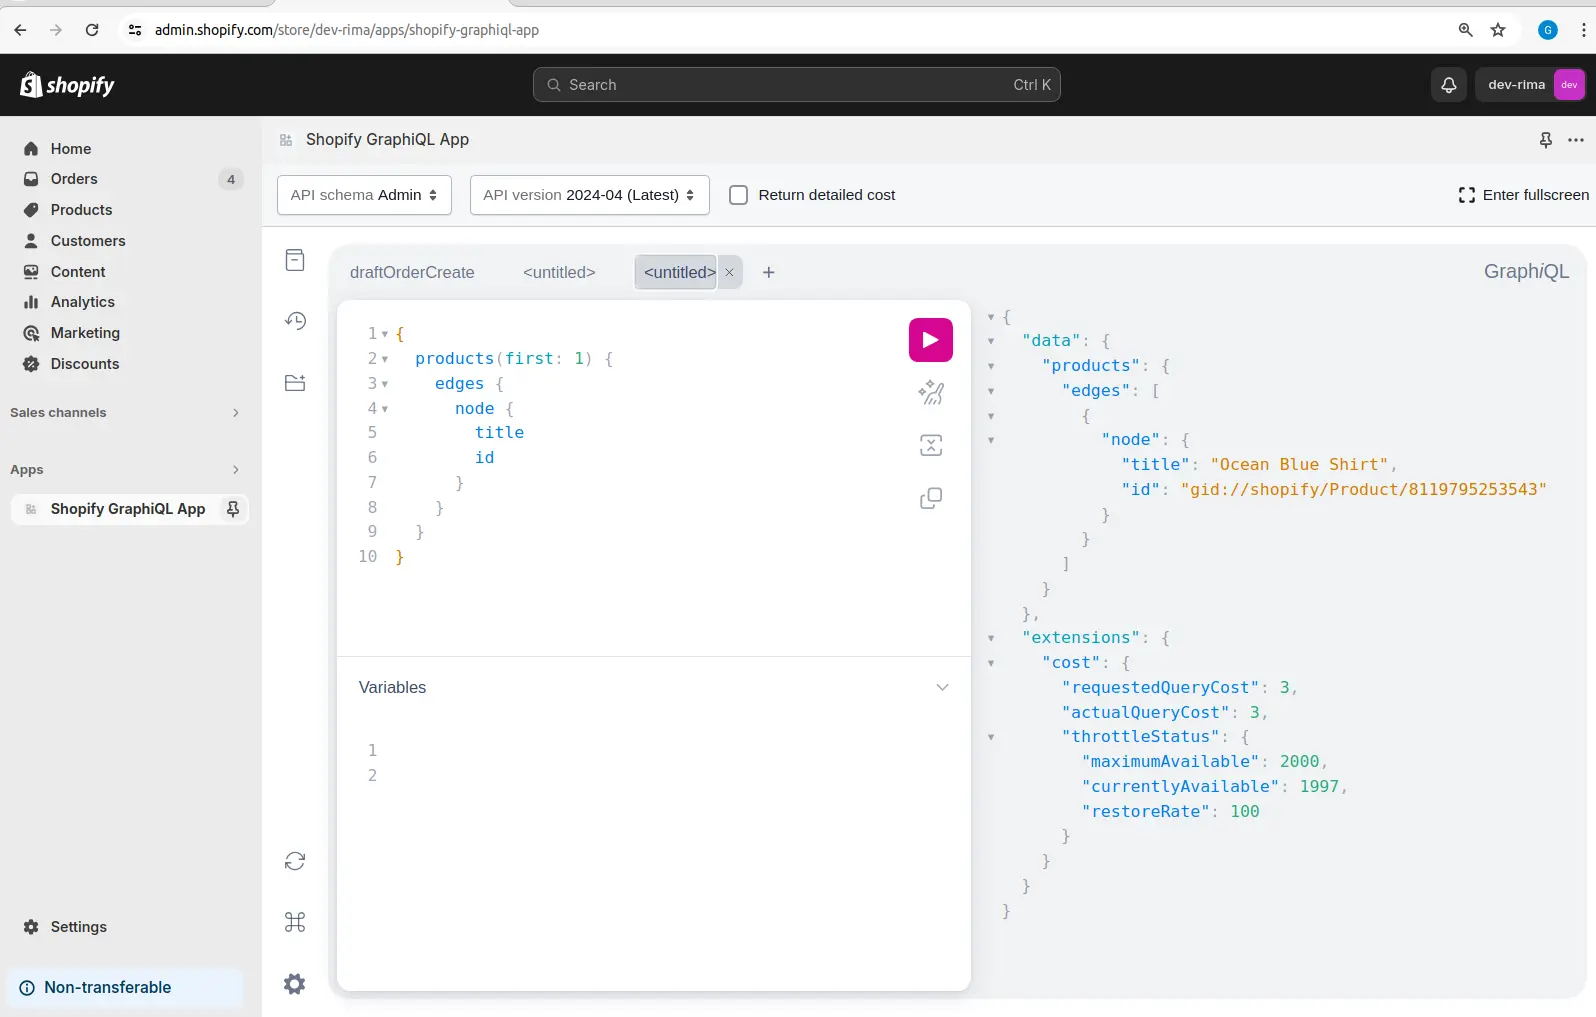
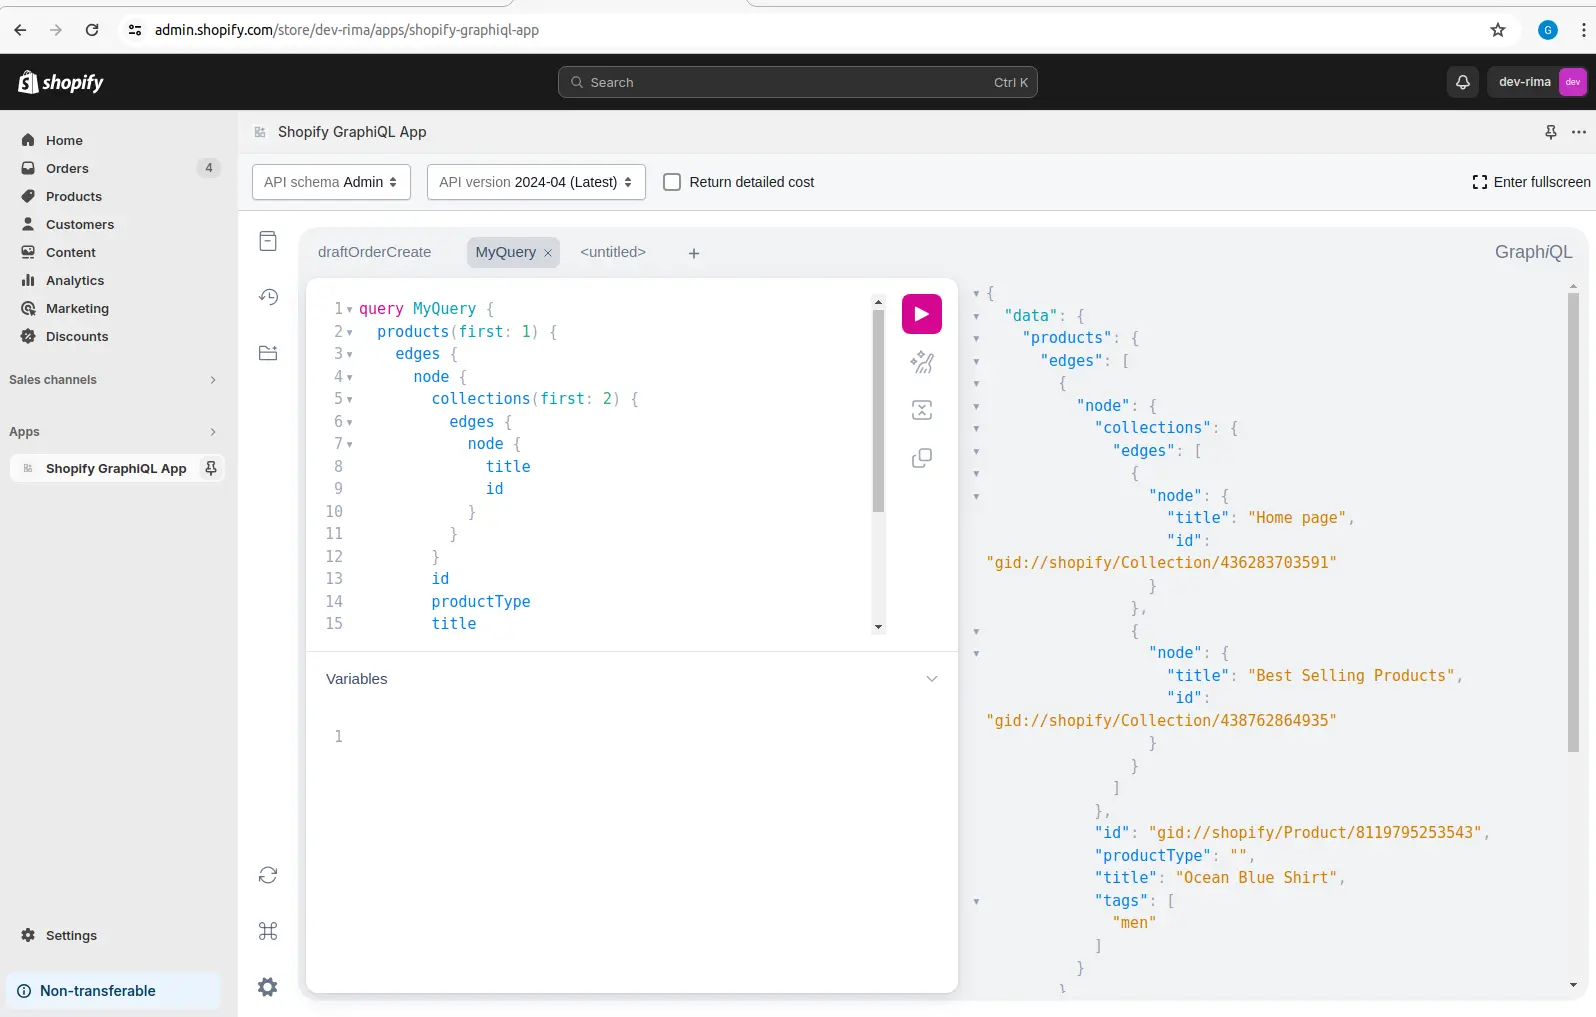
- The example shown is a query to get the ID and title of the first three products.
const client = new shopify.clients.Graphql({session});
const response = await client.query({data: ‘{your_query}’});
- The example shown is a query to get the ID and title of the first three products.
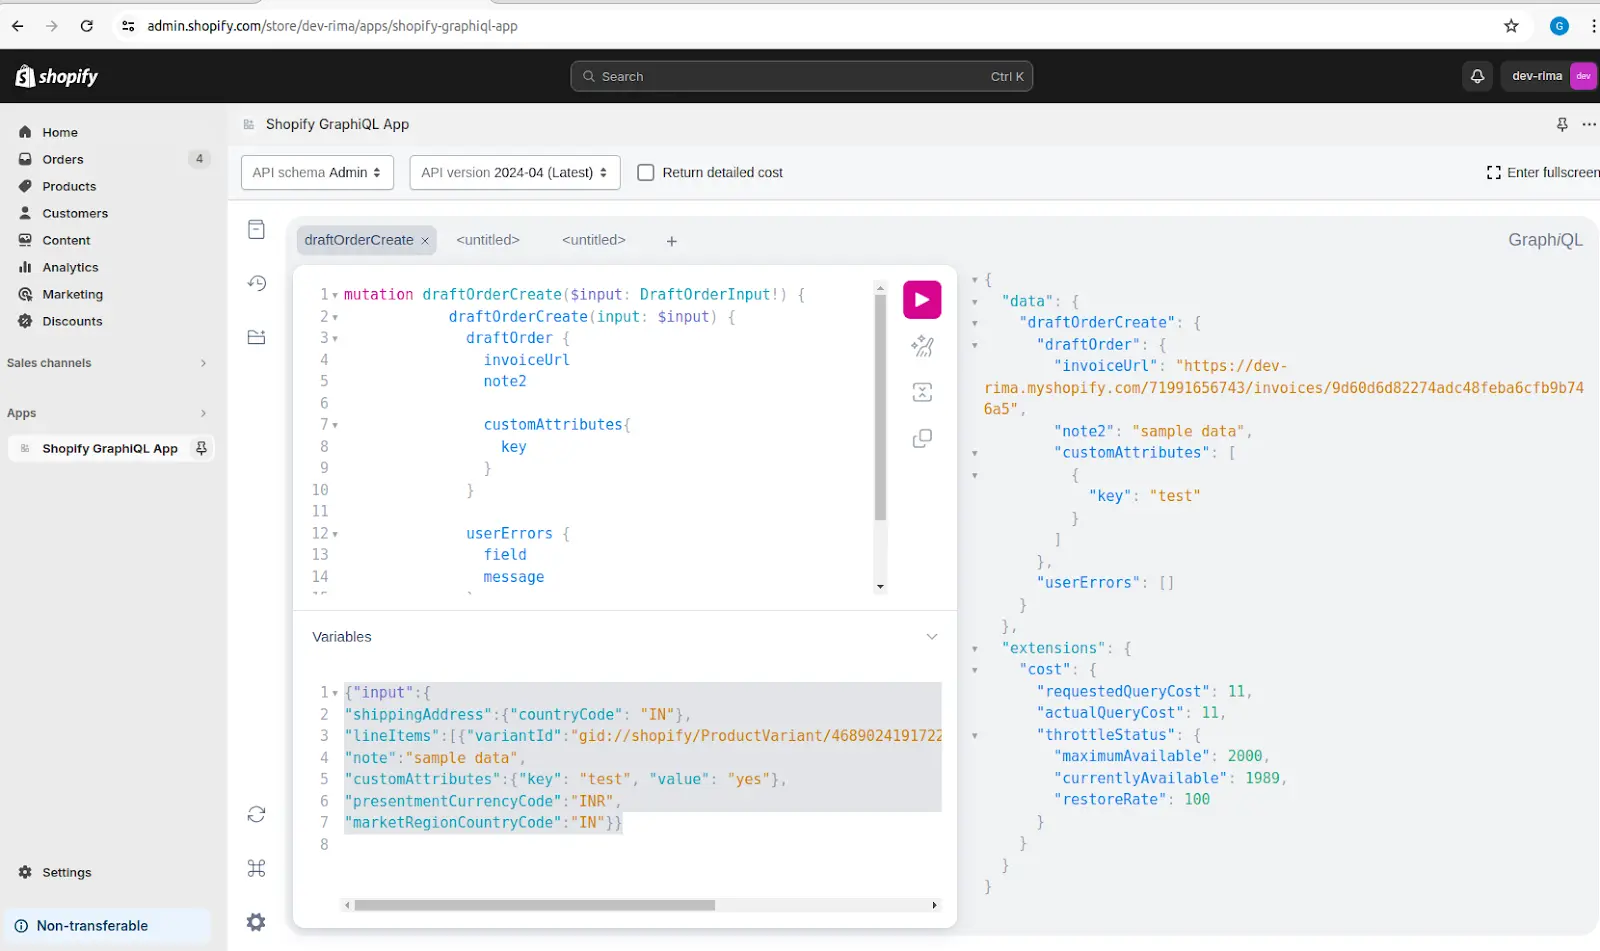
A temporary order that hasn’t been finished yet is called a draft order.
It allows merchants to create orders on behalf of customers without the customer having to go through the usual checkout process.
draftOrderCreate
Input Variable
You can generate an invoice URL using the draft order. After receiving the invoice
URL, you need to hit the URL on the browser and place the order.
Pros and Cons of draftorder Create shopify API
Pros :
- Flexible Order Creation : You can construct orders programmatically with flexibility when using draft orders. You can add custom line items, discounts, note, custom attributes and shipping options as per the client requirements.
- Custom Pricing : You can give discounts or change the amount of tax and shipping fees for each order before the customer buys it. This is great because it lets you offer special promotions or prices applied to each customer.
- Integrating with other systems : making your order creation process work together with other software, like CRM (Customer Relationship Management). Using the draftOrderCreate endpoint, you can set up a system where orders are made automatically when something specific happens, like a customer taking a certain action on your website.
Cons :
- Additional Development Effort: Integrating with draft orders requires additional development effort to handle the creation, modification, and conversion of draft orders into actual orders.
- Payment Processing: Apart from regular Checkout Process Shopify provides external invoice url.
REST Admin API
Endpoints and requests
All Admin REST API endpoints follow this pattern:
https://{store_name}.myshopify.com/admin/api/2024-04/{resource}.json
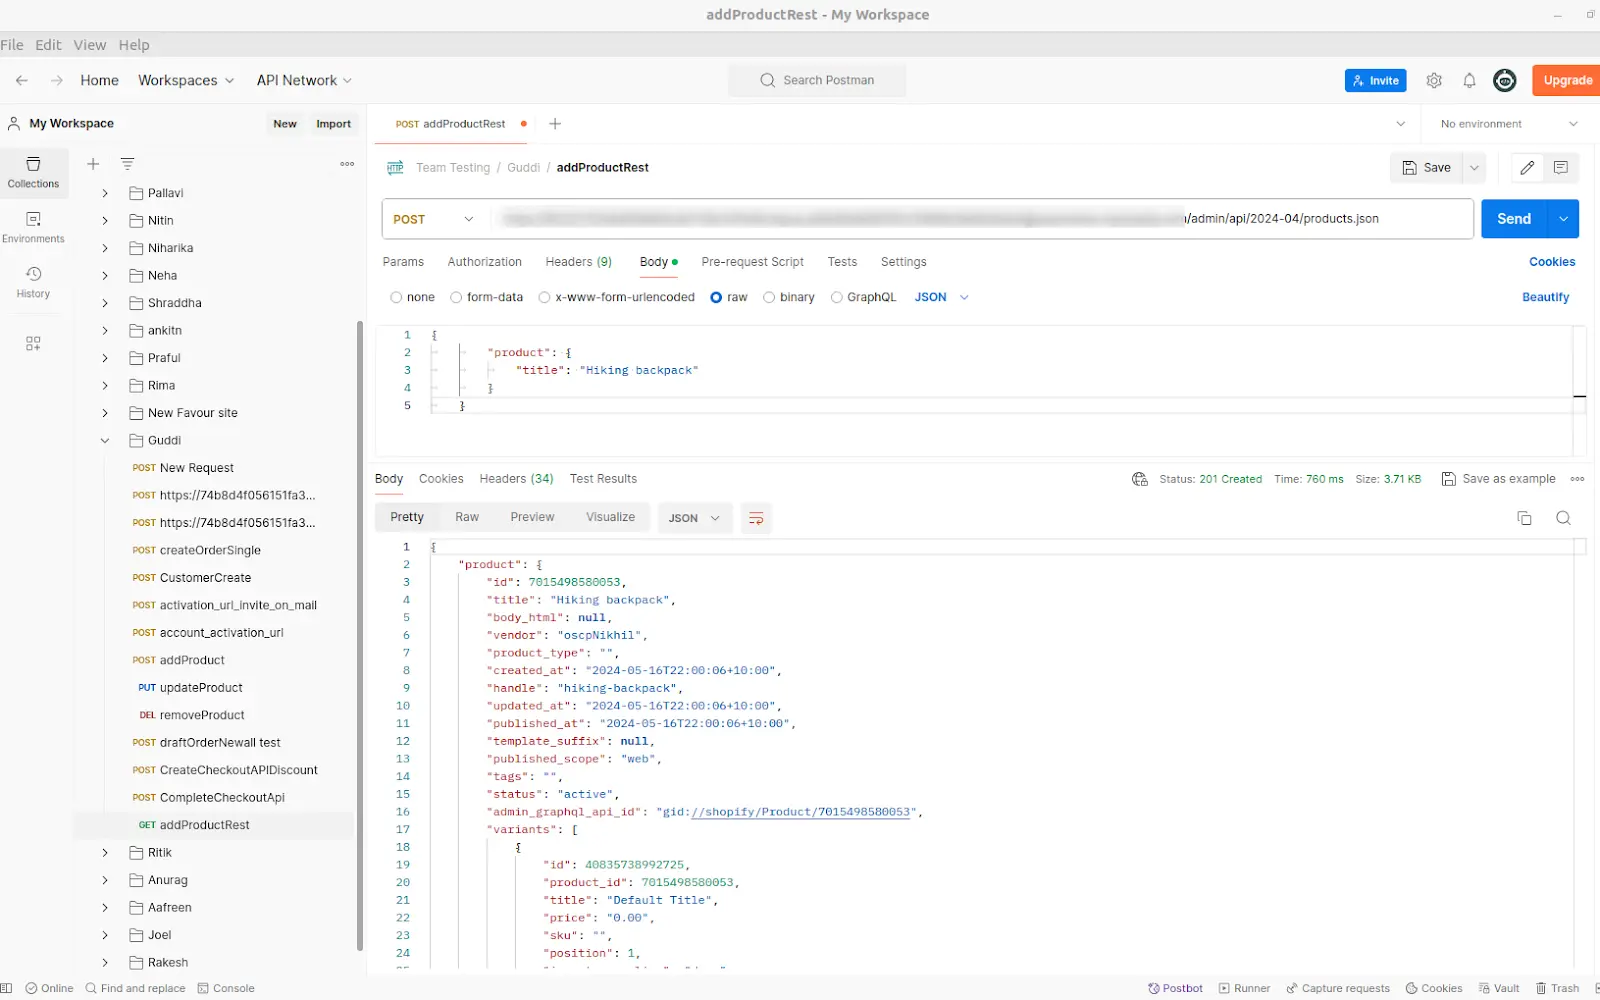
- POST Request : Create a new product.
This example represents how to create a new product using the Product resource and the POST /admin/api/2024-04/products.json endpoint. Replace {store_name} with your store’s domain and {access_token} with the access token you generated in the Authentication.
Need to run this API on the Postman tool to create a product.
https://{Api-key}:{access-token}@{store-name}/admin/api/2024-04/products.json
601****************** : API Key
Shp****************** : Access token
*************** : store name
admin/api/2024-04/products.json : Endpoint
Body
- GET Request : Retrieve a single product.
This request represents how to retrieve information for a single product using the Product resource and the GET admin/api/2024-04/products/{product_id}.json endpoint.
Replace {store_name} with your store’s domain and {access_token} with the access token you generated in the Authentication.
- PUT Request : Update a product.
This request represents how to retrieve information for a single product using the Product resource and the PUT admin/api/2024-04/products/{product_id}.json endpoint.
Replace {store_name} with your store’s domain and {access_token} with the access token you generated in the Authentication.
- DELETE Request : Update a product.
This example represents how to retrieve information for a single product using the Product resource and the PUT admin/api/2024-04/products/{product_id}.json endpoint.
Replace {store_name} with your store’s domain and {access_token} with the access token you generated in the Authentication.
Storefront API
GraphQL Storefront API
This gives you a lot of flexibility in fetching the specific information you need for your storefront, like cart details, customers information, metaobjects.
Authentication
The Storefront API doesn’t require any login information like usernames or passwords. It’s open for anyone to access, but users can only read data and can’t make any changes.
The Storefront API has the following types of access:
- Public access: Used to query the API from a browser or mobile app.
Endpoints and queries
The Storefront API is available only in GraphQL. There’s no REST API for storefronts.
The Storefront API uses a single endpoint for all queries, and it only accepts POST requests. This means if you want to get information from the API, you send a POST request to a specific URL
POST https://{store_name}.myshopify.com/api/2024-04/graphql.json
You include your GraphQL query in the body of the POST request, and the API responds with the data you requested.
Example : Query :
Response:
Shopify Ajax API
The Shopify Ajax API lets developers use JavaScript to do things on a Shopify website without making the whole page reload.
It doesn’t require access tokens or a client ID to access.
All API responses return JSON-formatted data.
Example : you can add items to your shopping cart, change how many items are in your cart, or get information about products without having to refresh the whole page.
The Ajax API offers a set of simple REST API endpoints specifically for building Shopify themes. However, it’s only available for themes hosted by Shopify itself.
If you’re using a custom storefront on Shopify, you can’t use the Ajax API. It’s designed specifically for themes hosted by Shopify’s platform.
- Add products to the cart and update the cart item counter
- Display related product recommendations.
The Ajax API accepts two types of HTTP requests:
- GET requests to read cart data
- POST requests to update the cart for the current session
To fetch the current data of the cart, send a request to the store’s /cart.js endpoint.
var cartContents = fetch(window.Shopify.routes.root + ‘cart.js’).then(response => response.json())
.then(data => { return data });
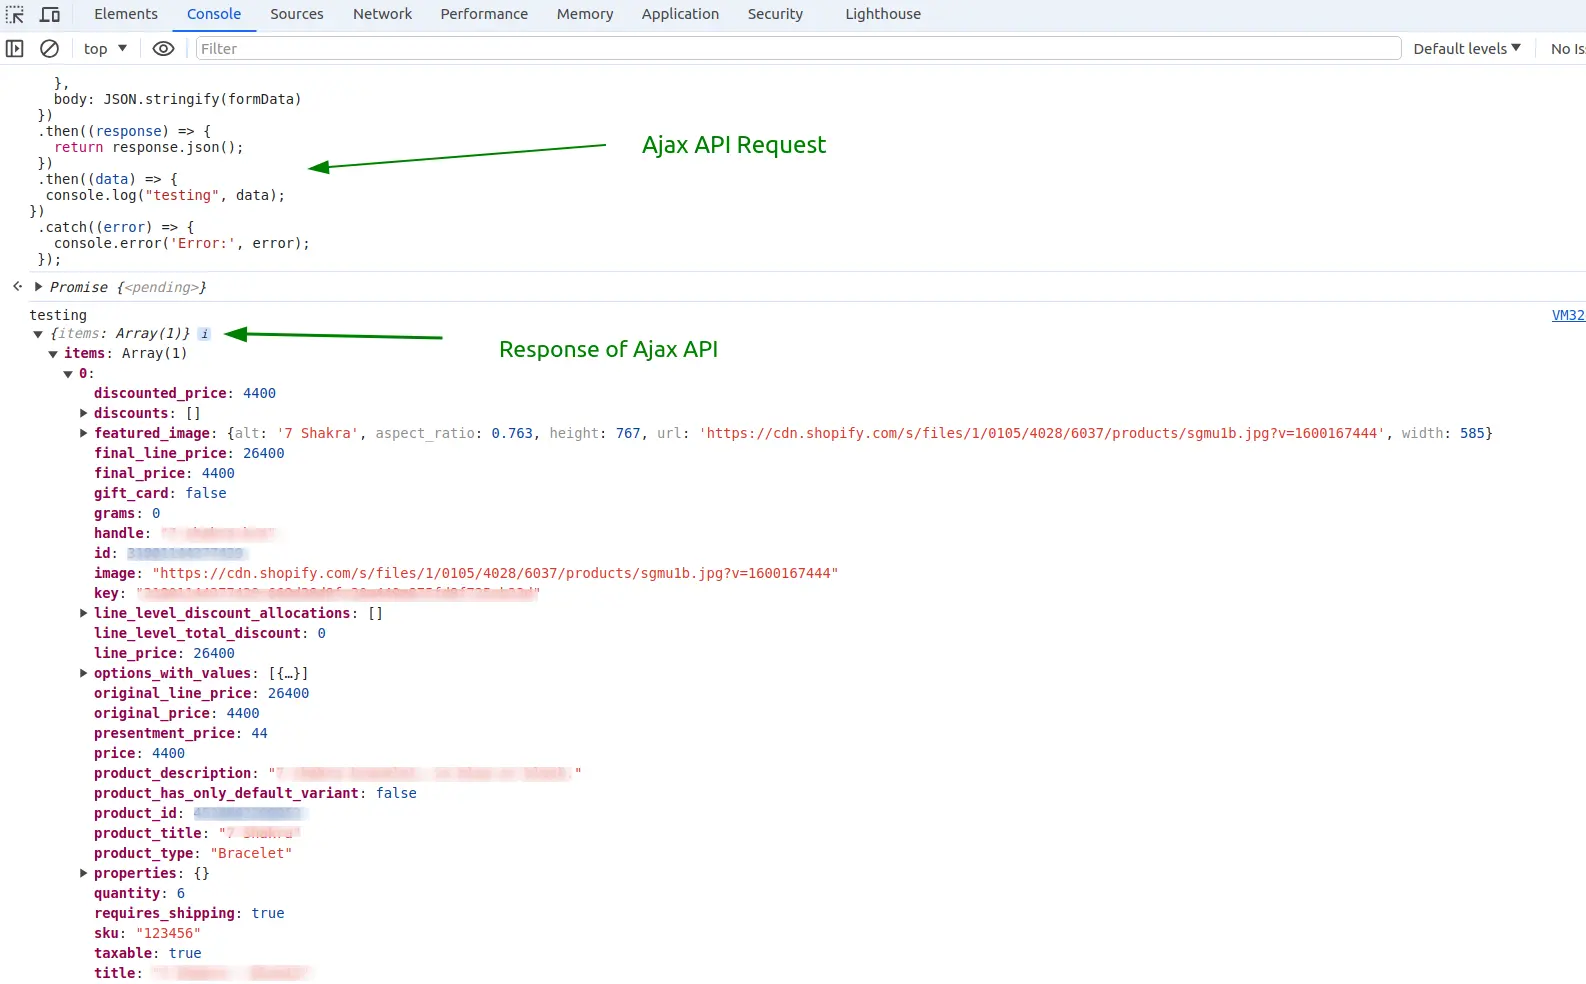
Request : Ajax API to add a product in cart.js
Response:
Pros and Cons of shopify Ajax cart/add.js API
Pros
- Faster Load Times : Shopify Ajax Cart Add API fetches only the necessary information from the server, like adding products to your cart, without making you wait for the whole page to reload.
- Improved User Experience : Allows for quick addition of products to the cart without requiring the page to reload, enhancing the overall user experience.
Cons :
- JavaScript Dependency : The Shopify Ajax Cart Add API needs JavaScript to work. If someone’s browser doesn’t support JavaScript or they’ve turned it off, the feature won’t work for them.
Security Concerns : This could allow hackers to enter into your website and do bad things, like stealing sensitive information or tricking users into clicking on harmful links. So, it’s really important to have strong security measures in place to protect your website and your customers’ data. Consulting with IT experts or IT consultants can help address these concerns and ensure a secure implementation.
Unlock Your Shopify Potential: Expert Development and Speed Optimization Await!


