 Skip to content
Means of Uploading Bulk Products in the Marketplace
Jan 20, 2021 | 05 min read
1. Introduction
Magento 2 permits you to import product information, to add or replace items, update existing information, and remove product entities. This helps save time compared to manual configuration. Nearly all of the information in Magento is stored in CSV documents (Comma Separated Value record) which look like an Excel document but are less complicated.
Therefore, we suggest that you get comfortable with CSV records for the import and export of various records other than product data; for example, client information, client address information, and product pictures. In this article, we aim to guide you in the most efficient ways to import products to your Magento marketplace. Let’s start!
2. Admin Management of Mass Upload on the Magento Marketplace
The Admin can mass upload products for any individual merchant. For this, the Admin needs to click on the field Marketplace Management > Manage Product Upload. Using this menu option, the administrator can add any item (straightforward, virtual, downloadable, configurable) from the backend.
All that the administrator needs to do is first select the Vendor for which the product has to be added, next select the Attribute set, choose the Data-stream profile, add the CSV/XML/XLS document and the Image ZIP record, and click the Save button to save these new products.
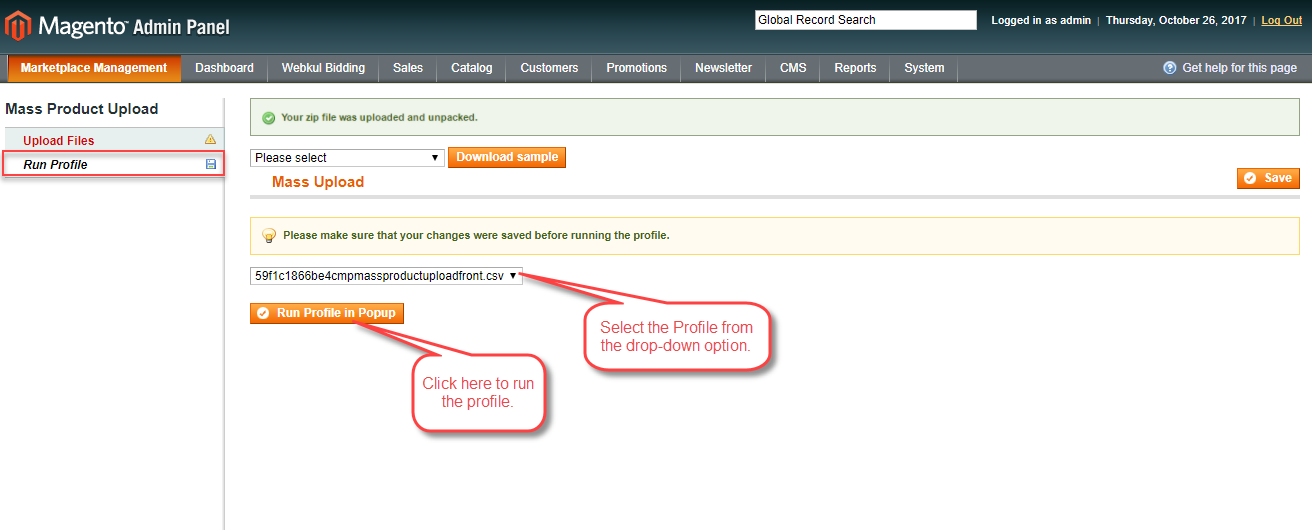
To cross-check whether the product upload has been successful, you can go to the Run Profile tab and select the profile from the dropdown list and tap the Run Profile in the pop-up button as shown in the image below:
After clicking the Run Profile in the pop-up button, you can see the running profile being executed, as demonstrated below:
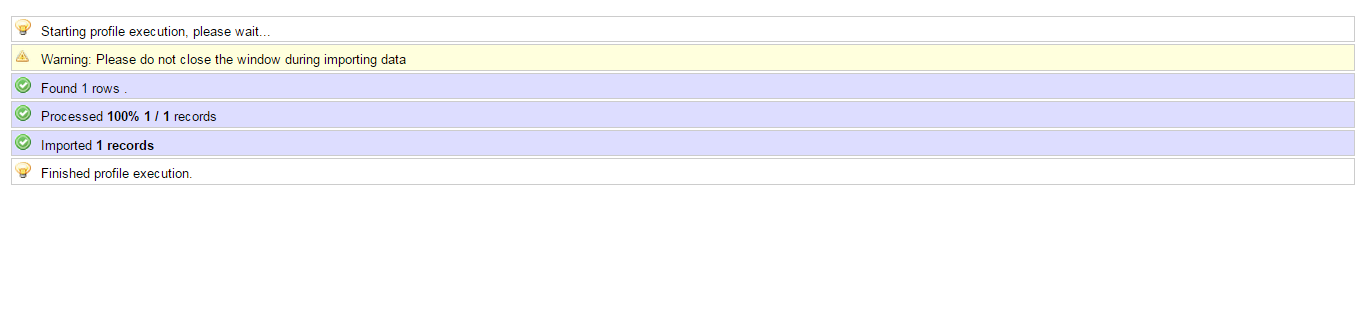
You will note that the administrator has added a single product called “Heels” for the dealer, John Doe. A similar exercise can be repeated or bunched together and carried out for multiple products or for different categories of products (basic, configurable, virtual, downloadable). The admin can do this from the back-end for any of its dealers. Let us next see how this exercise can be done for uploading multiple products in bulk.
3. Steps to upload products in bulk in the Magento 2 Database
Data preparation
- On the Admin sidebar, pick System > Data Transfer > Import. In the Import Settings area, set Entity Type to “Products” as you are uploading product information.
- After choosing the Entity Type, click the Download Sample File. In the event that you are prompted, click Save to begin downloading the document.
- Open to see the example document.
- Ensure that your CSV import record follows the example document exactly.
- Confirm that the size of your import document does now not exceed the restriction, limit in the message which is normally known to be 2MB.
- If the import statistics consist of paths to product pictures, ensure that the picture records have been added to the proper area. The default area on the Magento server is media/import/pub.
- If the pics live on an external server, make certain that you have the entire URL to the catalog that contains the pictures.

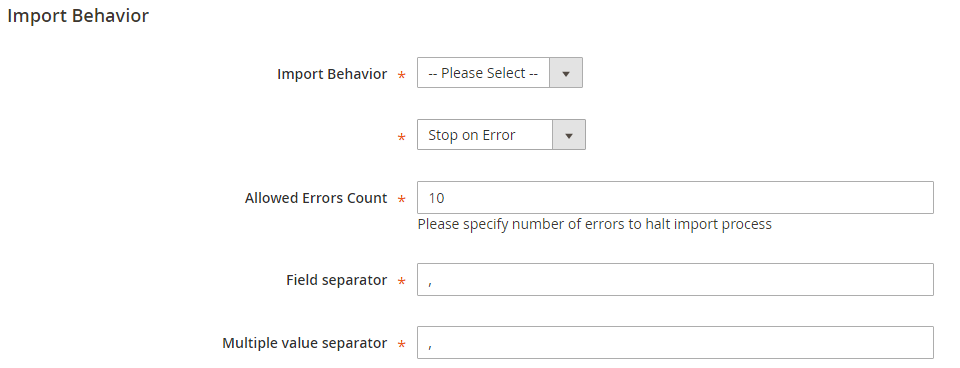
Configure Import Behavior
In the Import Behavior segment, pick the activity you need when importing the information in the Import Behavior field: “Add/Update”, “Replace Existing Data” or “Erase Entities”. At this point, set the accompanying field to either “Stop on Error” or to “Skip Error Entries”.
In the “Allowed Errors Count” discipline, input the number of errors after which to pause the import system.
In the Field separator and Multiple cost separator fields, leave the default as “,” for the reason, that the default separator in CSV report is a comma.
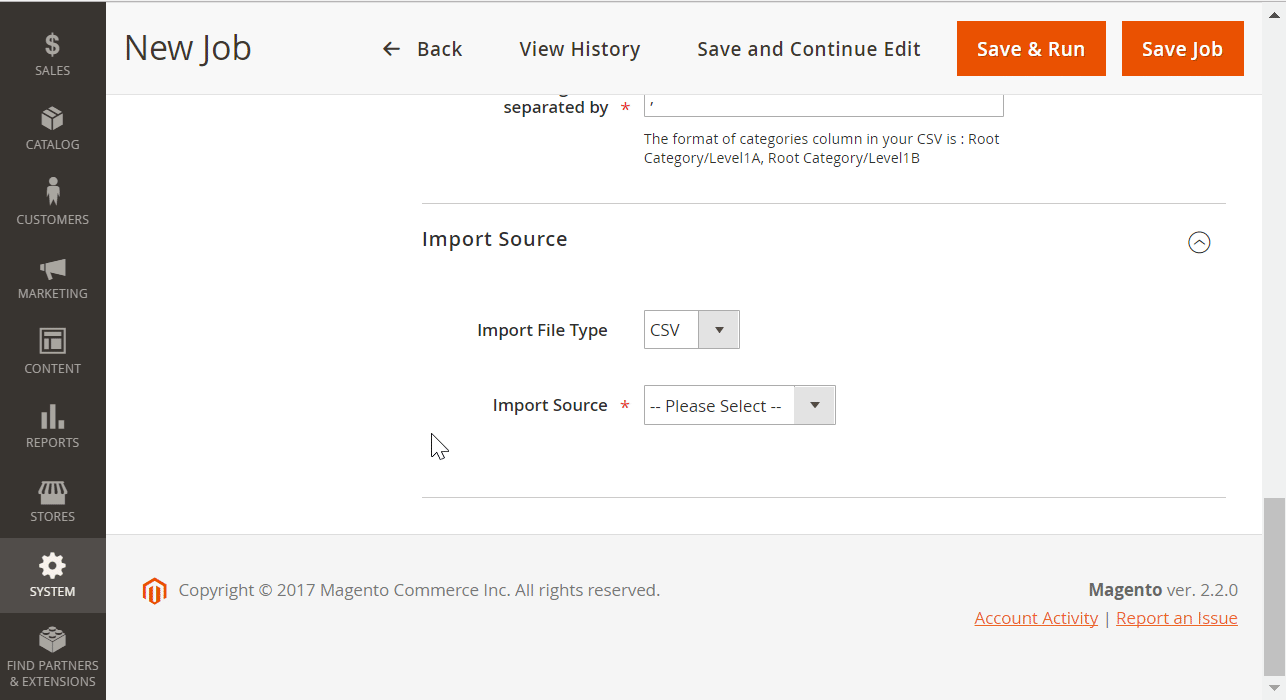
4. Specify the Import File
In the File to Import segment, click on the Choose File button and pick your import information record, and click Open. If the import statistics include paths to product pictures, inside the Images File Directory field, enter:
The route to the uploaded pictures on the Magento server. For example: var/import. OR
The complete URL to the pictures on another server. For example http://area.com/picture.
The complete URL to the pictures on another server. For example http://area.com/picture.

Check the Data and Complete Importing
In the upper-right corner, click on Check Data and wait till the cycle completes the data check.
If the document is valid, click the Import button that appears in the Validation Results. Conversely, in case of any error, correct the issue informed in the message and attempt once more. When the uploading completes, a message will notify you of the same.
If the document is valid, click the Import button that appears in the Validation Results. Conversely, in case of any error, correct the issue informed in the message and attempt once more. When the uploading completes, a message will notify you of the same.
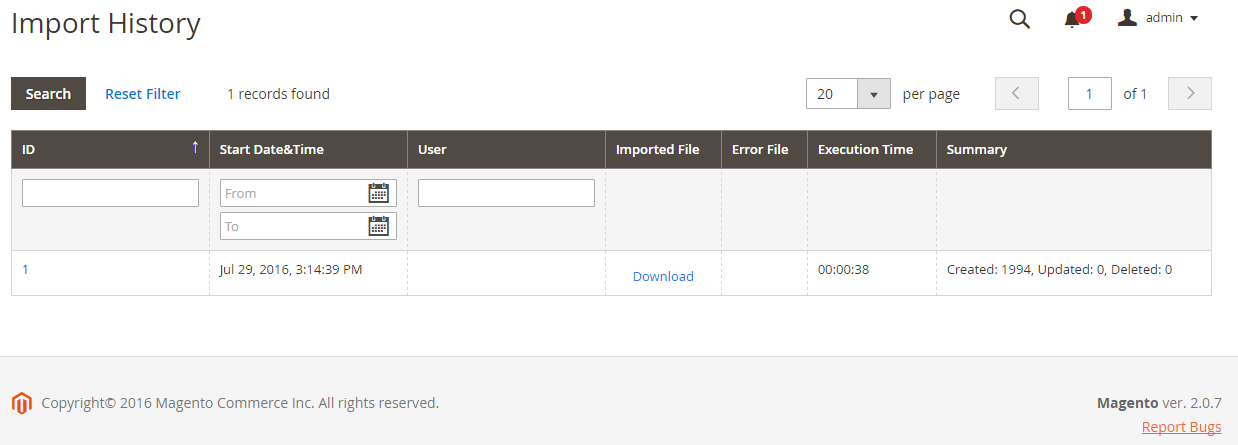
View the Import History
On the Admin sidebar, pick System > Data Transfer > Import History. The import history detail table will show the activity of import/export for you to cross-check and keep track.
5. Magento 2 Marketplace Import Without Files
Is it conceivable to add products into a Magento 2 marketplace without importing the information documents? By default, it would be impossible to do this. However, such is the superior capability of the Improved Import & Export extension, that it can be leveraged to import information directly from Google Sheets as shown in the following picture:
Then again, you can make an immediate connection with an outside platform through REST API, SOAP API, or GraphQL API. Note that each one of the extension functions works similarly with file transfers and direct connections
6. Magento 2 Marketplace Import Without File Editing
Another imperative issue that isn’t unraveled in Magento is the need to alter information records before each import. You need to match external attributes to the internal ones manually. This is a long way from being easy to implement and user-friendly one. The more information records you have, the more tedious the work. Also, this has to be repeated each time updated documents are supplied. The Improved Import and Export Magento 2 extension automate this entire process. Let’s take a look at every component separately.
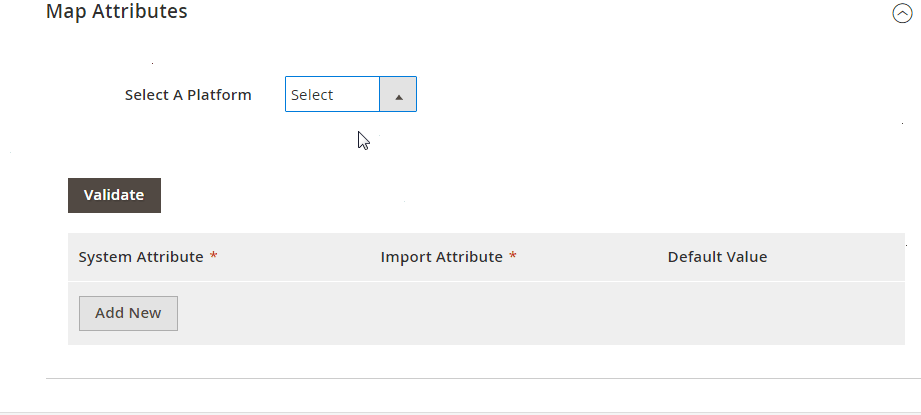
Presets
The Improved Import and Export Magento 2 module offers a preset that automatically coordinates external attributes to the ones utilized in Magento 2. All you need to do is pick a platform to connect your store with. Along these lines, attributes coordinating is decreased to only a few clicks. Below, you can perceive how to plan Magento 1 ascribes to their Magento 2 assignments:
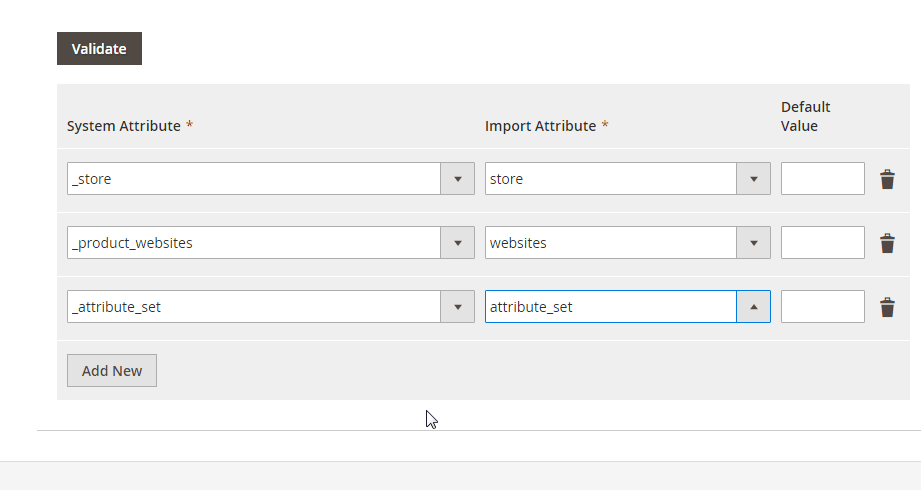
Schemes
Simultaneously, the Improved Import and Export module allows you to make a plan manually. The method isn’t as quick as the one above, however, it is still clear.
You simply need to choose an external attribute and pick a comparing assignment used in Magento 2. Furthermore, it is conceivable to indicate hardcoded values for it. Beneath, you can perceive how everything works:
Note that the created plan is stored and applied for all further information moves so you don’t have to repeat the cycle any longer.
7. Conclusion
As should be obvious, adding products into a Magento 2 marketplace largely enhanced with the help of the Improved Import and Export Magento 2 expansion. You can completely automate this cycle. Besides, the module can be handily associated with all existing market extensions supplying you with a consistent combination. In the event that you have any further inquiries on the subject, you can click on the following link to contact our support team.


