 Skip to content
How to Easily Build an Online Shopify Store
March 27, 2020 | 08 min read
1. Quickread
Are you prepared to learn how to build your own Shopify store? You may just have come up with a wonderful idea for the company and now you’d like to see if people are willing to purchase it. Okay, you’re in luck because to create a Shopify Store in less than 15 minutes you no longer need to be an expert web developer.
What’s Shopify and How’s it working?
Shopify may be one of the world’s best-known ecommerce platforms, but not everyone understands what this platform is, or how it operates. Simply put, Shopify is a platform you pay for using the SaaS model-that is, you subscribe to the program. Typically, you’ll benefit from a slightly reduced rate if you opt for the service for a year at once.
Ecommerce business owners and retailers may create a website using Shopify, and use a built-in shopping cart system to deliver digital and physical goods to customers around the world. Shopify also provides a system allowing clients to manage things like delivery specifications and product monitoring quickly and easily. You can access a state of the art admin panel using Shopify, where you can see the items you have for sale, compose details, process orders and so much more.
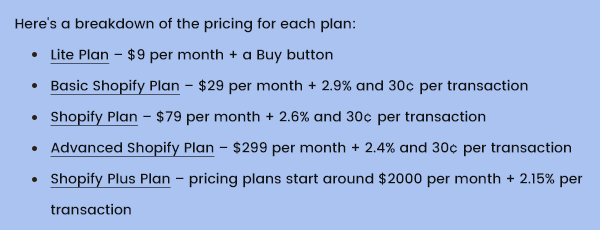
Pricing for Shopify – How much does it cost?
2. Sign up on Shopify
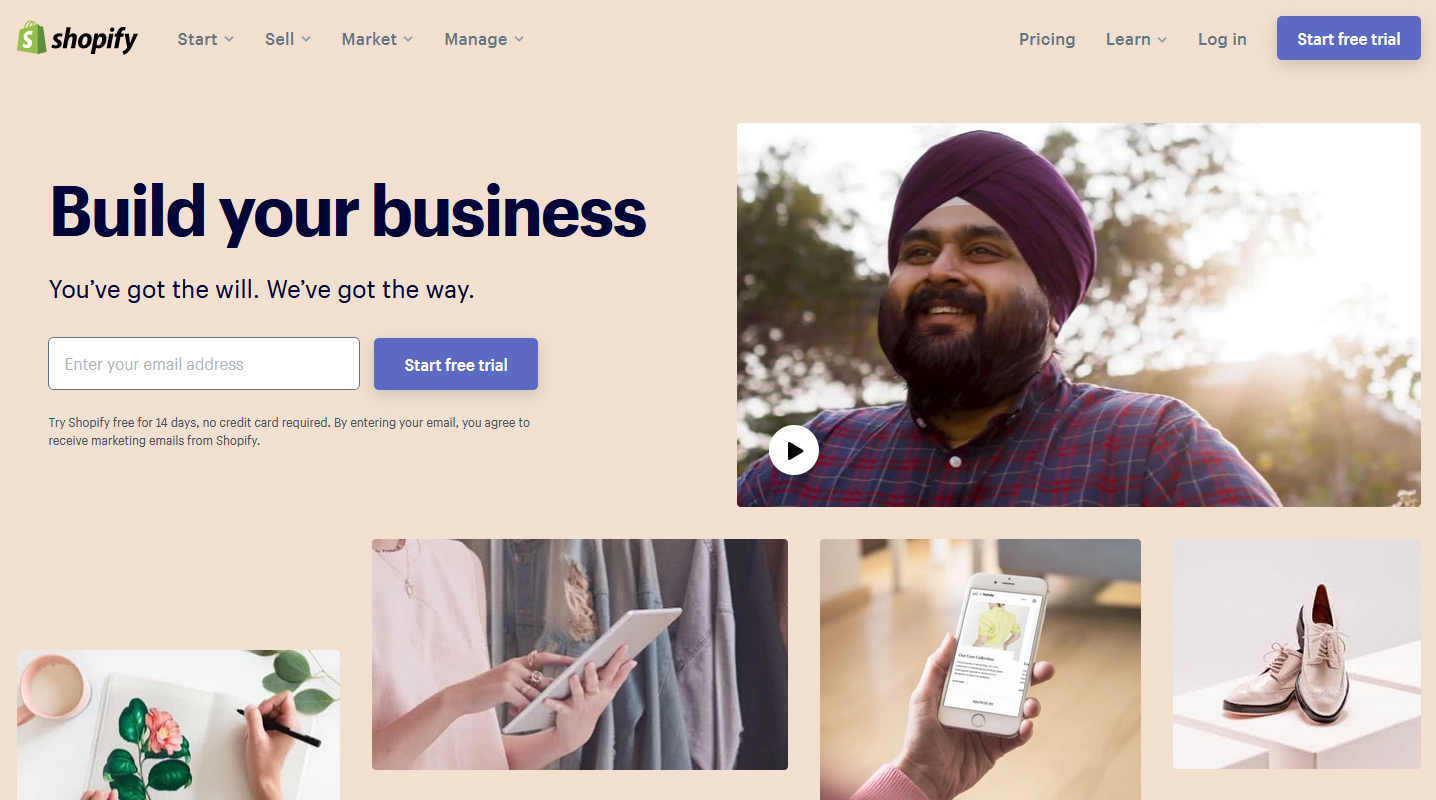
Visit Shopify.com Use the registration form to create an account. Enter the details required and press the ‘ Launch Free Trial ‘ button
The name of your shop has to be special otherwise Shopify may ask you to choose something specific. Further information, including your name, address country and contact number, will be asked after this initial screenshot.
You will also be questioned if you have goods and what you intend to sell if so. If you are just looking to see if Shopify fits you, you should pick ‘I’m just messing around’ in the ‘Have you got products?’ Dropdown, and ‘I am not aware’ in ‘What are you going to sell?’ Division.
Click the ‘I’m done ‘button once you’re done.
3. Start configuring your Online Store
You will be directed straight to your store admin page once you have signed up. Now you’re ready to start customizing your website, importing items and setting up delivery and payments.
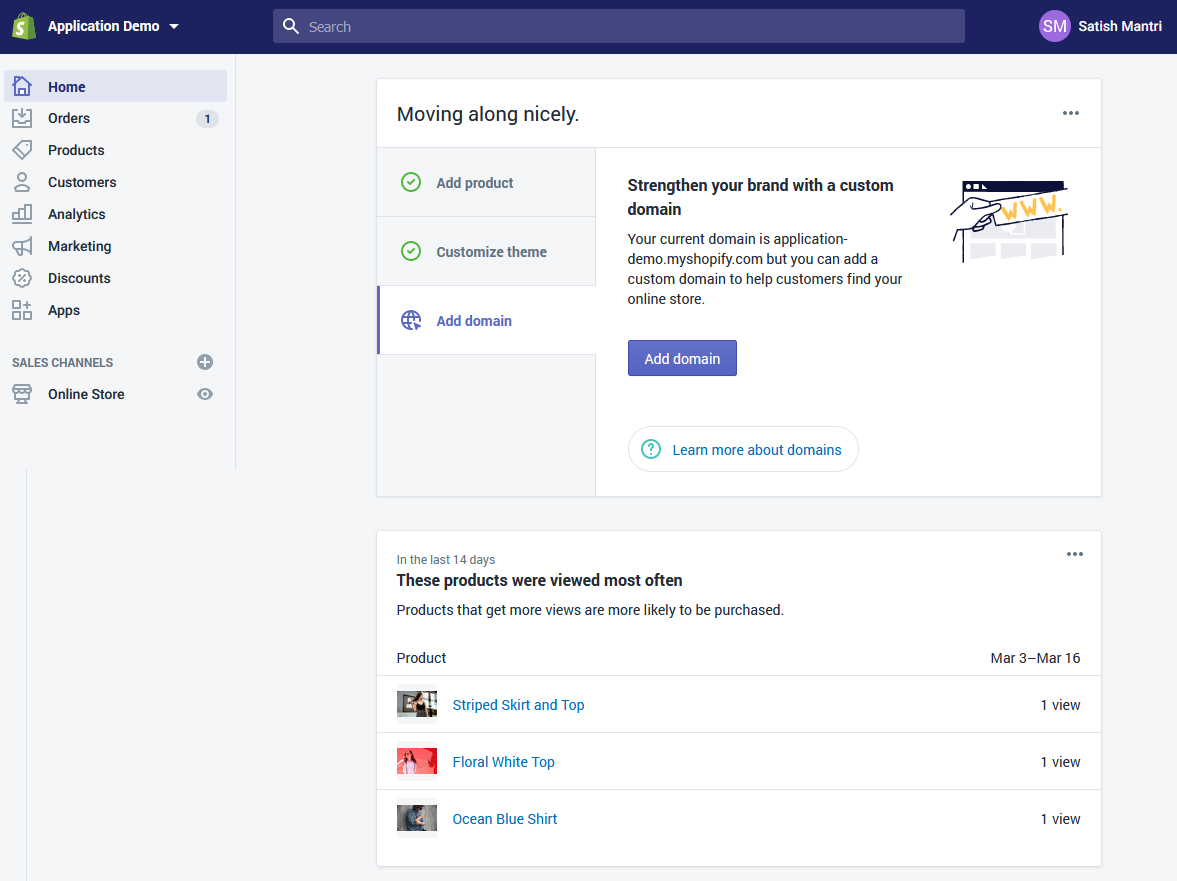
shopify admin panel
Your home admin screen should inform you everything you need to learn to get yourself up and running.
4. Select a “Theme” or a “Layout”
Shopify has its own selection of approved themes. All of these designs are assured to have complete creator sponsorship so that you feel your store is in good hands.
Both themes come with a detailed list of changes you can make without hitting a line of code. The paid themes come with more changes, but with a free one you can still attain a great looking web. The following section describes certain changes.
There are very few limitations on what can be accomplished by accessing the HTML and CSS, if you want to make radical changes to a theme. Don’t panic if you don’t have any prior experience in coding. Shopify has an international team of consulting firms dubbed ‘Shopify Experts’, which can be employed to configure the platform to the max.
We recommend following to find a theme that suits your needs:
Browse the Theme Store
Sign into Shopify and access the theme store at themes.shopify.com. You’ll find over 70 varieties of theme combinations, including a good selection of free ones.
On other marketplaces, including TemplateMonster, you might consider Shopify themes too.
You can filter by features such as paid or free, industry and. The topics can also be sorted by size, popularity and latest.
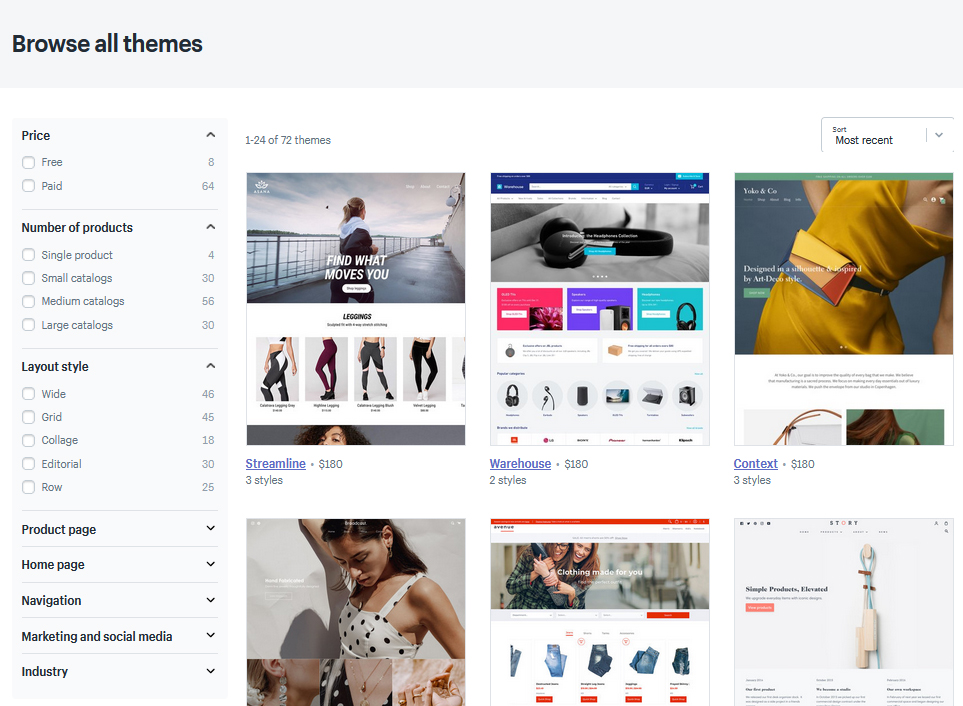
The Shopify Theme Store.
Check the Functionality and Reviews
Click on the preview image of the theme after you have selected a theme you want. More information will be given on the theme, such as whether the theme is responsive / mobile ready among other features. Scroll down to read a few reviews about what other e-tailers are thinking of using the theme.
Preview the Theme
Tap Demo view, to see the theme in action. Under the green ‘ Preview Theme ‘ button in your Store you will see this.
If the theme comes up in a range of styles, by clicking on them you can also show samples of the different styles.
Get the Theme
Click the green button after you have identified a theme you want.
Shopify will ask you to check if you would like to install the theme
Click Publish as a Theme for my Store.
Don’t hesitate if you’re not convinced that this is the best theme for you. You might change your mind some time later.
Shopify informs you that you have installed the theme and that you can go to your theme manager.
The theme manager displays themes that have been updated (the one you have most recently installed or activated) and unknown themes below (themes previously installed).
5. Edit Shopify Settings
Many Shopify themes allow you to make simple changes, which can make a big difference in shopping appearances, so that you can be sure you won’t end up with a website that looks like a clone of thousands.
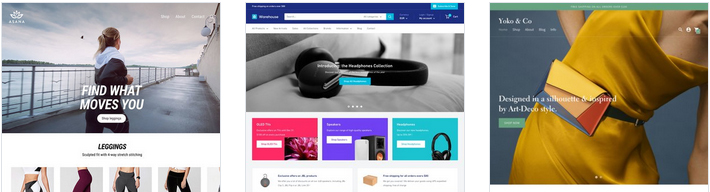
These stores are all built using the same theme
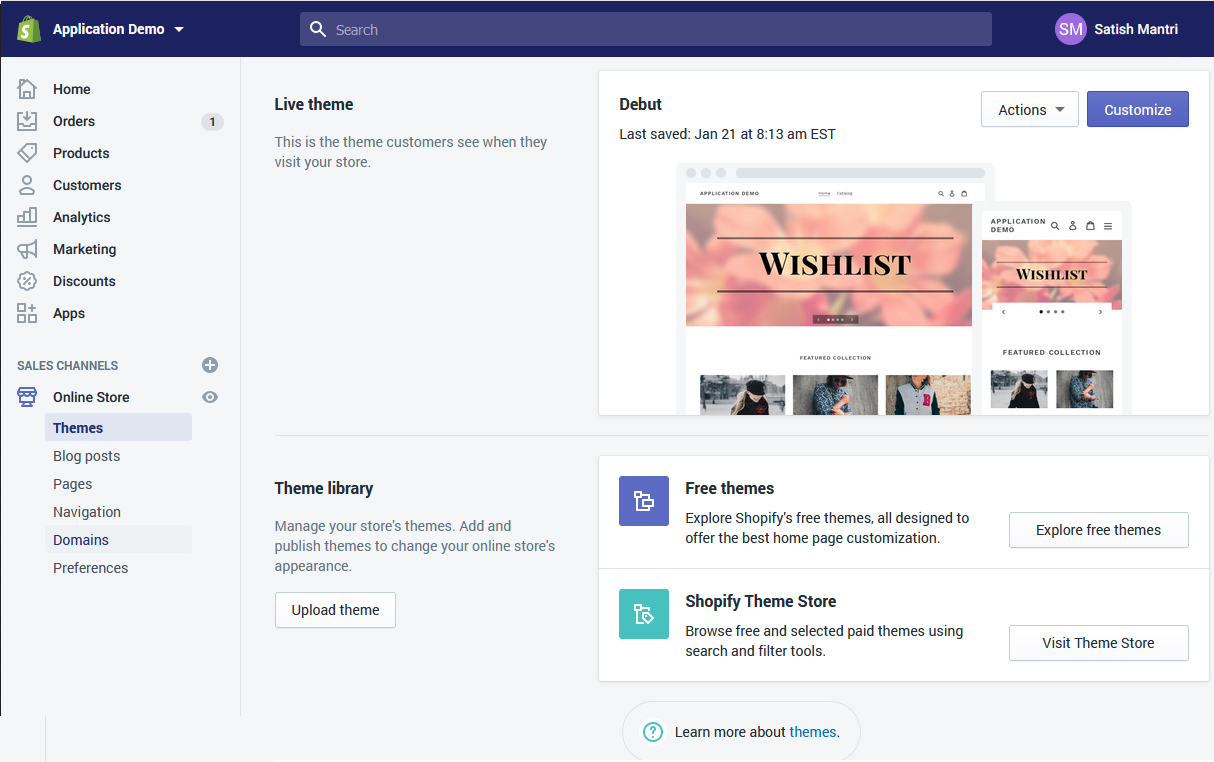
Pick “Themes” from the left window menu on your admin tab. You will see your Live Theme on this page in a box at the top, two buttons in the top right corner of the box. The first is three points that allow you to adjust basic settings. One of these lets you make a theme duplicate. You can uninstall the duplicate and restart it if you make some changes that you do not like.
The second button says ‘ Theme Customization’. Clicking on it will move you to a page that handles all of your store’s basic functionality. This is a great time for you to practice the settings extensively and check all the apps and figure out what your platform is capable of.
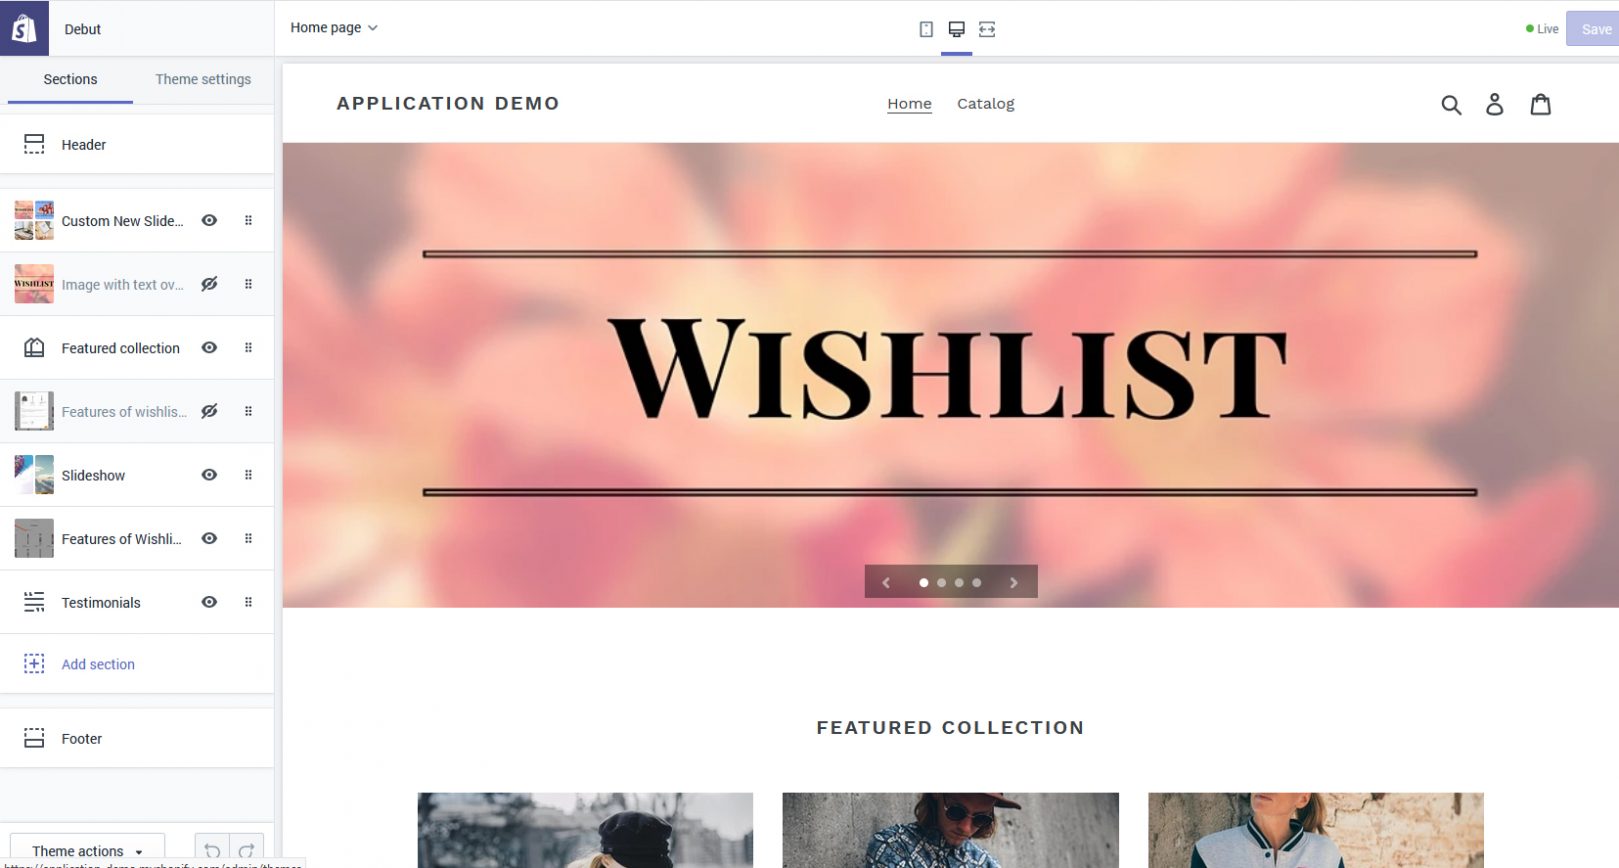
Your themes in custom settings.
That will include the most common features.
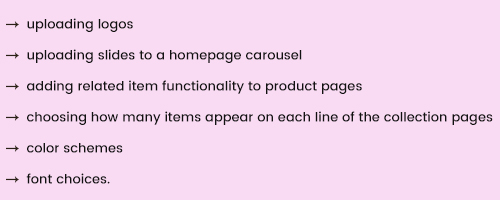
Many themes will also enable you to reposition items on pages such as showing pictures of the product at the left, right or middle of the website. You can also choose whether the media like / tweet / pin/+1 buttons will be shown.
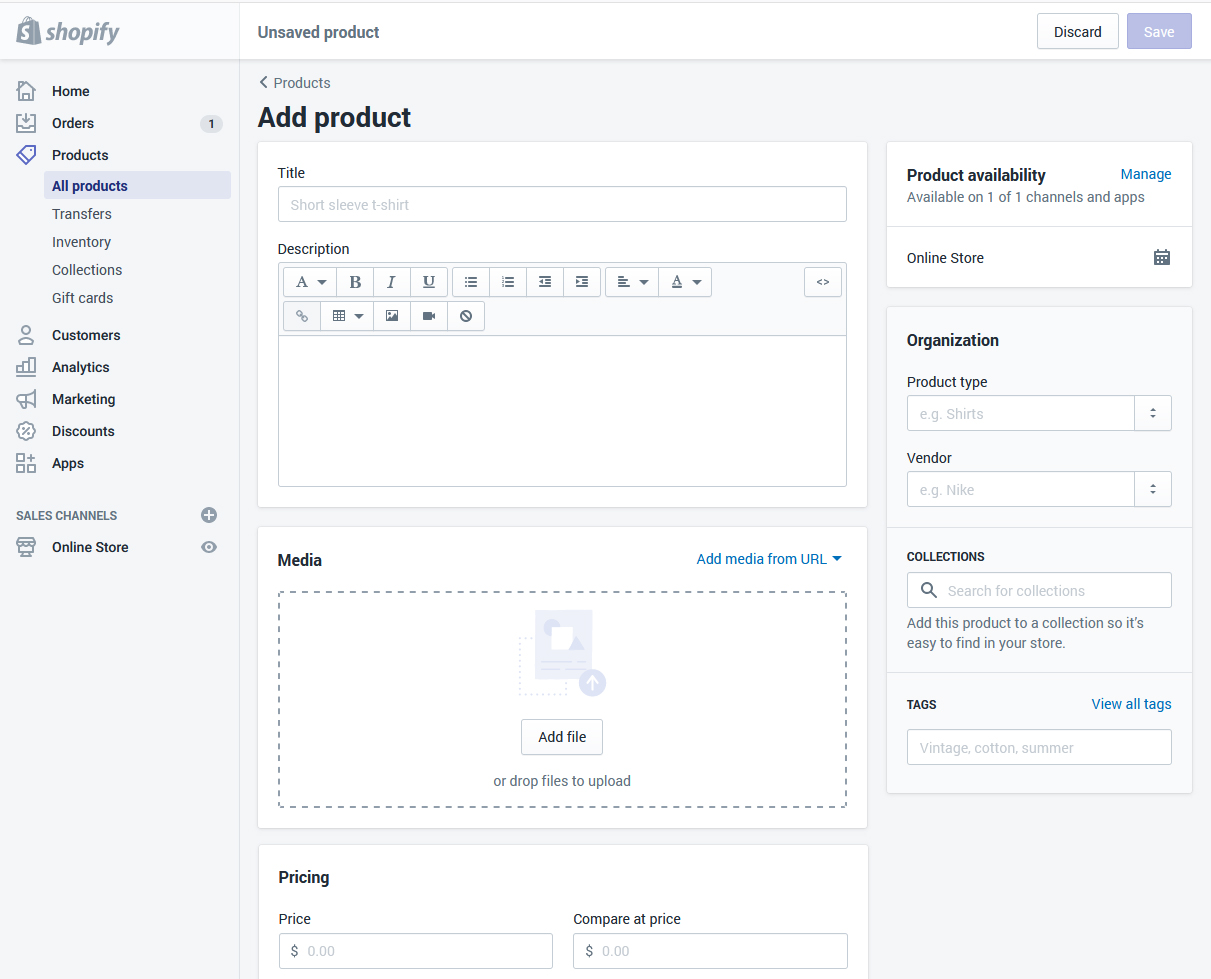
6. Add Your Products to The Store
Pick ‘ Products ‘ by clicking the left button. Then in the middle of the page you will see a blue ‘ Add a Product ‘ button. Use the screen below to provide as much information about your goods as you need. Look especially at those that will help with SEO including name, definition and URL. Include as many specifics as you can to help inform clients about your products.
This is the screen where you upload photos of the product. Once the files are saved, you will rearrange them in any particular order so don’t think about importing them.
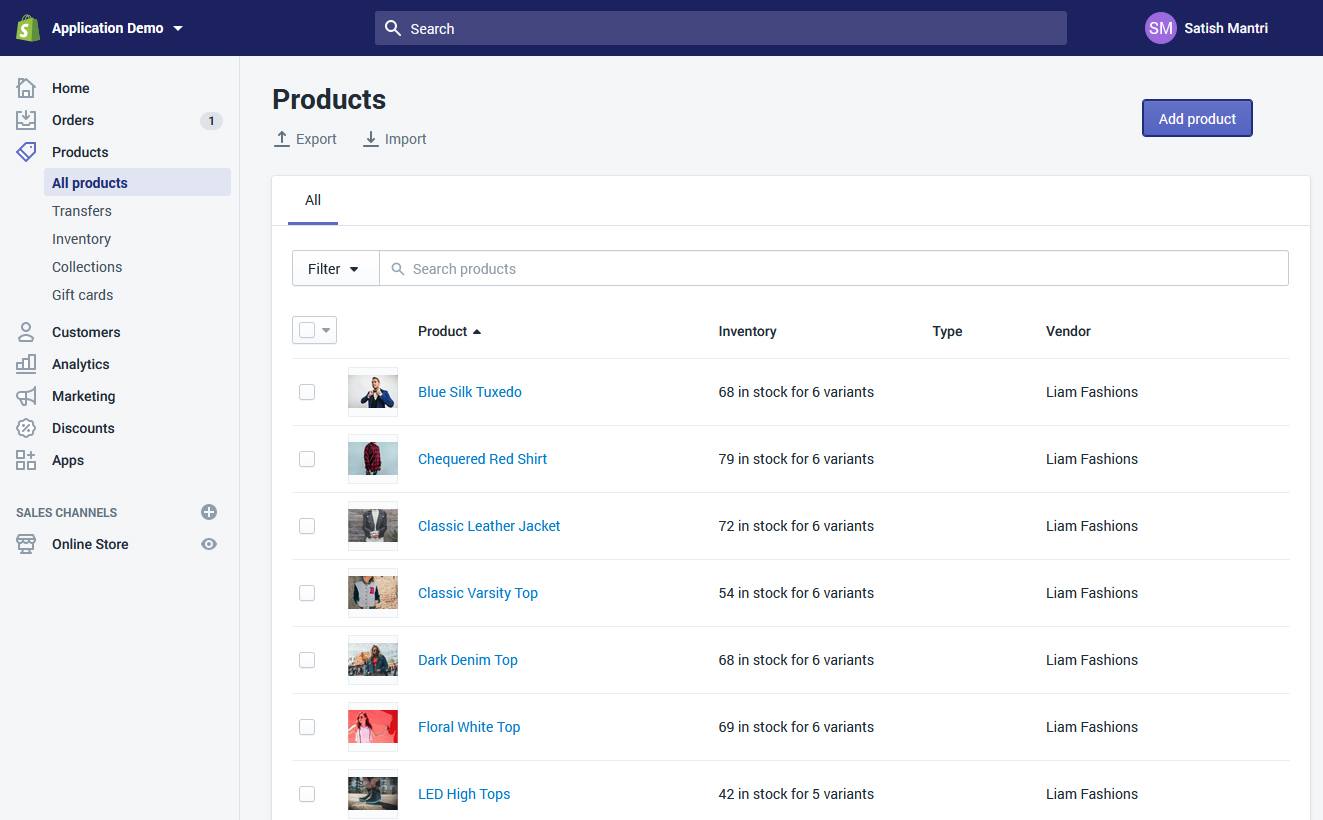
Screen for the Item. Make sure you fill in as much detail as you can.
Brand images can be sold so that the items are shown at their best and any special or unique features or closeup pictures are highlighted. We suggest you keep both images the same size to keep your store clean. Unless you’re considering making the collection pages appear like a Pinterest wall.
Please note that when all is filled out, always click “Save Product” in the upper and lower right corners.
Set Up Collections (Groups of Products)
A collection is any group of products that share similar characteristics that customers might be looking for while they visit your shop. For starters, your customers could go shopping for:
- Unique clothes for men, women or children.
- Other types of items such as lamps, cushions, or rugs.
- Items for sale.
- Products of specific colors or sizes.
- Seasonal items including holiday cards and decorations.
Items can be made available in any number of collections.Your collections will normally be shown on your dashboard and in the navigation bar. It lets consumers find what they are looking for without having to click the entire catalogue again.
The screen set up for the collection works exactly the same as for the product screen
Manual and Automatic Collections
You can choose how to add items after adding a new collection. These are the two possible options:
- Manually-You manually add and delete items in a series of manuals.
- Automatically-You can set the search conditions to include goods that meet certain criteria automatically.
7. Payment Gateways
You can take payment from your customers through your website via a payment gateway. The price and commission rate is important but seeing what functionality they sell is also important. Not every gateway to payment is created equal.
When selecting the best payment gateway for you, you need to look at the following.
Transaction Fees
Some gateways can keep a small percentage or flat fee (or sometimes both) for allowing you to use their service while making a payment. Compare these according to what the projected sales are.
Card Types
You need to learn what types of cards your chosen Payment Gateway accepts. Although most accept American Express, they accept both Mastercard and VISA. Paypal gets more popular for online payments as well.
Offsite Checkout
Many gateways take the payment through their own form onto their own servers. It means that your payment gateway takes the customer away from your checkout and they pay on the form given. Once the customer successfully pays, they are then guided to your confirmation tab. This gives you a bit more control over the checkout process.
You can bypass the limitations of Shopify-they do not allow you to customize the checkout other than with CSS.
Transaction fees for payment gateways are applied in addition to the transaction fees of Shopify itself. Stores based in the USA and UK will be able to use Shopify Payments as of November. You can save on those extra costs depending on your Shopify plan. You will receive some highly attractive prices, depending on your plan
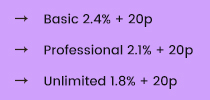
It might be worth upgrading to take advantage of those savings, depending on how many transactions you make each month.
8. Get Your Online Shop “LIVE”
You need to add a few more details about your business and how you plan to make sales and pay tax before your website can go live.
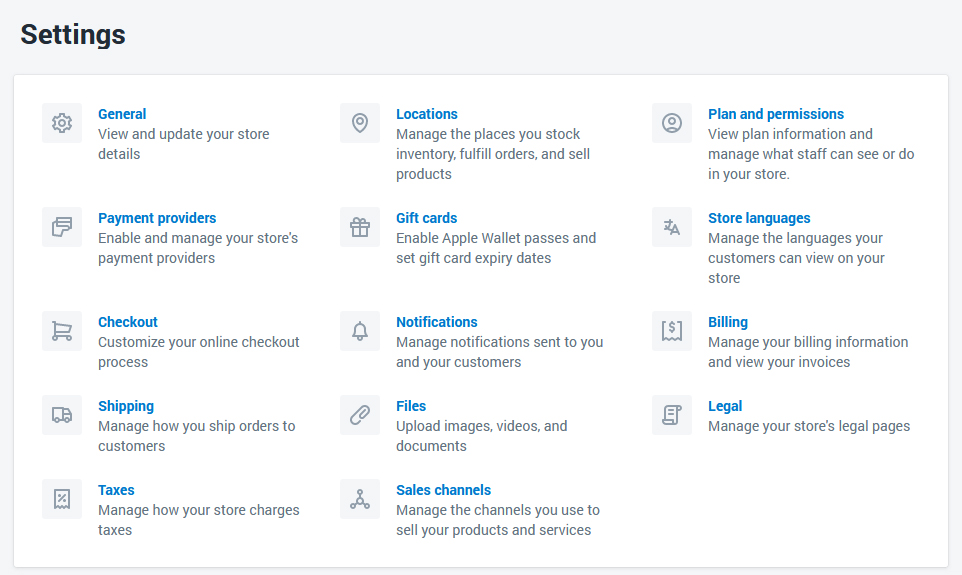
General
Make sure all information about your business were filled out in the settings area at the bottom left. Make sure to use the feature in Google Analytics. This can prove to be an invaluable source to monitor visitors to your shop.
Taxes
- Go ton the admin panel Products page
- Click on the name of a particular product.
- Scroll down to ‘ Variants ‘ segment
- Make sure you check the checkboxes next to Charge Taxes and Includes Shipping if you have to provide these with your goods.
- Some shops will not have to charge tax or delivery on items such as digital goods. A T-shirt shop, on the other side, would definitely
have to charge both. - If you intend on shipping your product to customers, be sure to enter the weight of the product in the correct area.
Shipping
You can miss out on some sales if your shipping rates are too low, or you don’t offer enough choices. Shopify can determine a shipping rate for your customers only based on the rules you specify in the admin’s Shipping tab. To ensure that you do not lose any of the sales:
- Go to Settings >Shipping page from your admin shop.
- See if you have set a weight-based shipping rate in the “Shipping rates” section, and change it to the requirements of your produc
Test Your Order System
To check your program, you may use Shopify’s Bogus Gateway to simulate a transaction. The Bogus Gateway used:
- Click Settings from your Admin list, then Payments to go to your Payments settings.
- If you have a gateway activated on your credit card, deactivate it before proceeding. (Click Edit, then deactivate, then confirm your deactivation.)
- Click Pick a Credit Card Gateway to open the drop-down menu in the Approve Credit Cards section.
- Scroll down the list to Other, then click on the Bogus Gateway (for testing).
- Tap Activate (or Reactivate, if you have already used the Bogus Gateway).
- Go to your front door and put an order like a customer would. Instead of genuine numbers enter the following credit card details at
checkout
Checking a genuine transaction with a valid payment gateway:
- Make sure that you have the Payment gateway that you want to check for.
- Make a buy from your shop as a customer might, and use real credit card details to complete checkout.
- Immediately cancel the order, to refund yourself and stop paying transaction fees.
- Log in to your payment portal to ensure the funds have gone through.
Is This Free?
Sure–Just be confident the order will be canceled and refunded shortly after you put it.
When your billing period hits after you have put the test order then the transaction costs will appear on your bill before you cancel it. Upon paying your bill to Shopify you can still cancel but you will receive a refund on your account as a purchase credit. The transaction points can be used to pay future transaction fees.
9. Add a Domain Name
You’ll need a domain name to get your site online. You’ve got two options.
Firstly, you can purchase a domain from Shopify, and it will be connected to your store automatically. This saves you time particularly if you don’t know how to host a website. Usually such domains cost $9-$14 USD per year. Your second choice is to buy a third party domain, like GoDaddy. Such domains begin at $10.00 USD per year. The downside is that you will have to navigate yourself the DNS records which may at first seem overwhelming.
Here are measures for placing your new Shopify store on a third party domain name live.
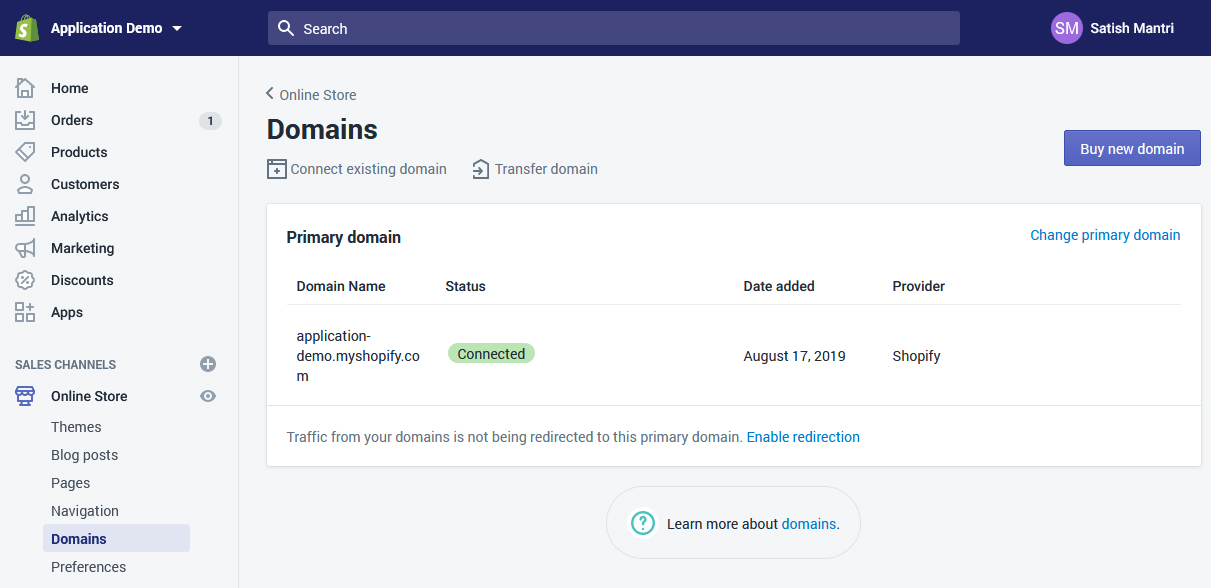
Add the new domain in Shopify
In the Shopify server, go to Settings and then Domains on the left navigation, and use the ‘Add an existing domain’ button to add your domain name.
Update DNS records
Log in to your Domain Registrar and make the following DNS record changes:

Remove any storefront passwords
Otherwise, even when it’s online, none will be able to access your site.
Set as primary if relevant
While in Online Store > Domains, you can use the drop-down at the top of the screen to choose your key domain:

Test the ‘Redirect all traffic to this domain’ as well. This ensures traffic to all other domains is directed at your primary domain. That’s vital to strong SEO.
Add additional domain names
With other domain names that you own, you can repeat steps 1 and 2. All domain names will be routed to the ‘ Primary ‘ domain which can be modified with the ‘ Set as primary ‘ option next to each domain name at any time.
Remember that the number of domain names which you own does not affect SEO.

Your New Shopify Store is set, congratulations!
If that’s how you managed-congratulations. You should have a fully-functioning online store now.
