 Skip to content
How to Add a New Product Attribute
April 07, 2021 | 10 min read
1. QuickRead
Adding a product attribute is one of the most common operations in Magento 1 and Magento 2. Attributes are a powerful way to solve a variety of practical tasks related to a product.
This is a fairly broad subject, but in this video, we’ll address the easy process of adding a drop-down attribute to the product.
Assume that the sample data collection is installed for this exercise.
We’ll add an attribute called clothing material with potential values: cotton, leather, silk, denim, fur, and wool.
We will render this attribute clear in bold text on the Product View tab.
We will allocate it to the Default attribute set and add a limitation that any “bottom” garments, including slacks, cannot be the Fur material.
In order to add a new attribute, we would need to take the following steps:
- Build a new module.
- Attach a script to InstallData.
- Attach a model to the source.
- Attach a backend model to that.
- Attach a frontend model to that.
- Run the InstallData script to make sure it works.
- Let’s get through each step.
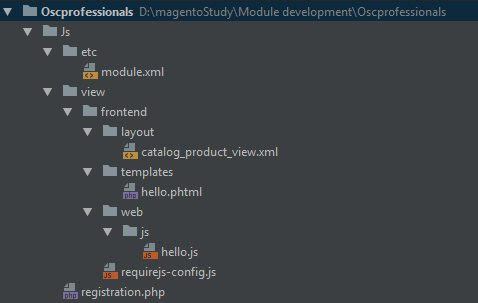
2. File Structure of Module
We’ve updated our File Module structure as follows:
3. Build a new module.
Since Magento is modular based, we start the process by creating a new module called Learning ClothingMaterial.
Now, create two files:
etc/module.xml
registration.php
4. Attach a script to InstallData.
Second, we need to build a script for InstallData. Since adding an attribute technically adds records to many tables, such as eav attribute and catalog eav attribute, this is data manipulation, not a schema update. We, therefore, use InstallData instead of InstallSchema.
Build an app/code/Oscprofessionals/ClothingMaterial/Setup/InstallData.php file:
Let’s just take a minute to look at the code.
First of all, we need to use a special setup object, not the one that comes in as a parameter. This is because Catalog is an EAV object, so to add an attribute, we need to use eavSetup instead of a regular one. This refers to every EAV entity in Magento 2. (category, product, customer, and so on).
That’s why we’ve added eavSetupFactory to the creator.
For the install () process, all we have to do is call the addAttribute() method with three parameters: entity type, attribute code, and properties.
These properties describe the behavior of the attribute. A full list of properties can be found in the catalog eav attribute and eav attribute tables. Notice that there is a mapping between the fields in these tables and the properties in the addAttribute() process.
You can look at the \Magento\Catalog\Model\ResourceModel\Setup\PropertyMapper class to see all mappings.
For now, we’re just going to quickly run through the most important ones:
- Group: Implies that we add an attribute to the “General” group attribute, which is present in all attribute sets.
- Type: varchar means that the values are stored in the catalog eav varchar table.
- Label: Attribute label (that is, how it will be rendered in the backend and on the frontend).
- Source/Front/Backend: Special classes associated to the attribute:
- Source Model: contains a list of options
- Frontend: specifies how the frontend should be made
- Backend: allows you to perform certain actions when the attribute is loaded or saved. This will be validation in our example.
- Global: determines the spectrum of its values (global, website, or store)
Visible on the front:: A flag that determines whether an attribute should be displayed on the “More Detail” tab on the frontend. _html allowed on the front:: Defines whether the meaning of the attribute will contain HTML
5. Attach a model to the source.
Next, we need to create the source model:
app/code/Oscprofessionals/ClothingMaterial/Model/Attribute/Source/Material.php
As the name implies, the getAllOptions method provides a list of all available options.
6. Attach a backend model to that.
Now we will create a backend model:
app/code/Oscprofessionals/ClothingMaterial/Model/Attribute/Backend/Material.php
In our case, only the validate() method is used.
The backend model may have methods beforeSave, afterSave, and afterLoad that allow the execution of some code when the attribute is saved or loaded. The backend model is what makes attribute management a strong customization method.
Notice that we have hardcoded the SetId attribute here for the sake of time. In other instances, it may be different. Check the eav attribute set table for the correct ID.
7. Attach a frontend model to that.
And finally, we create a frontend model to make our value bold:
As with the backend model, this is also a very simple class.
8. Run the InstallData script to make sure it works.
Now we can run our code and check the results:
The new attribute should have been applied to the database after you run it. You can search the eav attribute and the catalog eav attribute tables to see if the attribute and its properties are present. ClothingMaterial is shown here, with the primary key of 165, and its corresponding entry in catalog eav attribute, with the primary key being 165.
Now, let’s go to the backend, open any configurable product, and we’re expected to see the clothing material drop down. We will set our filters to be a configurable product with the “bottom” attribute set.
We’re going to pick the first object. Second, we’re going to set the clothing material to Fur and try to save our attribute. We see that our backend model has been effectively executed, so now we’re going to set it to Wool and save it.
Having saved the product, we’re going to switch to the front end. It should be clear in bold text.
Product Attribute Option Creation
The multiselect or select type of product attribute will provide selectable choices to the customer. These options can be applied manually via the admin panel or the update script. The script method is slightly different depending on whether the options are being added to the existing attribute at the time of development or whether the options are being added to the existing attribute at a later time.
Add options to a new product attribute
Basic instructions for creating a product attribute with a setup or update script can be found above.
Before scripting the development of the attribute, choose one of these two use cases for your options:
- You want a set of options that can’t be updated by the user via the admin panel and can only be changed through a future code push.
- You want a set of options that can be changed, added or deleted via the admin screen
For use of case 1 (‘immutable’ set of options), follow the “Add Source Model” instructions above. You build a model that contains and dynamically returns the selectable options of the attribute to the client.
For use of case 2 (‘mutable’ set of options), see “EAV and extension attributes.” Make sure you declare ‘Magento\Eav\Model\Entity\Attribute\Source\Table’ as the value for the ‘source’ attribute option. This ensures that the options stored by Magento are stored in the required database table.
With \Magento\Eav\Setup\EavSetup.php::addAttribute() and
\Magento\Eav\Setup\EavSetup.php::addAttributeOptions() you can add a series of options with the following array:
Alternatively, you may designate a specific option sorting order as follows:
To add options to a ‘immutable’ set of options, modify the custom source model with the additional options that you want to include.
Adding options to the ‘mutable’ option set leverages the same EavSetup object that you use when creating an option attribute, but includes an additional step, because EavSetup needs to know which attribute you want to assign new options to.
Assign an array of new options to a variable:
Update your array with the attribute ID from the database:
Add your options:


