 Skip to content
How to Create And Use Tags in Shopify
1. QuickRead
Creating and editing tags in Shopify are critical activities for better inventory control when it comes to managing your items and orders. Tags are a great method to organize your store. Tags organize your Shopify store’s items and information to make it easier to manage. To organize crucial data, you may add custom tags to certain parts of your business. Your consumers will not see the tags, but it will be difficult to categorize and search for your items if you don’t utilize them in your e-commerce store.
Today’s article will be entirely about Shopify tags and how to utilize them on Shopify.
2. What are Shopify tags?
Shopify tags are the elements that are intended to be used to label items, transfers, customers, or orders, as well as draught orders and even blog entries from your Shopify shop. Tags are used to identify groups of objects such as products, orders, draught orders, customers, and transfers. This would allow you to easily filter and search for anything by simply putting the tag’s name into the search field. One suggestion for efficiently using Shopify tags is to add tags from comparable groupings of things so that you can view them all at once, such as products from the same distributor. Meanwhile, your consumers will be ignorant of your store’s tags. At the same time, your online store can use these tags to search for and categorize products, then organize them for consumers to use.
3. Types of tags in Shopify
You would be able to add several tags to each section, such as Product, Transfer, Order, Draft order, Customer, and Blog post. When a tag is added to one section, it has no effect on the others where tags are utilized. For example, you may use tags like packaged or test to handle your orders and tax-exempt or wholesale to manage your customers at the same time. Each sort of tag in Shopify is described here.
Product Tags
The most essential tags in Shopify are the Product Tags. Product tags based on product attributes can be applied to certain groupings of products to automatically construct a collection or create a filtering menu. This may be done from the Products or Inventory pages. In addition, you can quickly add, view, and delete all of your product tags from the details page. Each product can have up to 250 tags attached to it. When someone visits your website and searches for a keyword that matches one of your tags, the results will show the tagged products.
Transfer Tags
Transfer Tags are used to refer to specific transfers on the details page. Tags may also be added, viewed, and removed from this page. Go to the Transfer page to filter transfers using tags.
Order Tags
On the details page for a specific order, you may add and remove tags. Orders may be found by searching for them using their tags on the Orders page.
Draft Order Tags
Create and remove tags from the list that include information about individual drafts orders. On the details page, you can see all of the draught order tags. When an actual draft is generated, its tags are passed to and added as order tags.
Customer Tags
Insert and remove tags for particular customers on their separate detail pages. View all customer information sites’ customer tags. Customers can also be filtered by tags on the Customers page.
Blog Post Tags
Tags may be added and removed from a blog post’s information page. On the Blog posts page, you may filter your entries by tags.
4. How to use tags in Shopify
Tags may be particularly useful for labeling items, transfers, customers, orders, drafts orders, and blog entries. Once you’ve added tags, you’ll be able to search, filter, and be more organized. It is especially important if you run a Shopify store.
The tags may be invisible to your consumers, but your Shopify store search uses tags to classify products and categorize search results for your customers.
How to add a tag
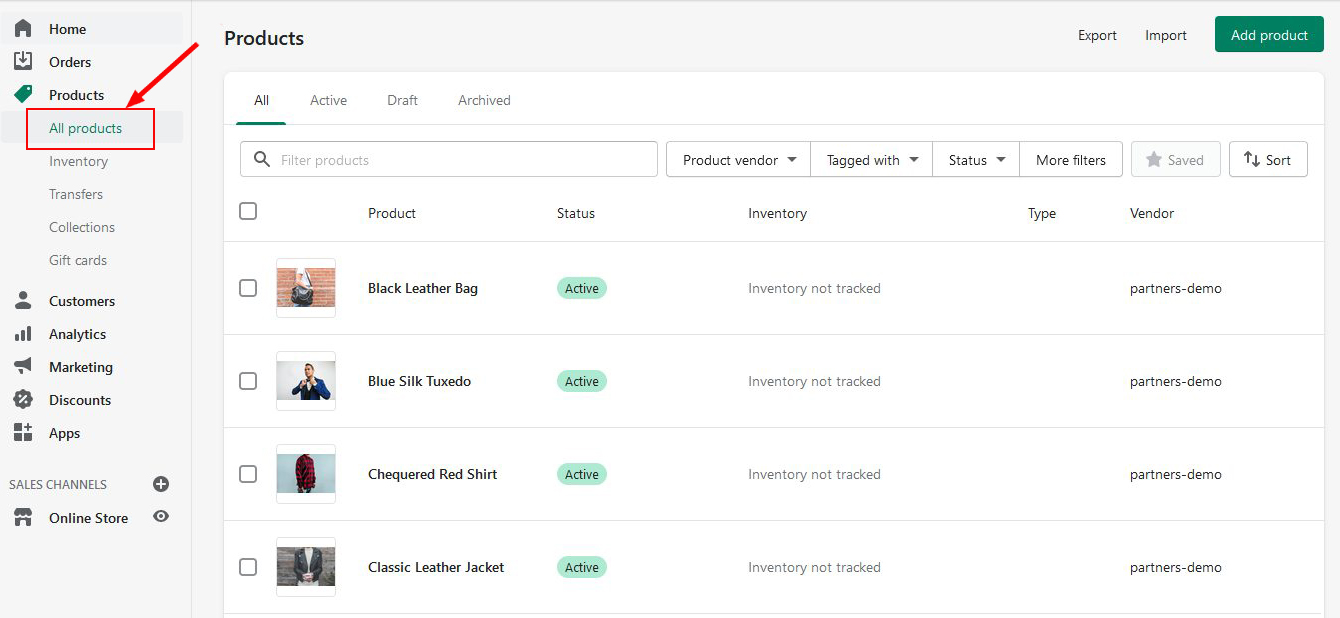
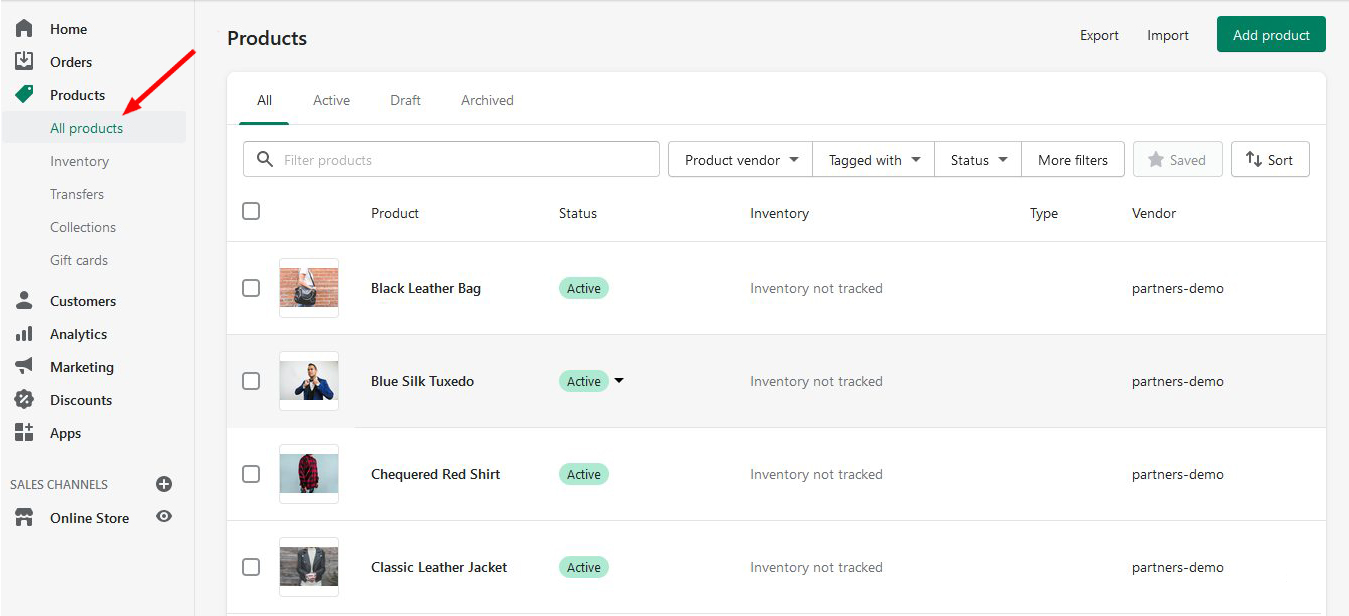
a. To add a product login to your Shopify Admin and click on the Products section. After clicking on the Products section this window will appear:
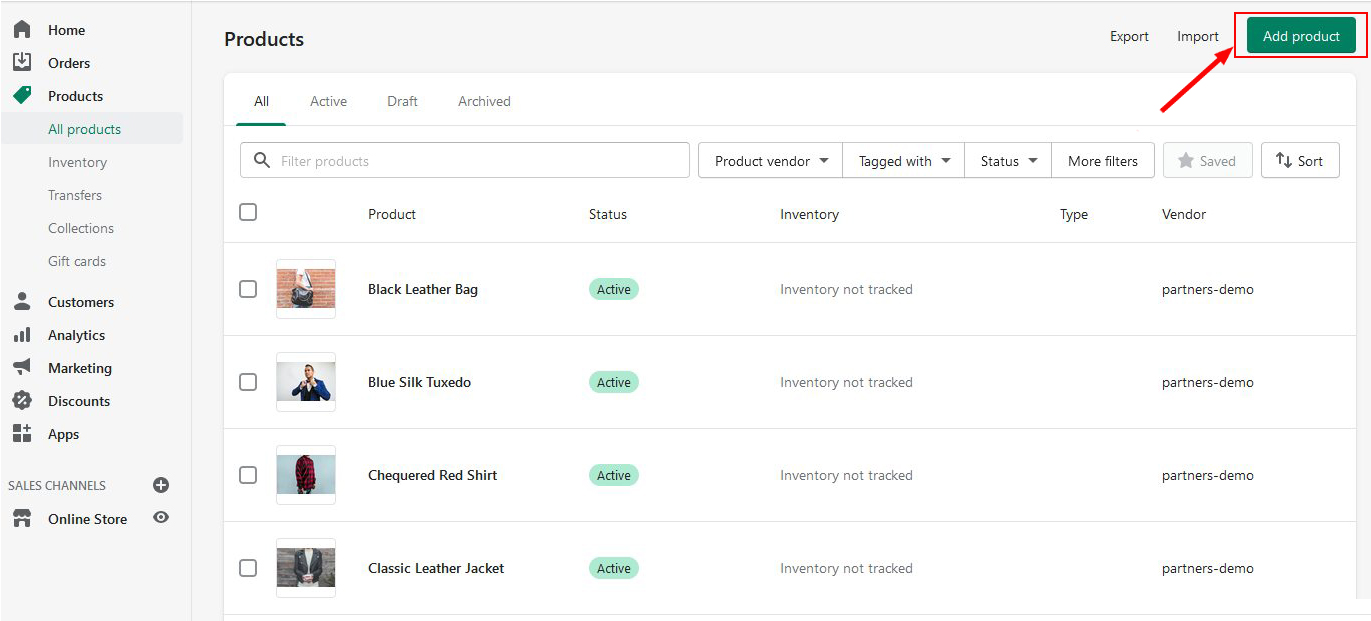
b. You can select an existing product or add a new product.
c. To add a new product click on Add Product
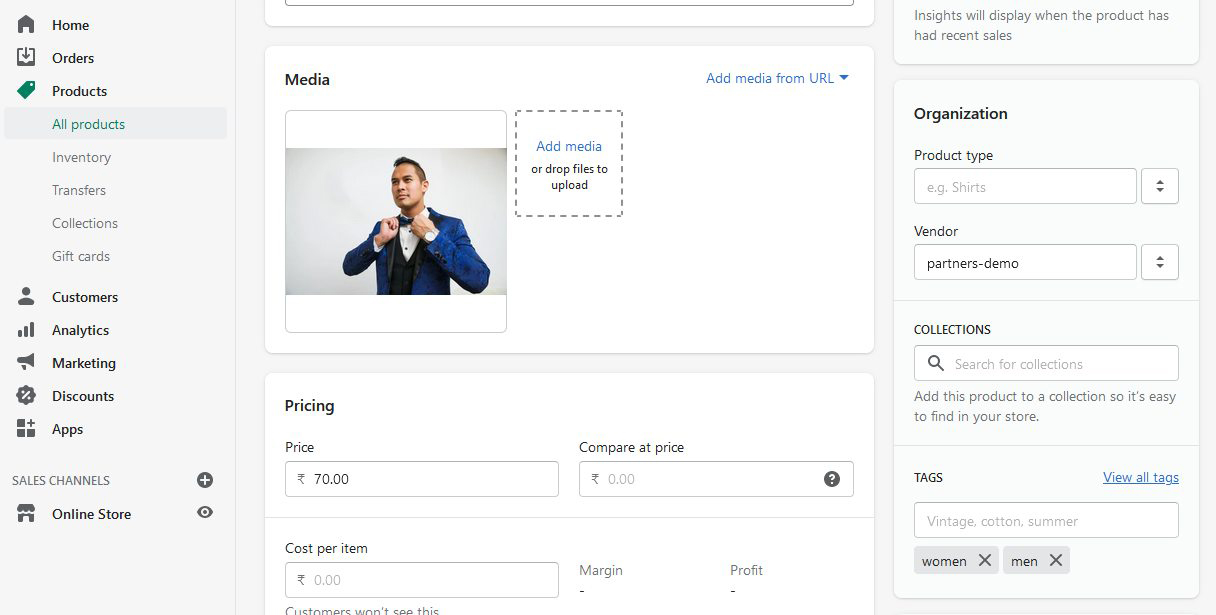
d. Once you click on Add Product the following window will appear:
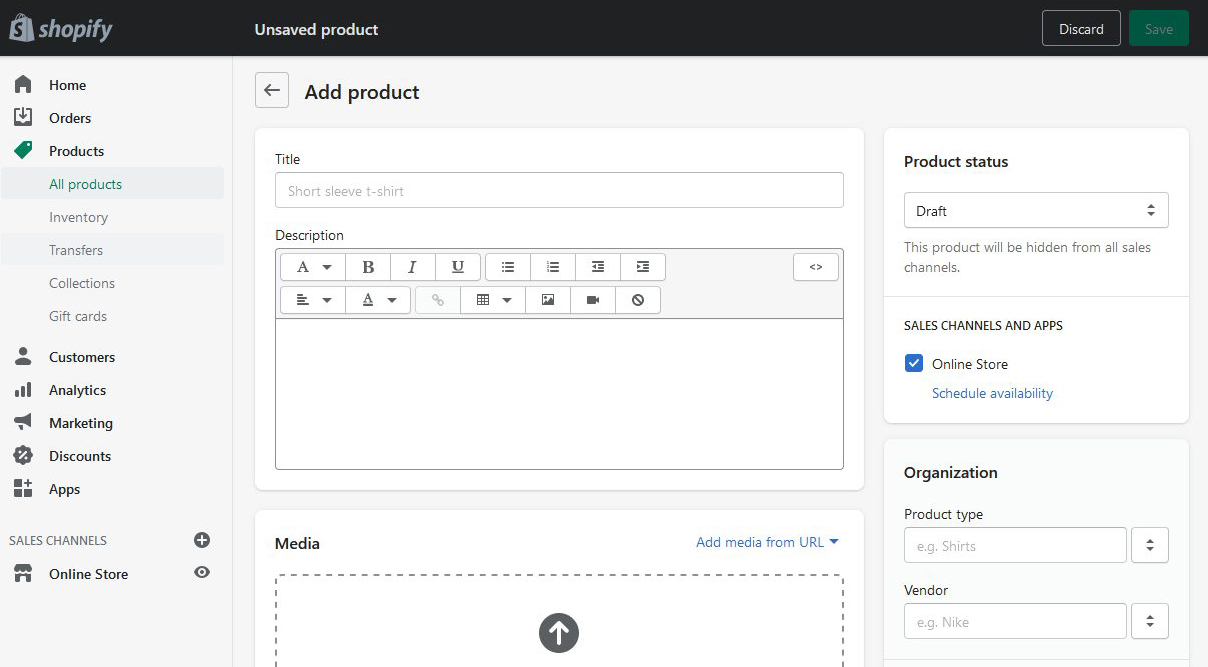
e. Under the Organization section, you will find the Tags section :
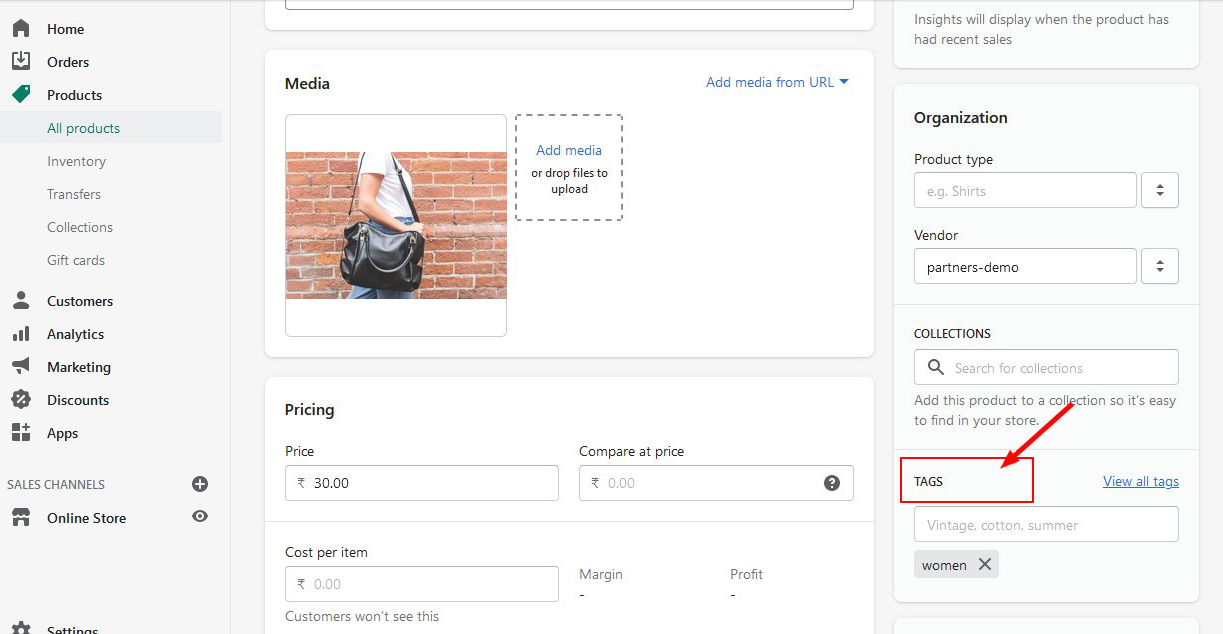
f. Now either you can click on View all tags to see the list of all available tags like the ones we have here for this particular product::
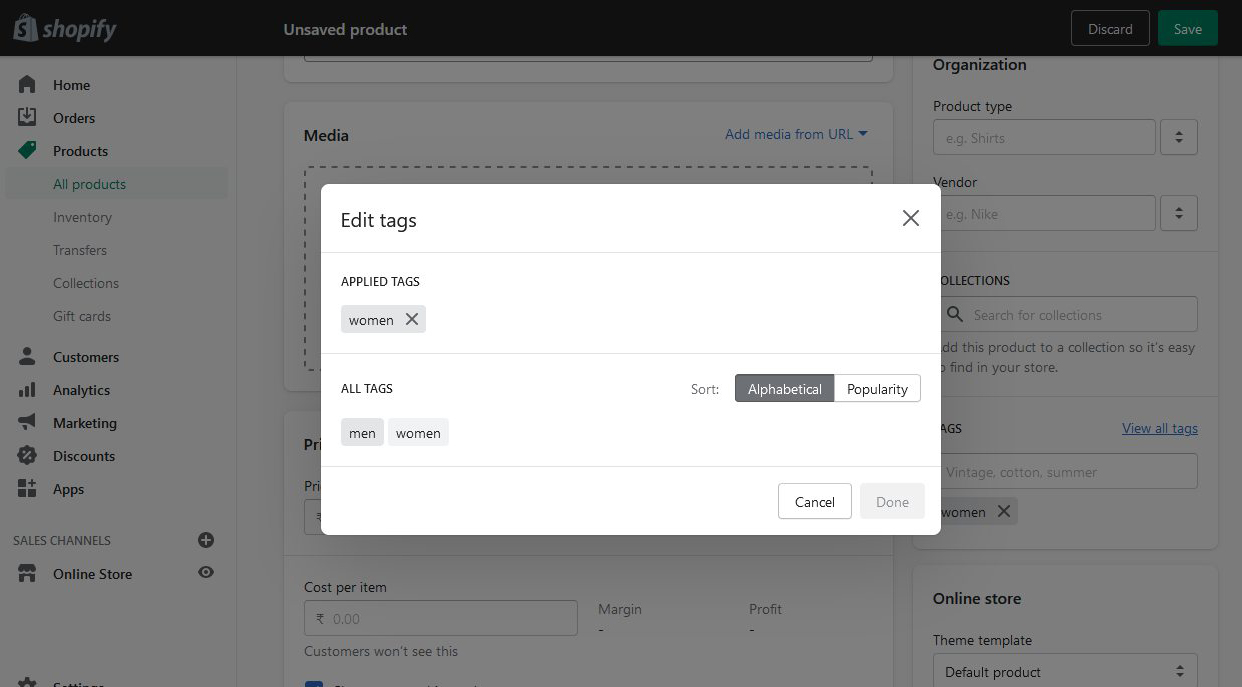
g. Or you can create a new tag
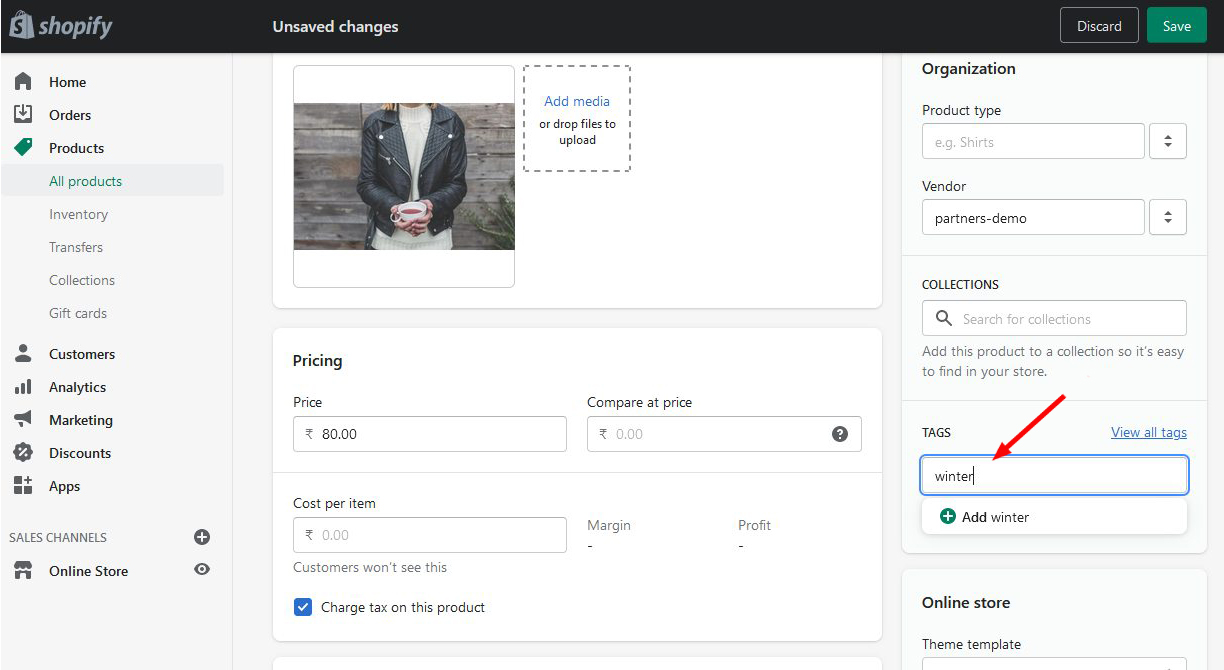
You can enter multiple tags just be sure to use a comma to separate them.
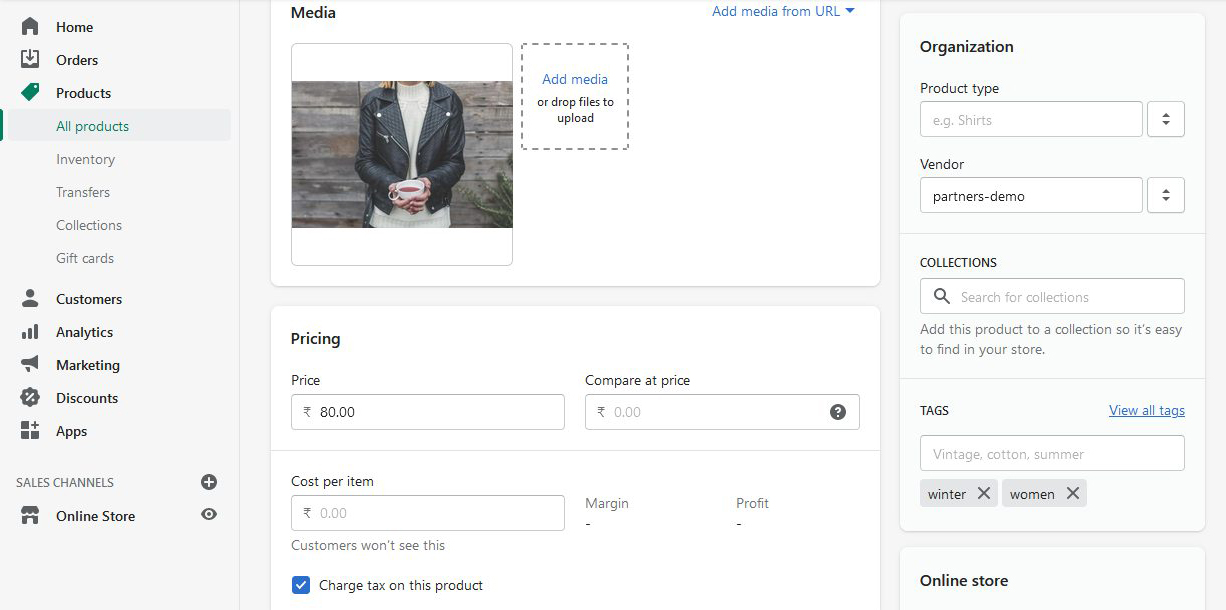
h. The applied tags will appear underneath the Tags section:
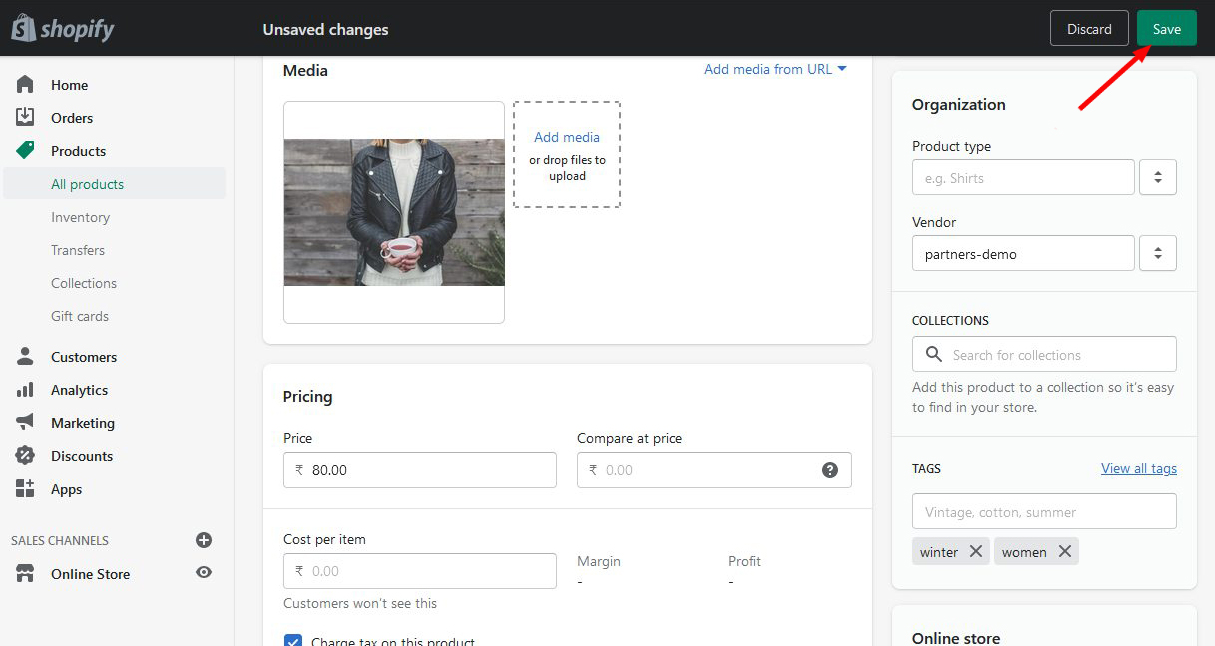
i. Click on Save once you’re done:
Note. Tags linked with orders and drafts orders can be up to 40 characters long. Tags for items, transfers, customers, and blog entries can have up to 255 characters.
Tags are not case-sensitive. Approved and approved, for example, are the same tag. In your tags, only letters, numbers, and hyphens should be used. Search results may be excluded if letters with accents or other symbols are used. Each product, customer, transfer, blog post, order, and drafts order can have up to 250 tags.
How to remove a tag
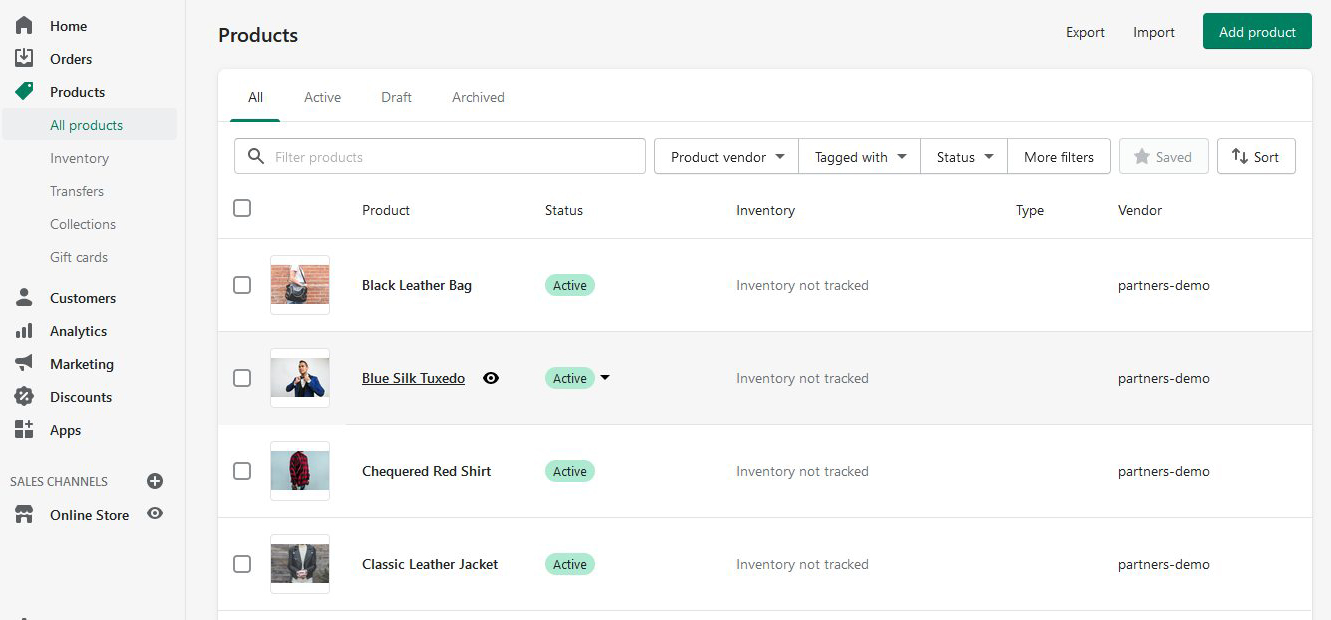
a. To remove a product login to your Shopify Admin and click on the Products section. After clicking on the Products section this window will appear:
b. Click on any of the existing product
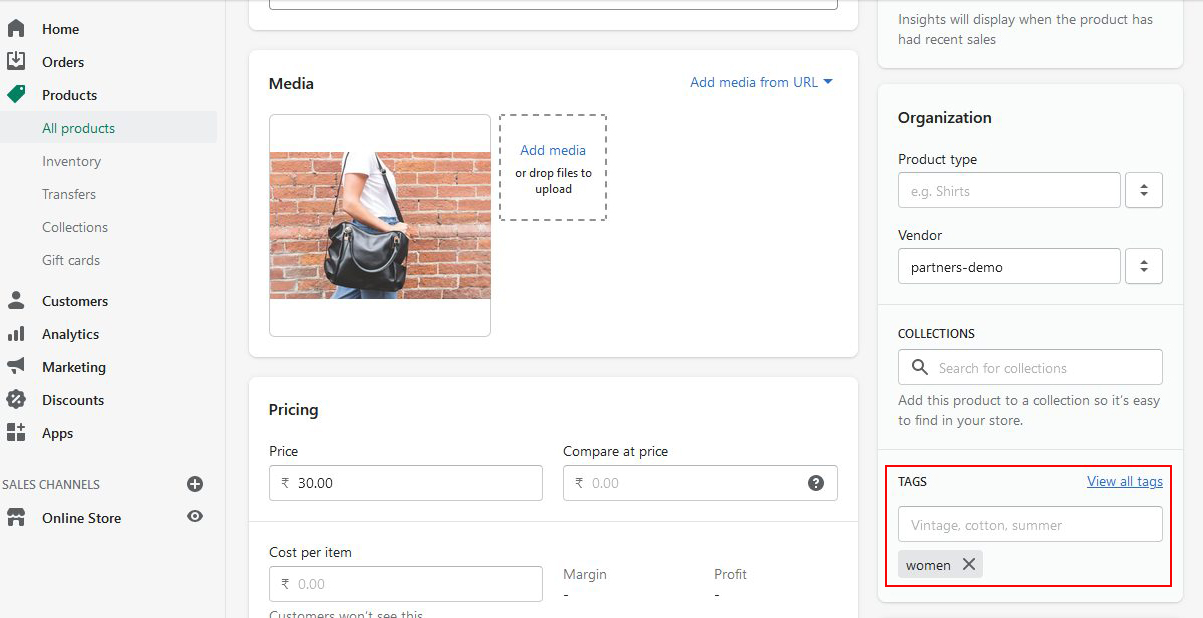
c. Once you click on the exiting product the following window will appear:
d. Under the Tags section, you will see the exiting tags of the product. When you click the x symbol next to the name of the tag you wish to delete, the tag will be deleted from the specific product, transfer, order, draught order, customer, or blog post immediately.
e. Click on Save once you’re done:
How to search by tag
To find a tag on your product, transfer, order, draught order, customer, or blog post on Shopify, simply do the following:
a. Simply put the name of the tag you want to look for in the search field.
b. Then a list of results will appear; all you have to do now is go through them and pick one to explore in further detail. That’s it!
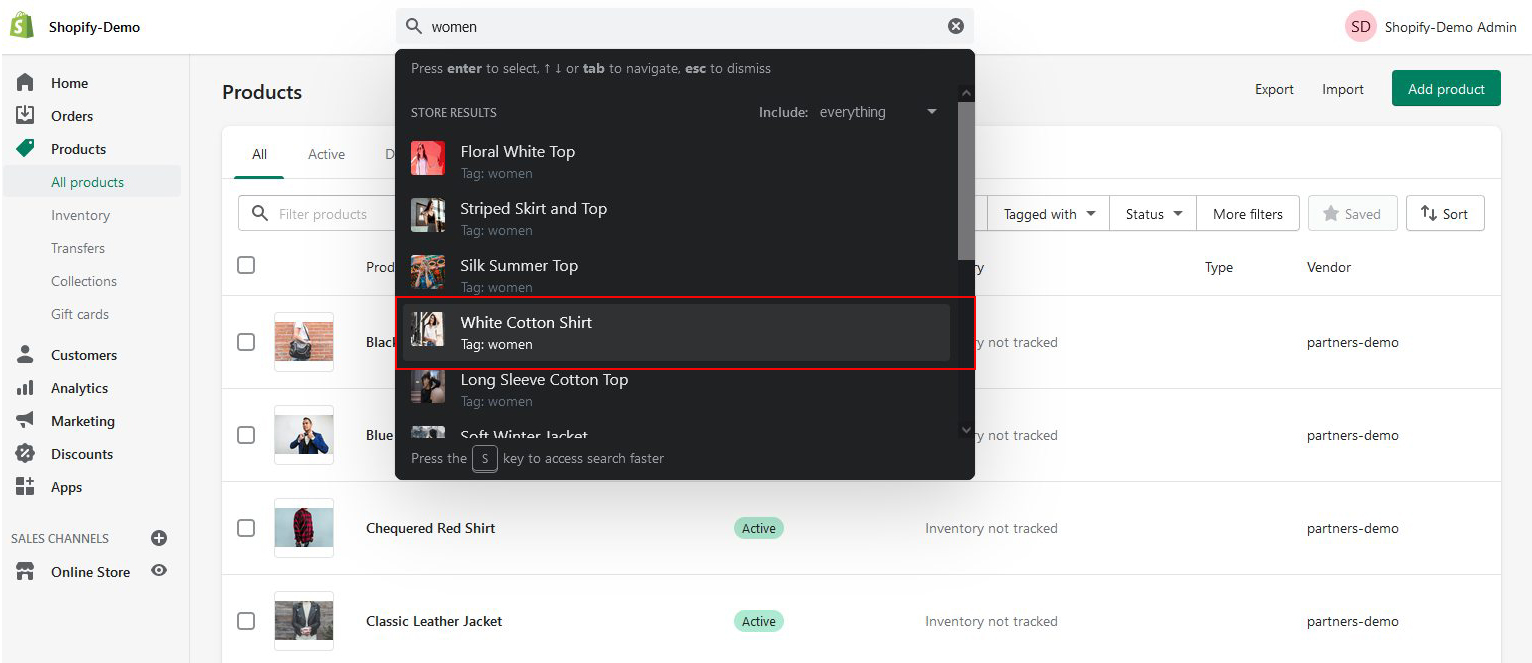
This can help you locate your result faster because the search tool will return any results that match the tag. If a tag has previously been created but hasn’t been applied to anything, no search results will display.
How to filter by tag
There are numerous relevant tags accessible for you to filter aAs lists of your Products, Transfers, Orders, Draft Orders, Customers, and Blog Posts pages. All you have to do now is:
a. To use a filter, go to the relevant page and click the drop-down menu.
b. To filter, look for the Tagged with button beneath the Select a filter… option. Simply click on it.
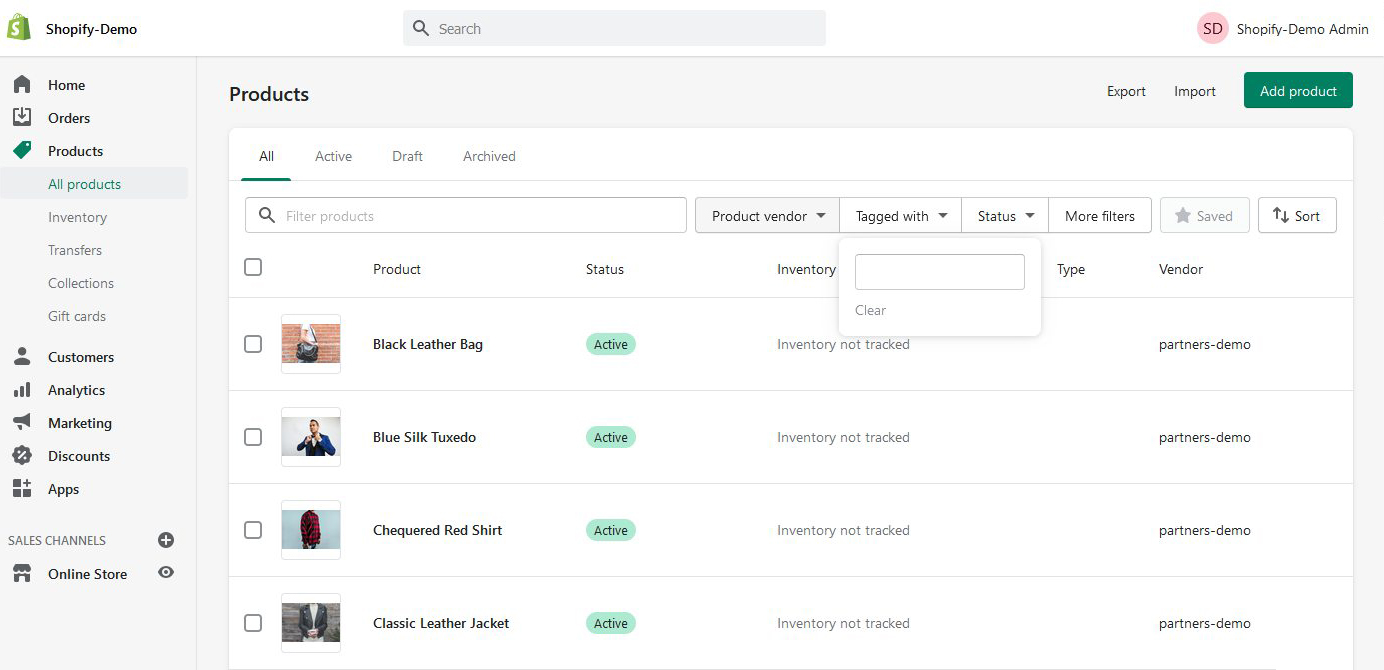
c. Put the name of the tag you’d want to use as a filter here.
d. To see a list of items that have that tag, click the Add filter button from here.

Bulk edit Product, Transfer, Customer, Blog post, and Draft Order tags
To bulk edit, choose what page you want to perform the task on. In this example, we will look at the product page.
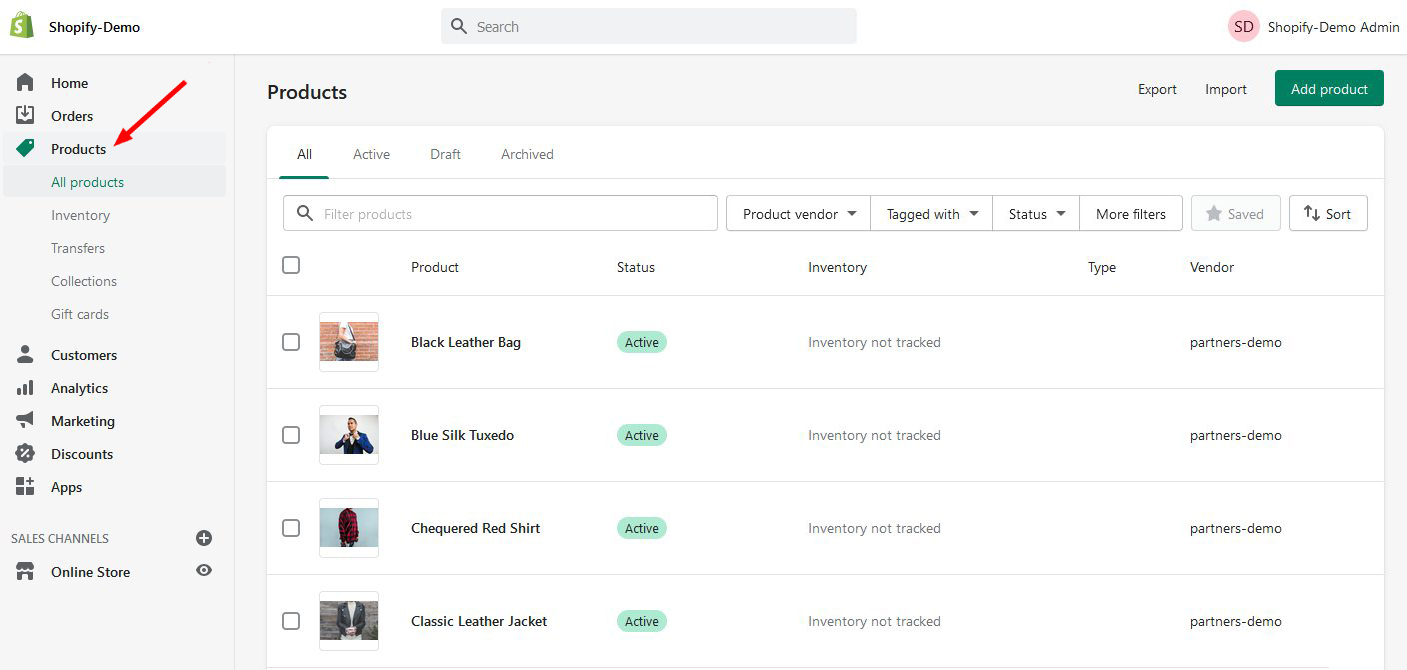
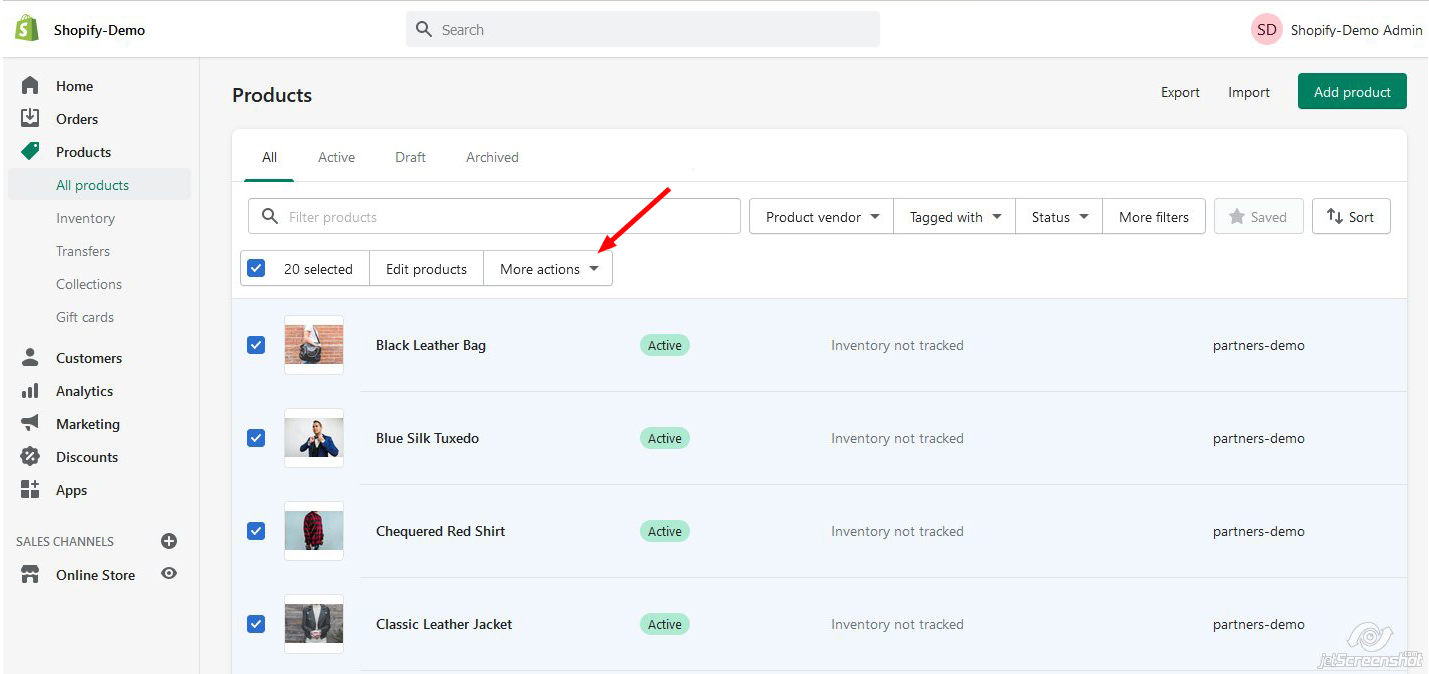
a. Log in to your Shopify Admin and click on the Products section. After clicking on the Products section this window will appear:
b. Using the checkboxes, select each of the products that you want to modify. If you want to edit variants of just one product, then select only that product.
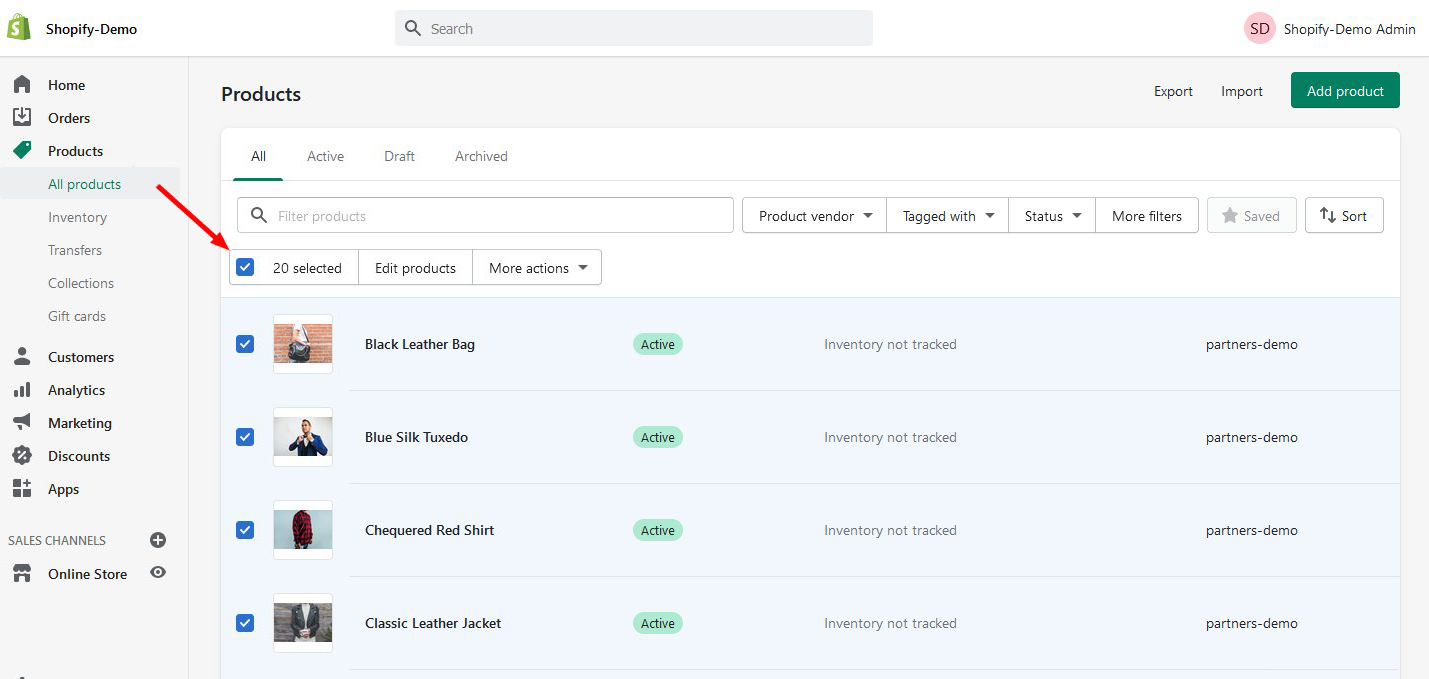
c. When you have selected your list items, choose a bulk action to perform. Click on Actions
d. Once you click on the action a dropdown menu will appear
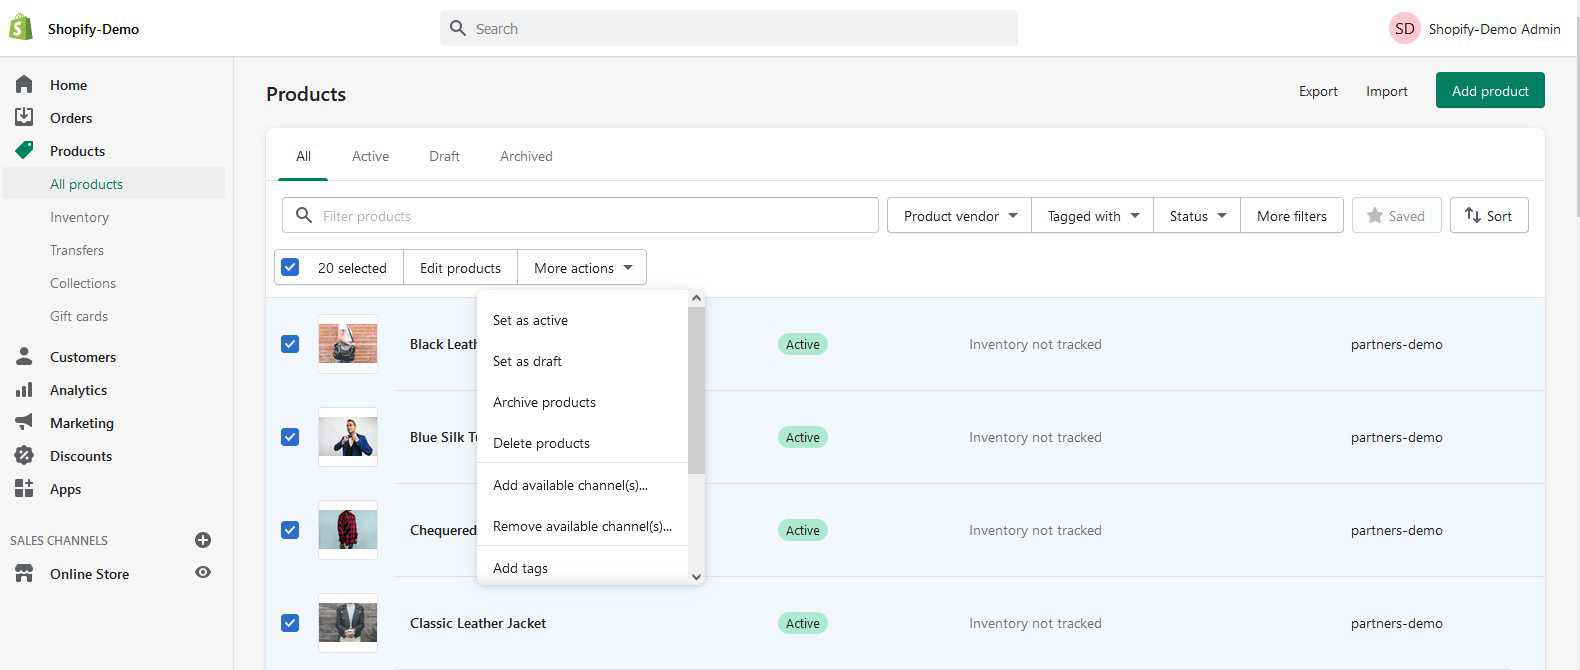
e. From the drop-down menu click on Add tags if you want to add tags in bulk or click on Remove tags if you want to remove tags in bulk.
f. Click the tags that you want to add or remove.
g. Click Save
Note: you can follow the same steps to add or remove tags in bulk using bulk editor tools for, Transfers, Customers, Blog posts, or Draft Orders.
Conclusion
Not only that, but there are other methods to utilize tags to help you keep organized, such as building an automatic collection with tags or filtering with tags when generating a link to a collection in your online shop navigation, and so on.
Whatever manner you use your Shopify tags, we can all agree that they make it simpler to build automatic collections and keep organized while working in Shopify.


