 Skip to content
How to Set Up CustomPrint App
1. Initial Setup
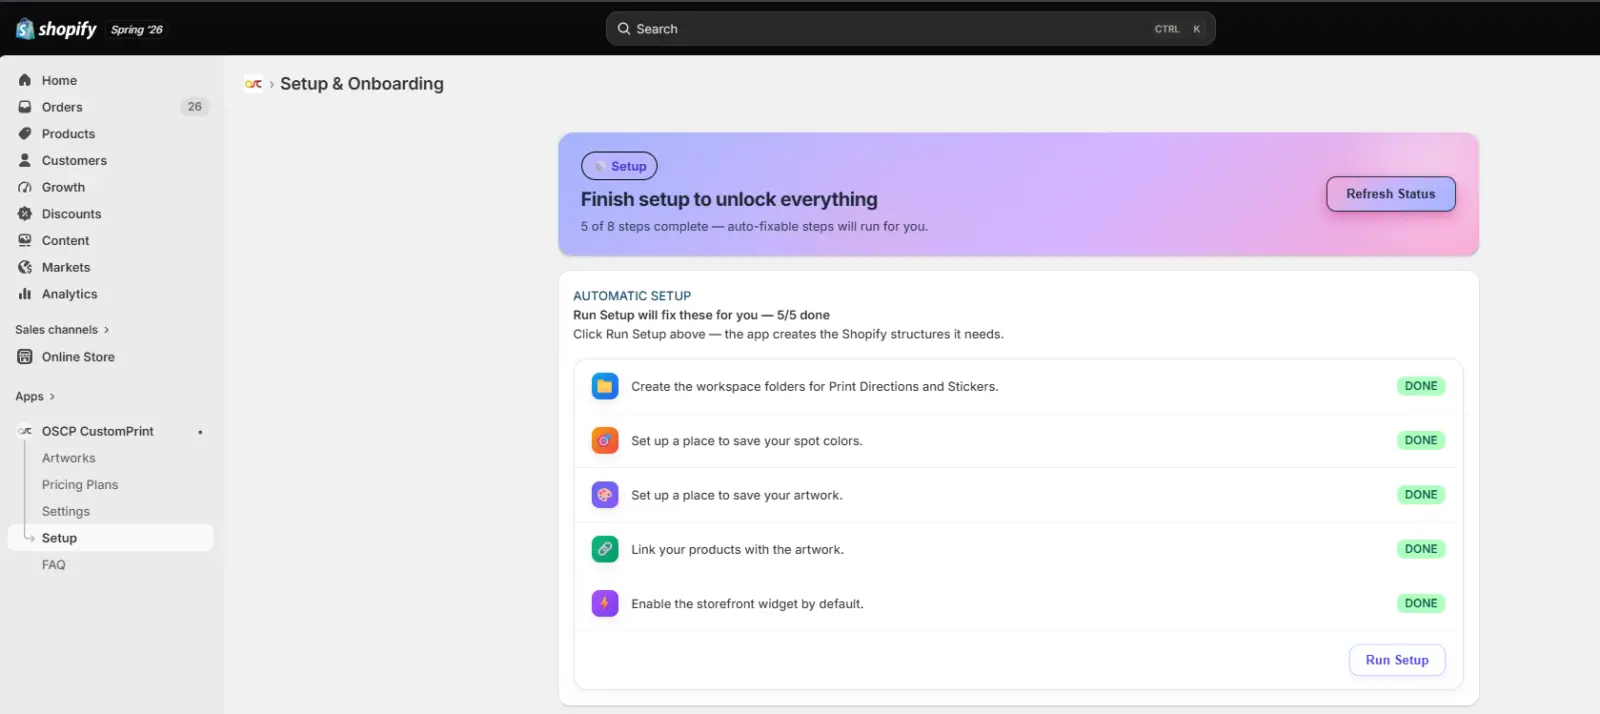
Step 1: Complete the Setup Checklist
- Open the CustomPrint Onboarding Dashboard.
- Review the Setup Checklist.
- Ensure there are no pending setup items.
- If a Run Setup button is displayed, click it and wait for the setup process to complete successfully.
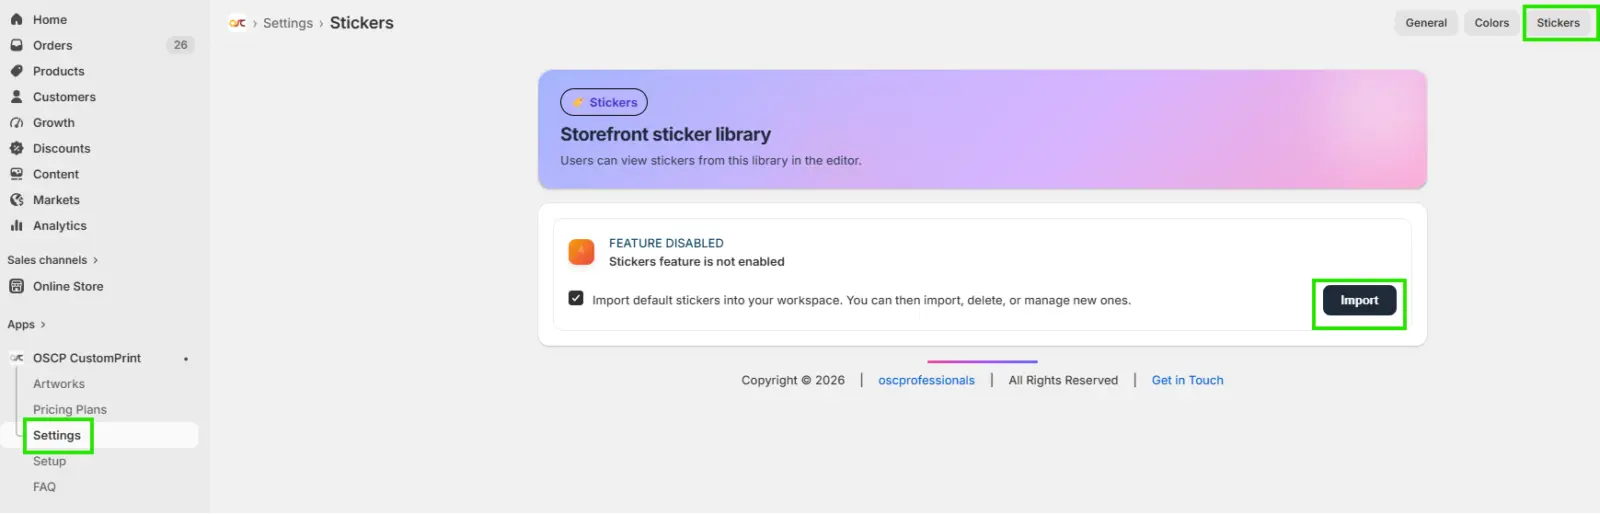
Step 2: Configure Print Directions & Stickers
- Navigate to Settings → Print Assets.
- Manage your print direction icons or import the default icons available in the system.
- Verify that the required assets are available for use in artwork creation.
Step 3: Add Spot Colors
- Navigate to Settings → Colors.
- Click Add New Spot Color.
- Enter the required color details.
- Click Save.
2. Artwork Creation
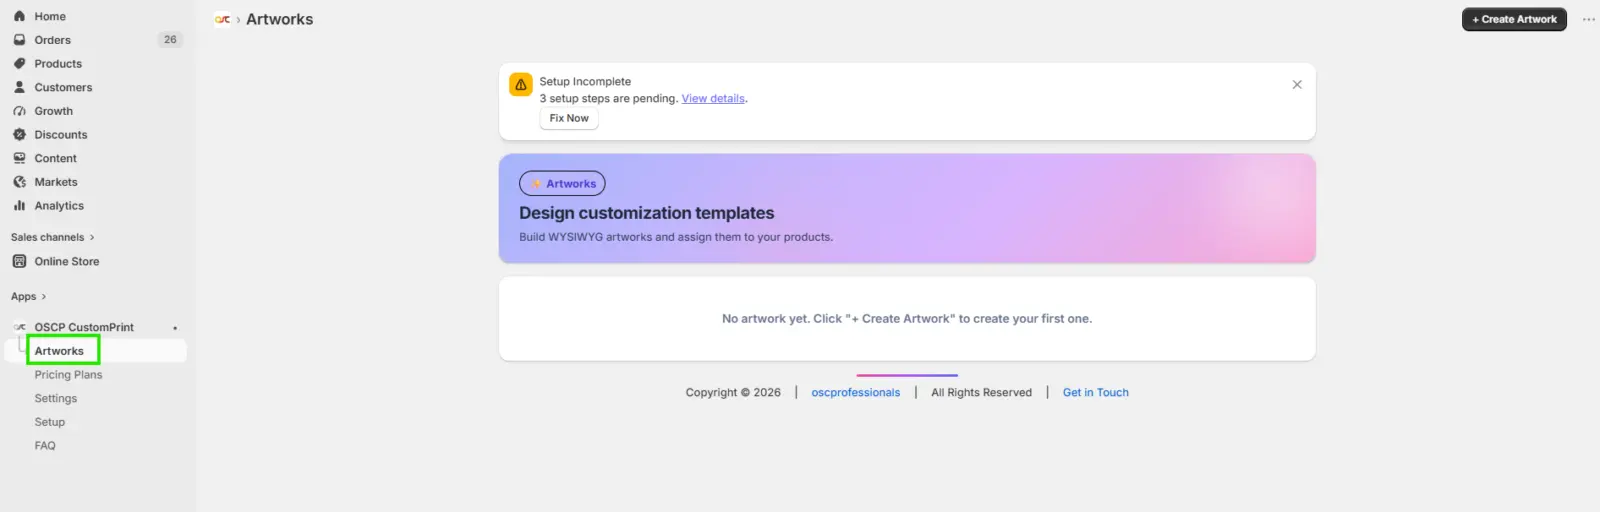
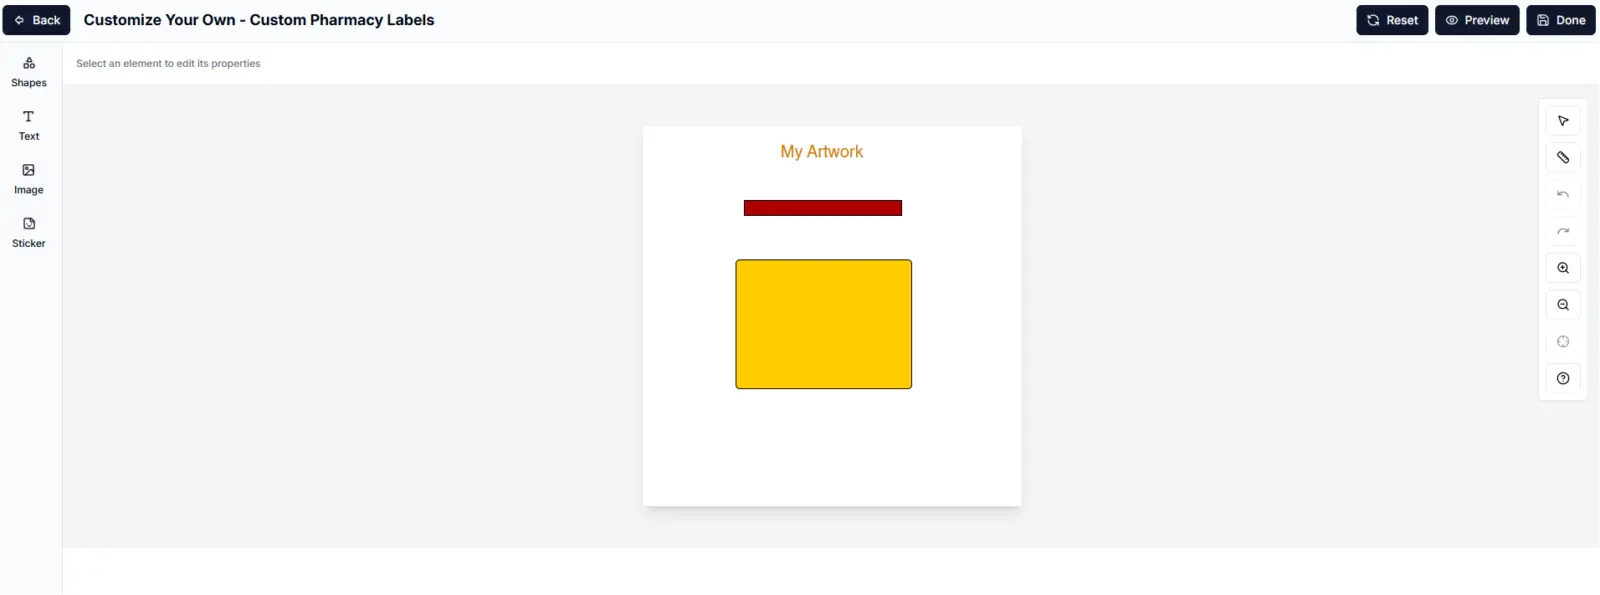
Step 4: Create Your First Artwork
- Navigate to Artworks.
- Click Create New Artwork.
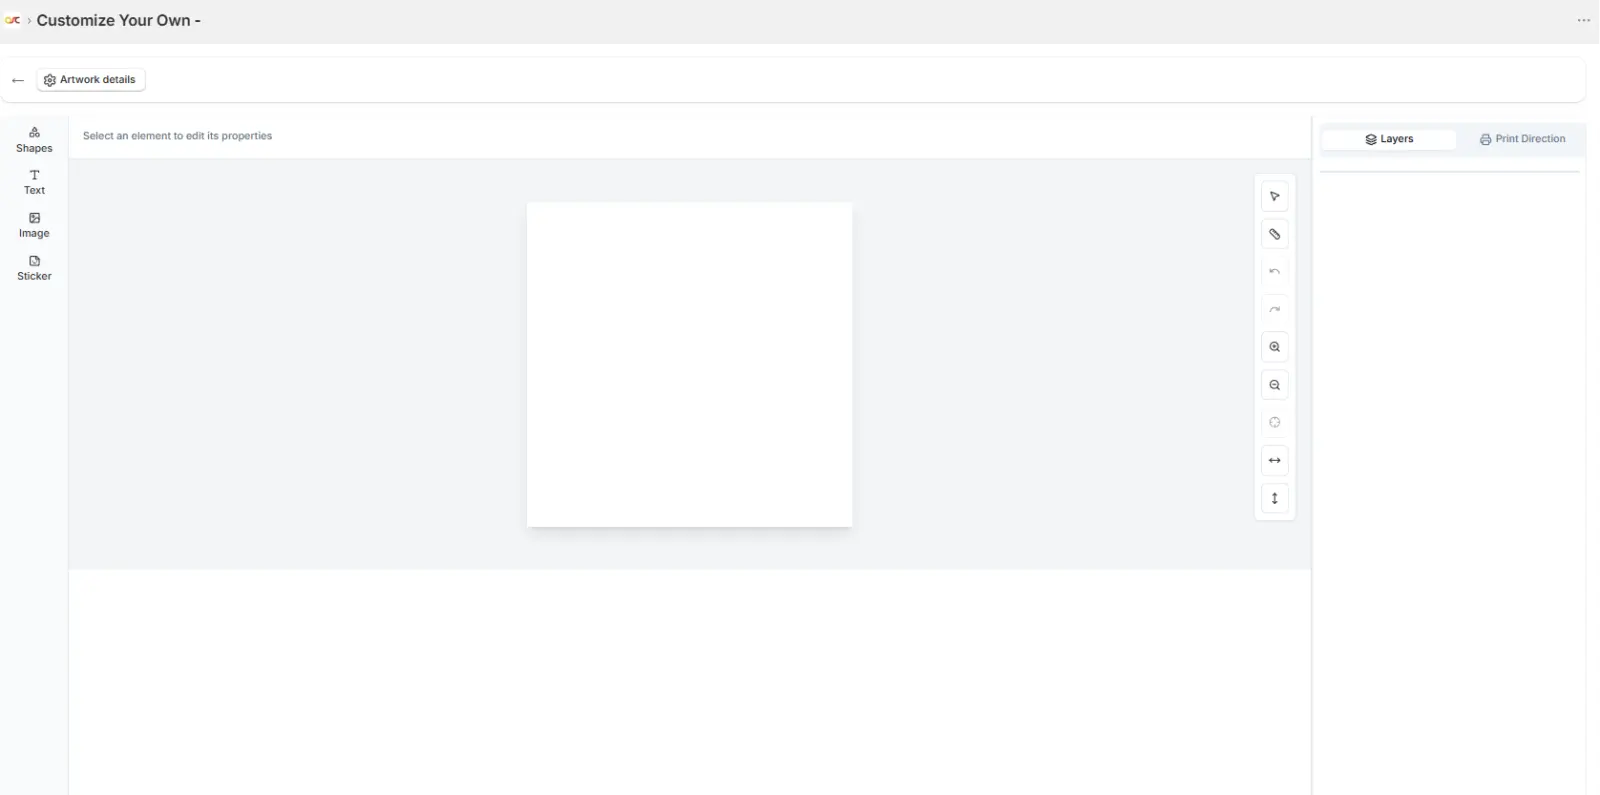
- Configure the canvas size using the Artwork Details (gear icon in the top-left corner).
- Add design elements such as:
- Stickers
- Text
- Images
- Drag, resize, and position elements as required.
- Verify that design area restrictions are working correctly.
- Enter a name for the artwork/template.
- Click Save Artwork.
3. Product Assignment
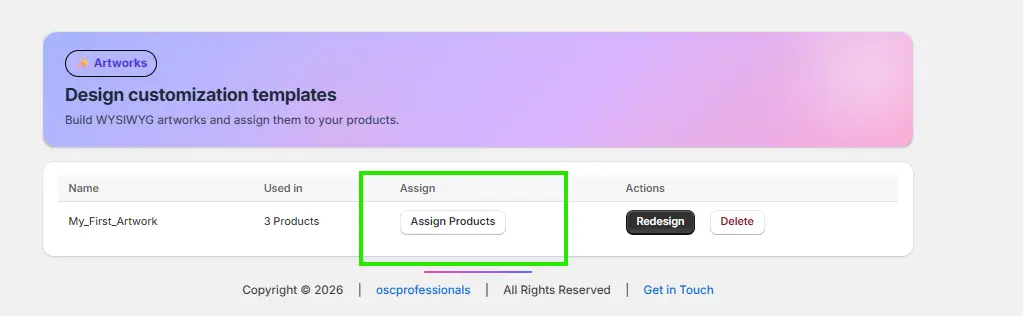
Step 5: Assign Artwork to a Product
- Navigate to the Artworks list.
- Click Assign Products for the desired artwork.
- Select the artwork you created.
- Choose the Shopify product that will use this artwork.
- Save the assignment.
4. Store Configuration
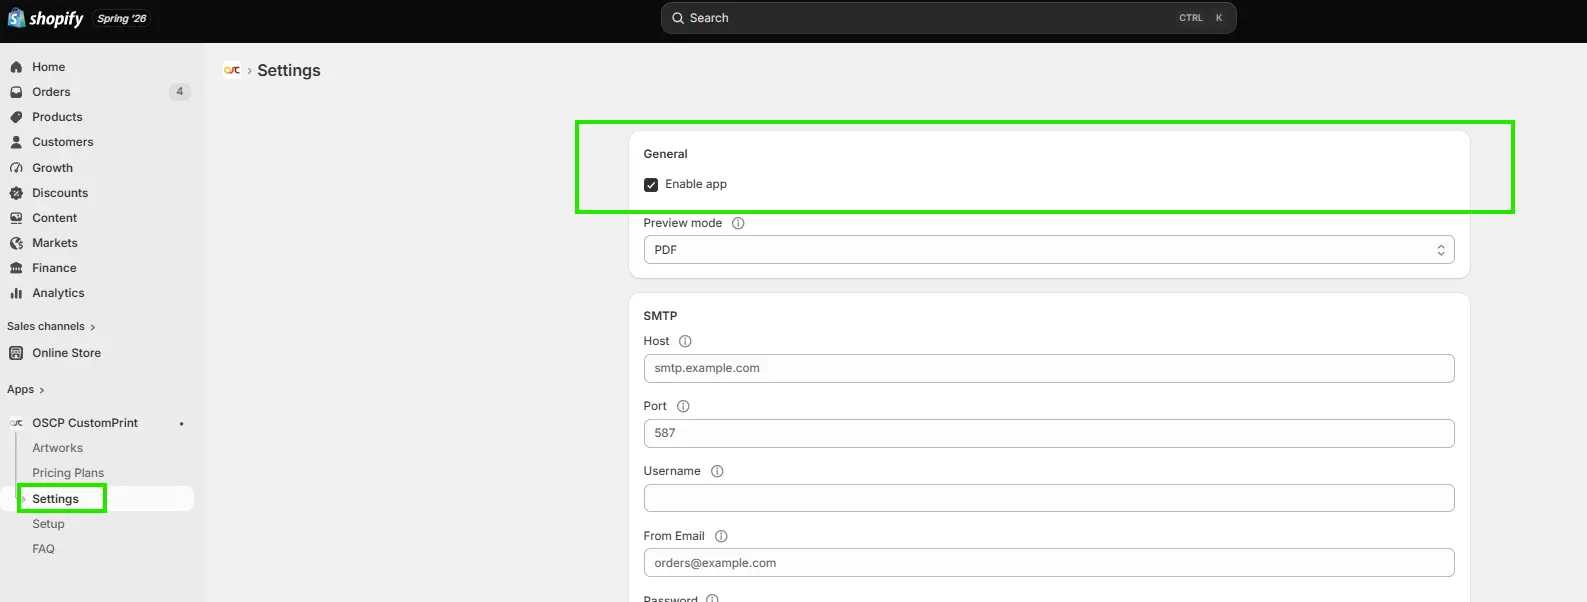
Step 6: Enable the App
- Navigate to Settings.
- Enable the App Status toggle.
- Click Save Changes.
Step 7: Configure SMTP (Optional)
SMTP Setup
- Navigate to Settings → SMTP Configuration.
- Enter the following details:
- SMTP Host
- Port
- Username
- Password
- Sender Email
- Use the SMTP Connection Validator to verify the configuration.
- Save the settings.
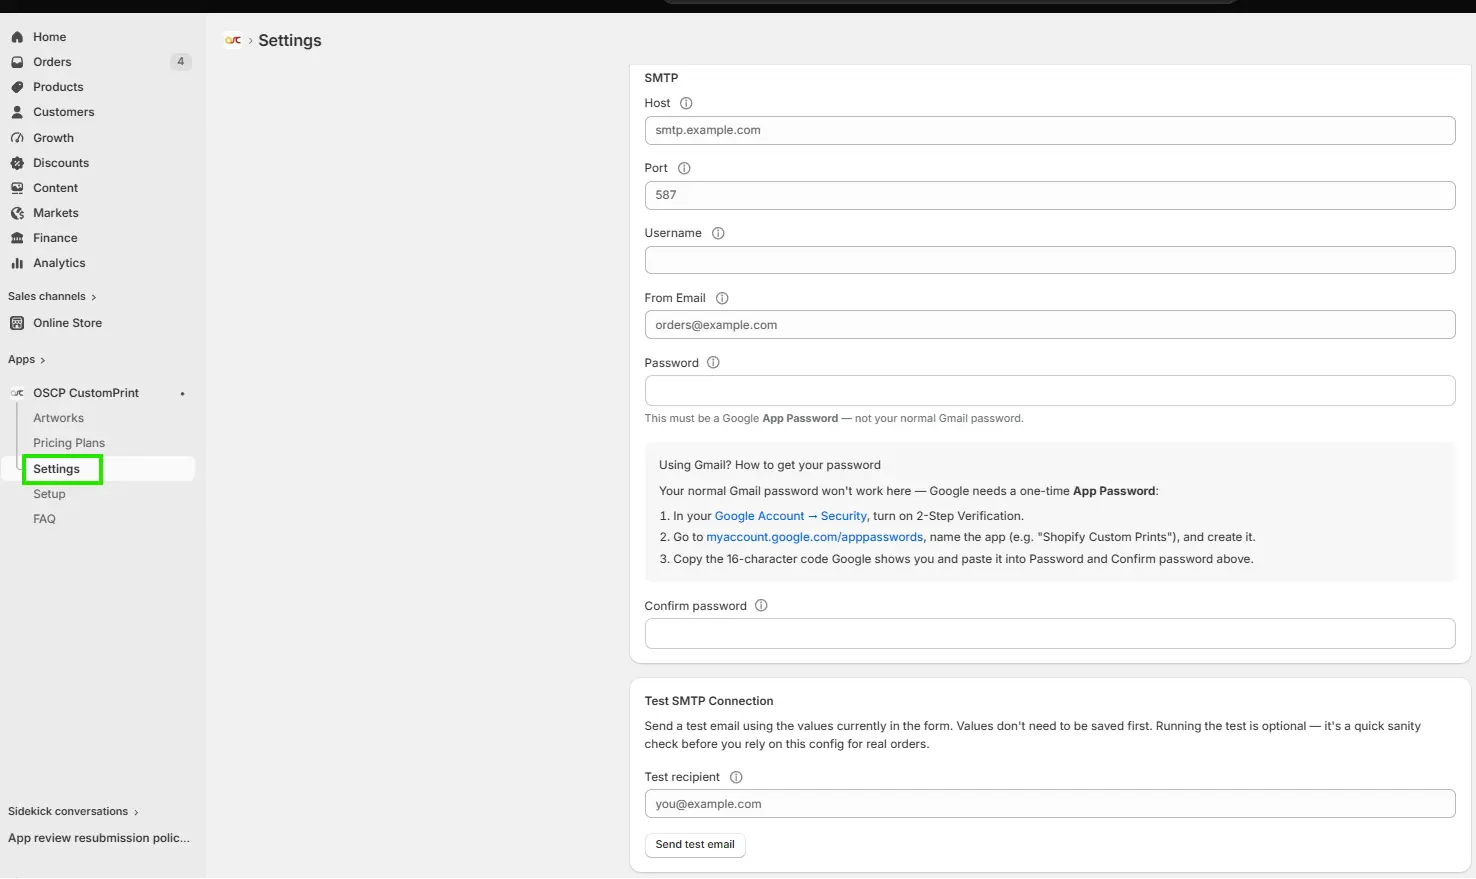
Note: If SMTP details are not configured, emails will be sent using the application’s default SMTP settings.
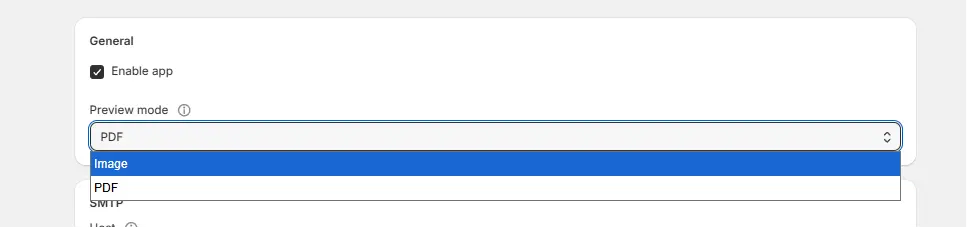
Step 8: Configure Preview Mode (Default Mode is Image)
- Navigate to Settings → Preview Mode.
- Select one of the available preview formats:
- PDF Preview
- Image Preview
- Save the configuration.
5. Theme Integration
Step 9: Enable the Theme App Widget
- Open Shopify Admin.
- Navigate to:
- Online Store → Themes → Customize
- Open a product template/page.
- Enable the Customize Your Own app block/widget.
- Save the theme.
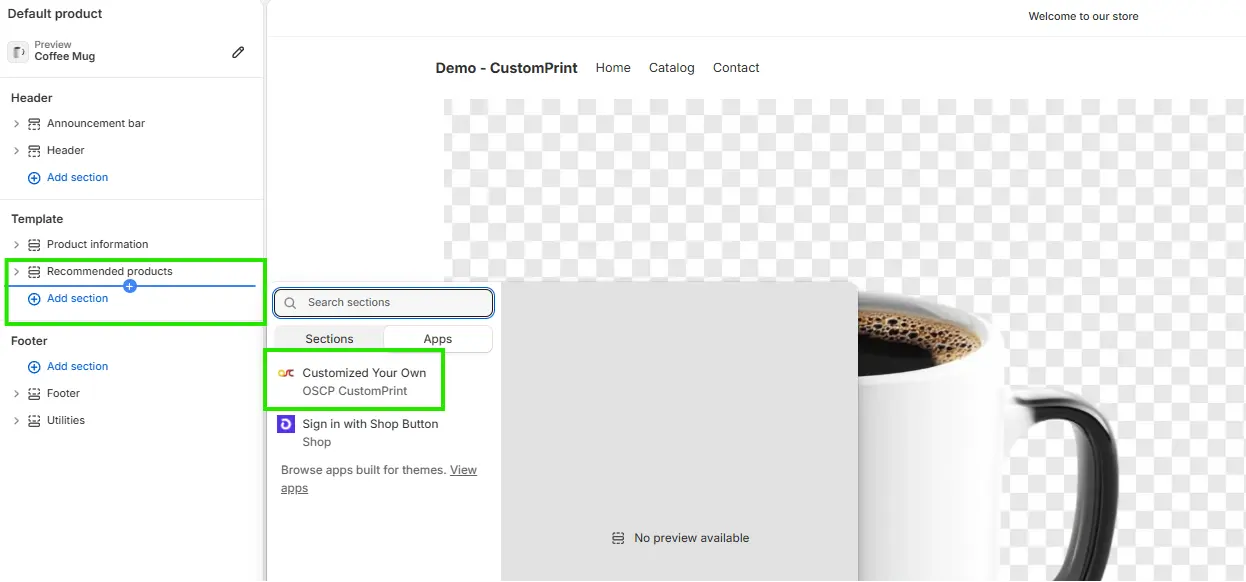
Verification
Visit a product that has an assigned artwork and confirm that the Customise Your Own button or option is displayed.
6. Storefront Testing
Step 10: Test Product Customization
- Open a Shopify product that is assigned to an artwork.
- Launch the CustomPrint editor.
- Customize the product by:
- Adding text
- Uploading images
- Adding stickers
- Adjusting element positions
- Save the customization.
- Add the product to the cart.
Step 11: Complete Checkout
- Proceed through the checkout process.
- Place a test order.
Step 12: Verify Email Review
- Open the order confirmation email.
- Review the generated artwork and attachments.
