 Skip to content
Setup For Registration Forms
Create Wholesale Registration Form
On the app’s left navigation, click on “Customer Management” and then click on “Create New Form.” The registration form will appear.
OR
On the app’s left navigation, click on “New Registration Form”. The registration form will appear.
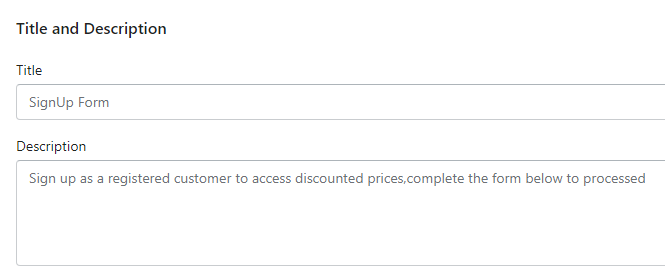
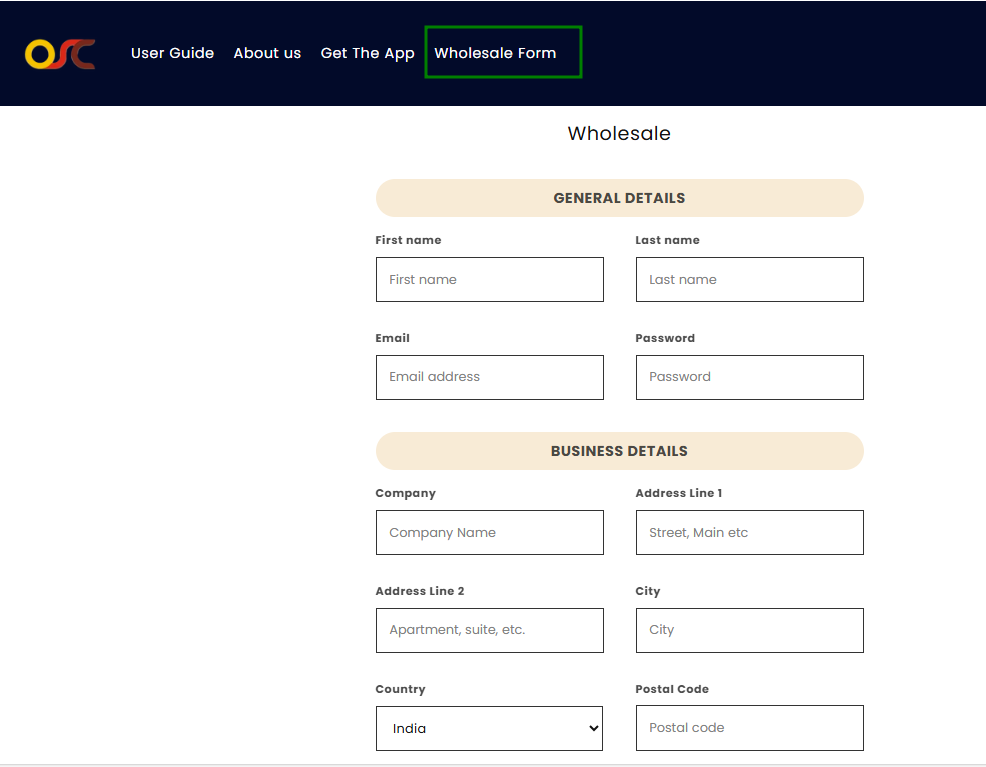
Step 1 : Add Title & Description
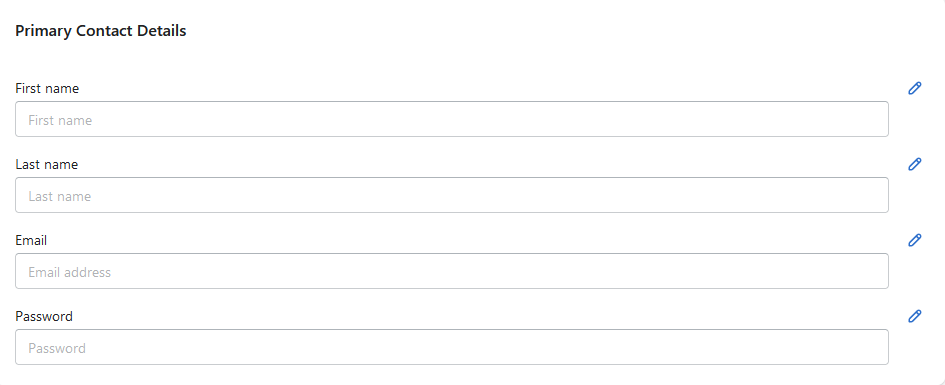
Step 2 : Add Primary Contact Details
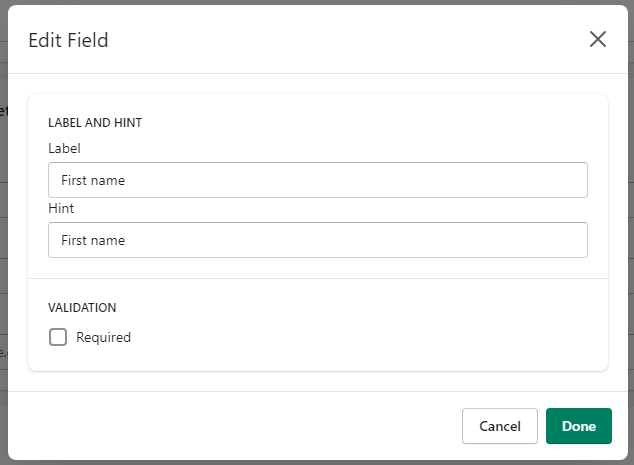
When you click the pencil icon to edit, you’ll see options for Label, Hint, and Validation. Here, you can modify the label, hint, and validation type so that they appear in the frontend form.
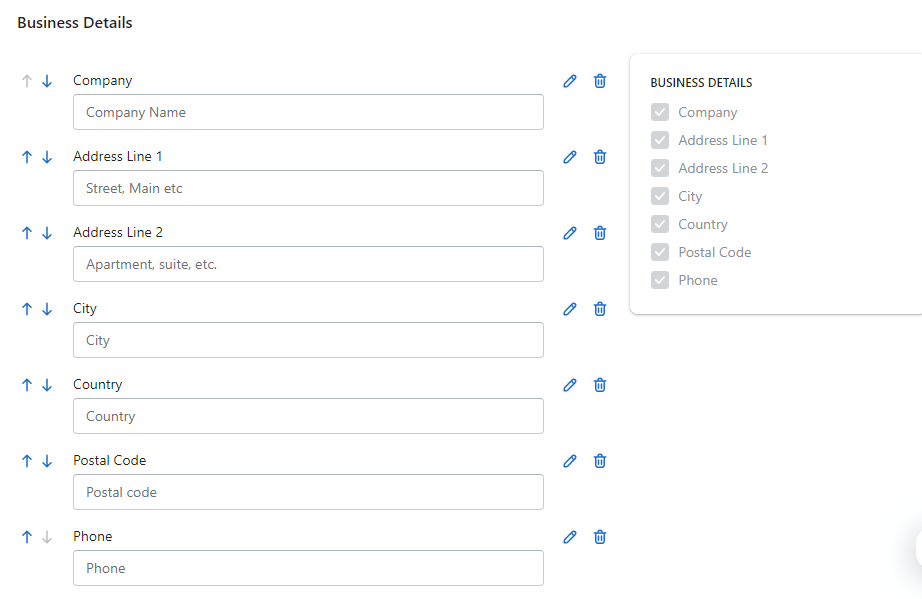
Step 3 : Add Business Details
- You need to click on the right side section check boxes provided in the business details.
- Once clicked, it will allow you to add details for those particular fields.
- You can rearrange the fields by clicking the up and down arrows.
- When you click the pencil icon to edit, you’ll see options for Label, Hint, and Validation. Here, you can modify the label, hint, and validation type so that they appear in the frontend form.
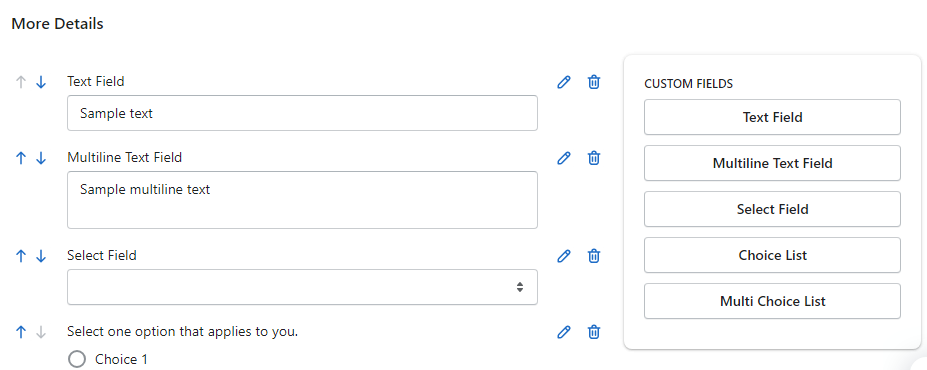
Step 4 : Add More Details
In this section, you can add additional details with custom fields. You can select them according to your preferences.
Add Registration Form to your store front
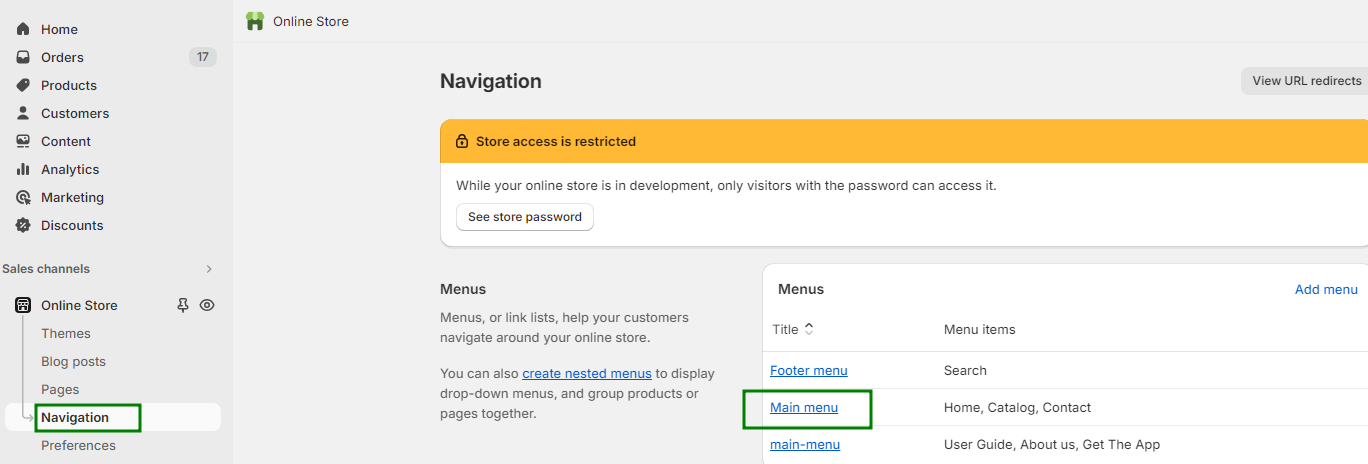
Step 1 : Locate the Main menu in storefront
- From the Shopify admin page, click to Online stores > Navigation
- From the Navigation page, click Main menu
Step 2: Add the form to the menu in storefront
- Once you are in Main menu, click on Add menu item
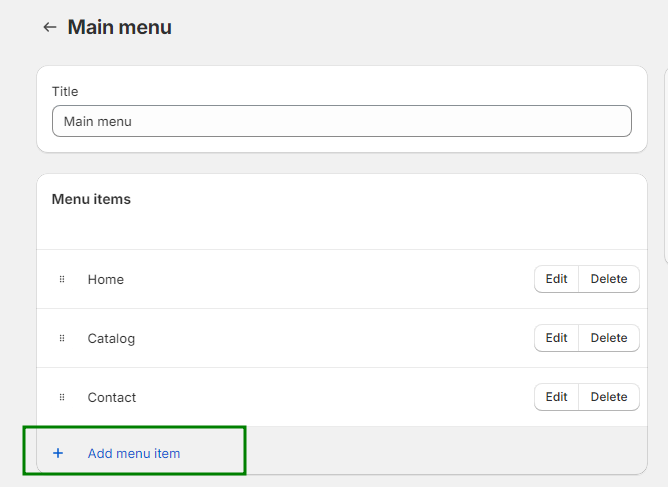
- Add menu item popup will open in right hand side
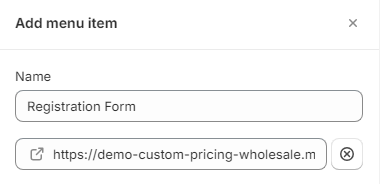
Fill the name and add the link by punching in the Registration Form Setup. You can copy your Registration form link from here. (Dashboard > Registration Form Setup)’
Now You can view the Registration Form in the Frontend menu section
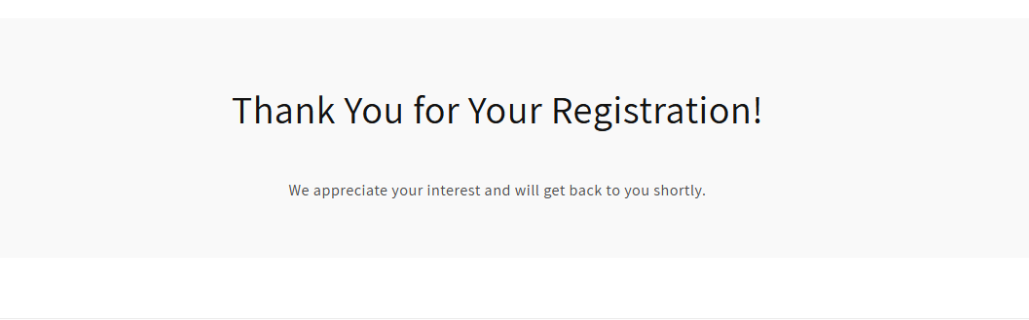
This form will be visible to customers. Once a customer fills out and submits this form,
The Thank You page will be displayed.
Once the form is submitted, two emails will be sent: one to the customer stating that their account is under review, and one to the merchant stating that a potential customer has submitted their registration form.
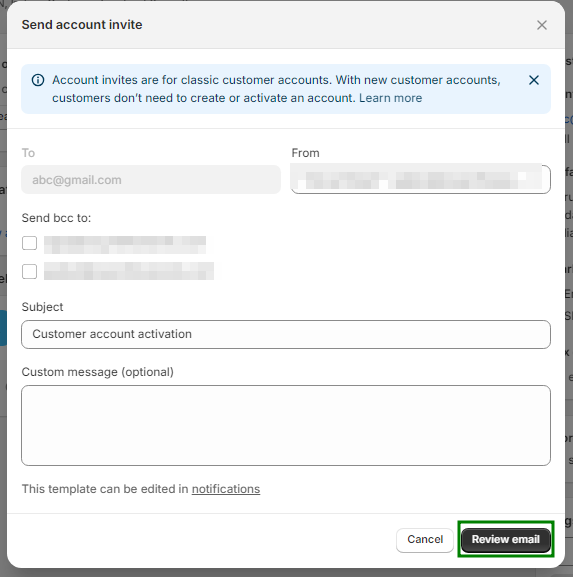
To create a password for a customer, follow these steps:
- Navigate to the Customers page in the Shopify admin.
- Select the desired customer.
- Click on “More actions” in the top right corner.
- Choose “Send account invite” from the dropdown menu.

5. Click on “Review email” and then click “Send email.”
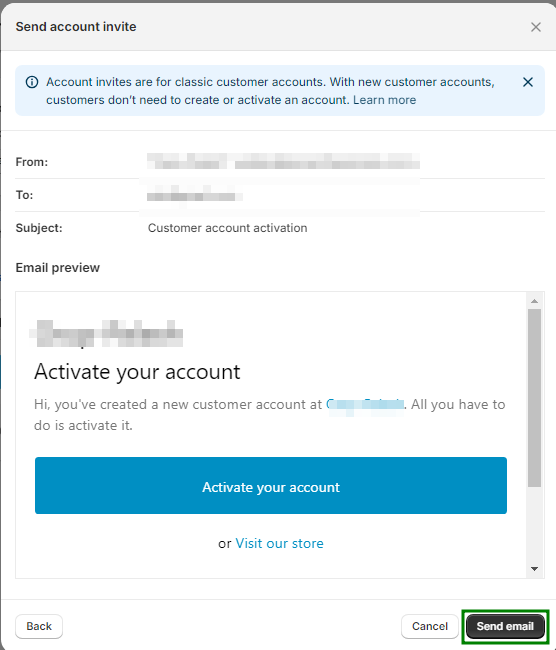
The customer will receive an email prompting them to activate their account by creating a password.
Manage, approve and notify status via email to your customers
1. Manage and approve your customers
Navigate to the “Customer Management” section in the app’s navigation menu. Here, you can access all the forms you’ve created, each listed with its name and corresponding actions.

Under the Actions tab, you’ll find two options:
- Edit : You can modify your form
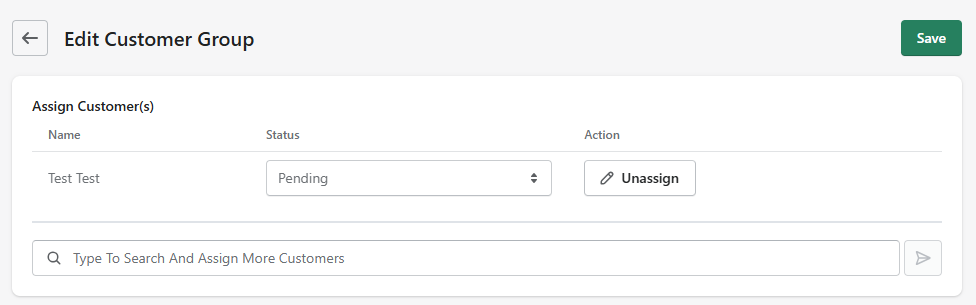
- Customer List : This section allows you to view all registered customers, and also gives the merchant the scope to add a customer directly through this section
Initially, when a customer fills out the form, their status will appear as Pending. Store Owners verify their customer details, after which you can change their status from pending to Approved.
2. Notify of new registration and account approvals
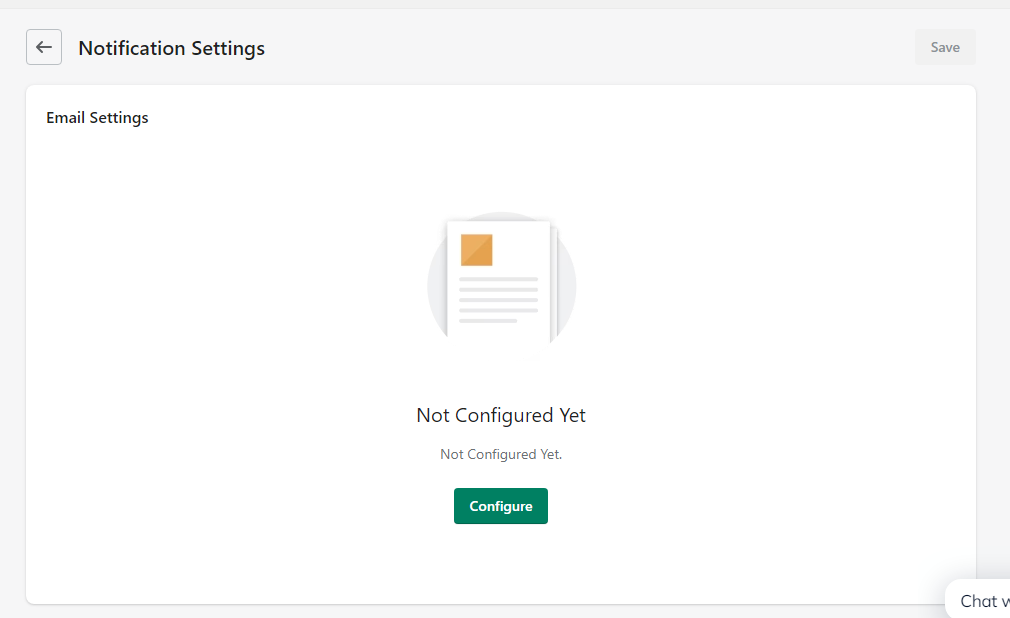
On the app’s navigation, there’s a tab of Email Notification Setup to configure the emails notifying your customers of account approval.
There’s configuration to notify you of new registration too.
In the Notification section, store owners can input their email addresses to receive all communications.

Step1: Click on Configure
Here we will provide three email templates
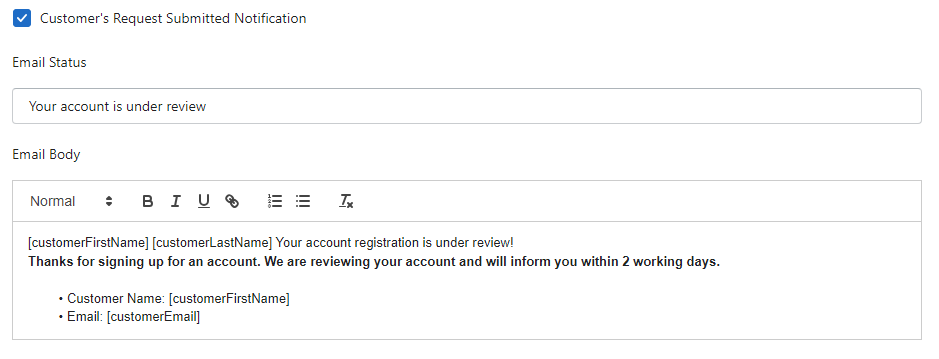
1. Customer’s Request Submitted Notification:
When a customer submits their form, an email is automatically sent to them, informing them that “Your account is under review.”
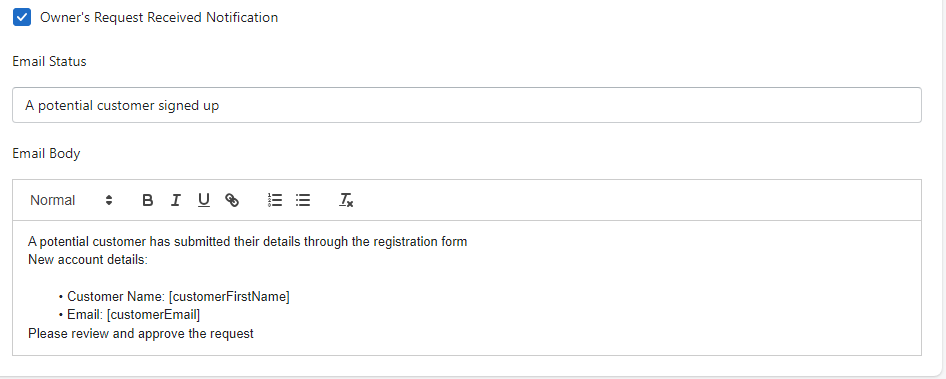
2. Owner’s Request Received Notification:
Likewise, an email is sent to the store owner, informing them that a potential customer has submitted the form along with the customer’s details.
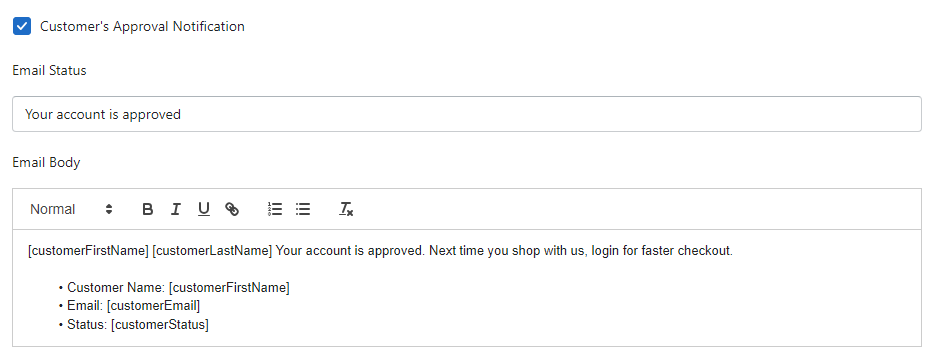
3. Customer’s Approval Notification:
Once the form has been reviewed and the store owner changes the customer’s status from pending to approved, another email is sent to the customer.
Email Notification Setup
1. Go to the email notification settings in the app menu.
2. Add your email address where you want to receive notifications.

3. You’ll see three sections— the first two are for customer emails when they submit the form, and the third section is for the store owner. By default, the email sent to you only shows the customer’s name and email.

4. You’ll receive an email like this:
A potential customer has submitted their details through the registration form.
New account details:
Customer Name:
Email:
Please review and approve the request.

5. If you want to include all the fields from the registration form in the notification, you need to adjust the settings.
6. To do this, click on the “Email Body” icon and find the shortcodes for each field.

7. Copy the shortcodes for the fields you want, then paste them into the email body under “Owner’s Request Received Notification.” Don’t forget to save.

After completing these steps, you’ll receive emails with all the details you need.