 Skip to content
March 10, 2021 | 10 min read
This tutorial applies to Magento 2.2.x only. For Magento 2.3.x, see Declarative
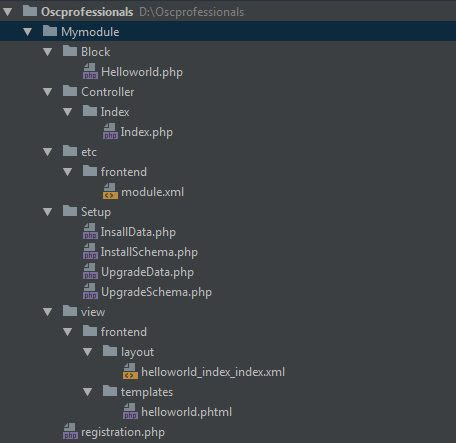
2. File Structure of Module
We’ve updated our File Module structure as follows:
3. Create file module.xml and registration.php
For the job of creating these 2 files, I have detailed instructions and explanations in the previous article. You can read it here.
4. Create file InstallSchema.php
You create this file according to the path: Oscprofessionals/Mymodule/Setup/InstallSchema.php.
We will create a table name magetop_blog with fields: id, title, description, created_at, status.
We will create a table name magetop_blog with fields: id, title, description, created_at, status.
$tableName = $installer->getTable(‘oscp_blog’);
//Check for the existence of the table
if ($installer->getConnection()->isTableExists($tableName) != true) {
$table = $installer->getConnection()
->newTable($tableName)
->addColumn(
‘id’,
Table::TYPE_INTEGER,
null,[
‘identity’ => true,
‘unsigned’ => true,
‘nullable’ => false,
‘primary’ => true
],
‘ID’
)
->addColumn(
‘title’,
Table::TYPE_TEXT,
null,[‘nullable’ => false, ‘default’ => ”],
‘Title’
)
->addColumn(
‘description’,
Table::TYPE_TEXT,
null,[‘nullable’ => false, ‘default’ => ”],
‘Description’
)
->addColumn(
‘created_at’,
Table::TYPE_DATETIME,
null,[‘nullable’ => false],
‘Created At’
)
->addColumn(
‘status’,
Table::TYPE_SMALLINT,
null,[‘nullable’ => false, ‘default’ => ‘0’],
‘Status’
)
//Set comment for oscp_blog table
->setComment(Oscprofessionals Blog Table’)
//Set option for oscp_blog table
->setOption(‘type’, ‘InnoDB’)
->setOption(‘charset’, ‘utf8’);
$installer->getConnection()->createTable($table);
}
$installer->endSetup();
}
}
5. Create file InstallData.php
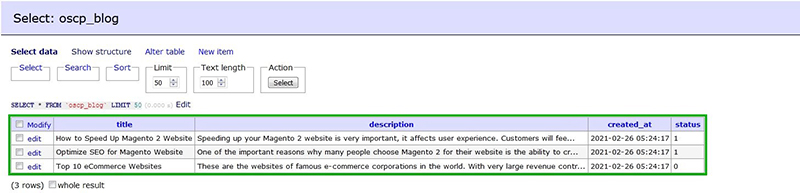
Next, we will insert data for the oscp_blog table.
You create this file according to the path:Magetop/Helloworld/Setup/InstallData.php.
You create this file according to the path:Magetop/Helloworld/Setup/InstallData.php.
//Check for the existence of the table
if ($setup->getConnection()->isTableExists($tableName) == true) {
$data = [[
‘title’ => ‘How to Speed Up Magento 2 Website’,
‘description’ => ‘Speeding up your Magento 2 website is very important, it affects user experience. Customers will feel satisfied when your site responds quickly’,
‘created_at’ => date(‘Y-m-d H:i:s’),
‘status’ => 1,
],[
‘title’ => ‘Optimize SEO for Magento Website’,
‘description’ => ‘One of the important reasons why many people choose Magento 2 for their website is the ability to create SEO friendly’,
‘created_at’ => date(‘Y-m-d H:i:s’),
‘status’ => 1,
],[
‘title’ => ‘Top 10 eCommerce Websites’,
‘description’ => ‘These are the websites of famous e-commerce corporations in the world. With very large revenue contributing to the world economy’,
‘created_at’ => date(‘Y-m-d H:i:s’),
‘status’ => 0,
],
];
foreach ($data as $item) {
//Insert data
$setup->getConnection()->insert($tableName, $item);
}
}
$setup->endSetup();
}
}
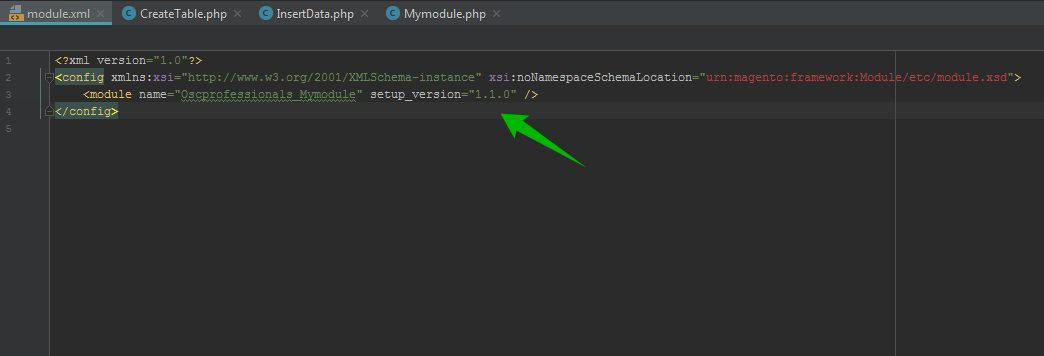
6. Increase the version in module.xml
If you have just created this module and you have not declared it on the database yet, you do not need to increase the version in module.xml
If you have already declared this module on the database, please increase the version in module.xml
7. Run the command
You need to run 2 commands:
php bin/magento setup:upgrade

php bin/magento setup:db-schema:upgrade

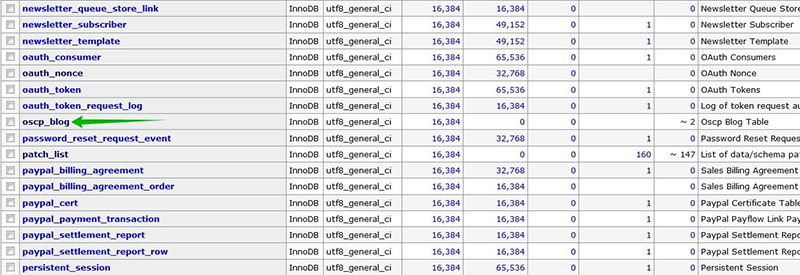
Please check on the database and You will see your accomplishment.
8. Upgrade table in the database
Next, I will guide you to add fields to the created table and create a new table in UpgradeSchema.php.
You create this file according to the path: Magetop/Helloworld/Setup/InstallData.php.
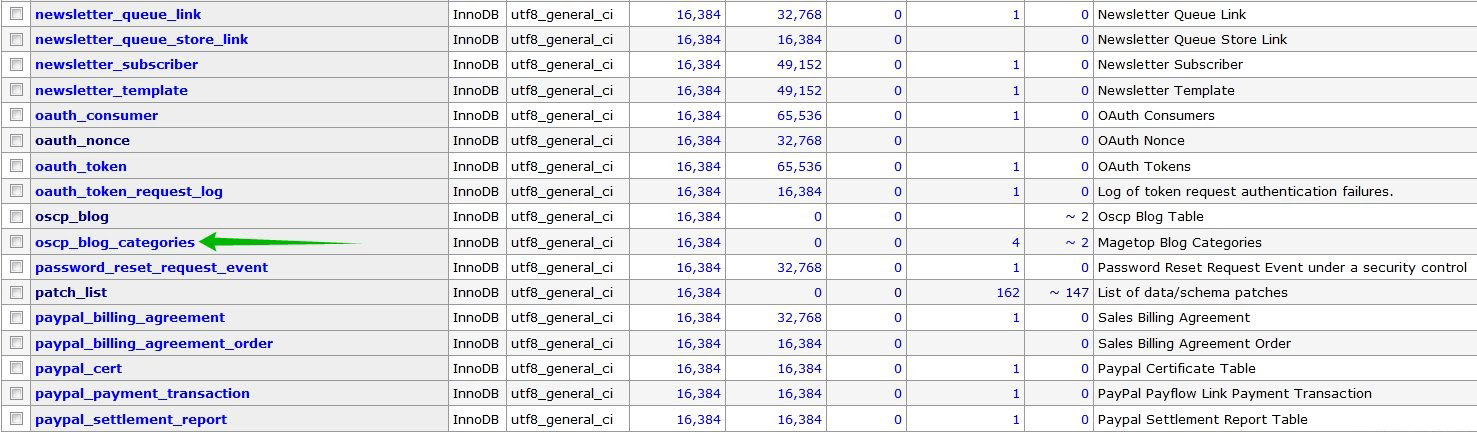
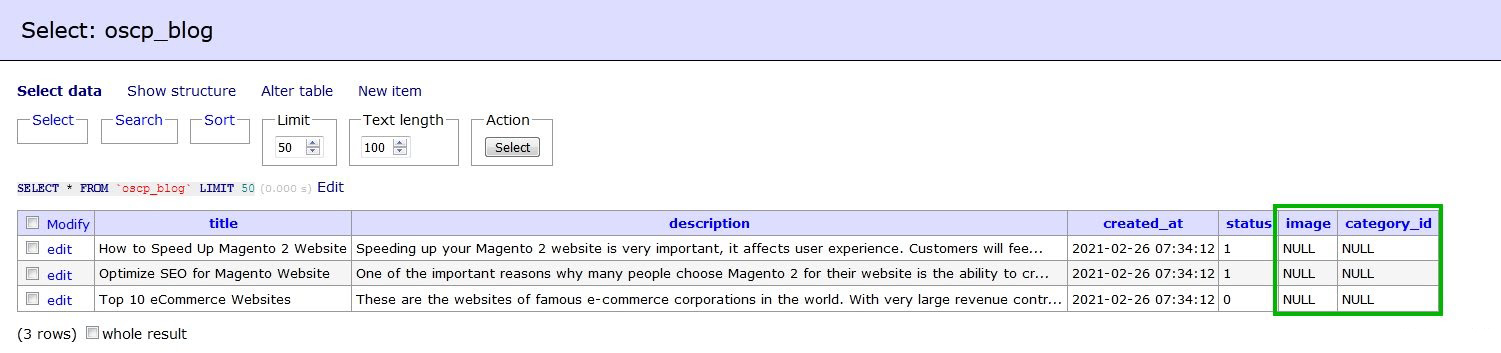
In the following code, I will implement two field images, category_id, and create a new table magetop_blog_categories.
You create this file according to the path: Magetop/Helloworld/Setup/InstallData.php.
In the following code, I will implement two field images, category_id, and create a new table magetop_blog_categories.
use Magento\Framework\Setup\UpgradeSchemaInterface;
use Magento\Framework\Setup\ModuleContextInterface;
use Magento\Framework\Setup\SchemaSetupInterface;
class UpgradeSchema implements UpgradeSchemaInterface
{
public function upgrade(SchemaSetupInterface $setup, ModuleContextInterface $context)
{
$setup->startSetup();
//Add new fields to the created table
if (version_compare($context->getVersion(), ‘1.0.2’) < 0) { $table = $setup->getTable(‘oscp_blog’);
//Check for the existence of the table
if ($setup->getConnection()->isTableExists($table) == true) {
// Declare data
$columns = [
‘image’ => [
‘type’ => Table::TYPE_TEXT,[‘nullable’ => true],
‘comment’ => ‘Image’,
],
‘category_id’ => [
‘type’ => Table::TYPE_INTEGER,[‘nullable’ => false, ‘default’ => 0],
‘comment’ => ‘Category ID’,
],
];
$connection = $setup->getConnection();
foreach ($columns as $name => $definition) {
$connection->addColumn($table, $name, $definition);
}
}
}
//Create a new table
if (version_compare($context->getVersion(), ‘1.0.2’) < 0) { $categories = $setup->getTable(‘oscp_blog_categories’);
//Check for the existence of the table
if ($setup->getConnection()->isTableExists($categories) != true) {
$tableCategories = $setup->getConnection()
->newTable($categories)
->addColumn(
‘cat_id’,
Table::TYPE_INTEGER,
null,[‘identity’ => true, ‘unsigned’ => true, ‘nullable’ => false, ‘primary’ => true],
‘Category Id’
)
->addColumn(
‘status’,
Table::TYPE_SMALLINT,
null,[‘nullable’ => false, ‘default’ => 1],
‘Status’
)
->addColumn(
‘cat_title’,
Table::TYPE_TEXT,
null,[‘nullable’ => false, ‘default’ => ”],
‘Category Title’
)
->addColumn(
‘created_at’,
Table::TYPE_TIMESTAMP,
null,[‘nullable’ => false],
‘Created At’
)
//Set comment for oscp_blog table
->setComment(Oscp Blog Categories’)
//Set option for oscp_blog table
->setOption(‘type’, ‘InnoDB’)
->setOption(‘charset’, ‘utf8’);
$setup->getConnection()->createTable($tableCategories);
}
}
$setup->endSetup();
}
}
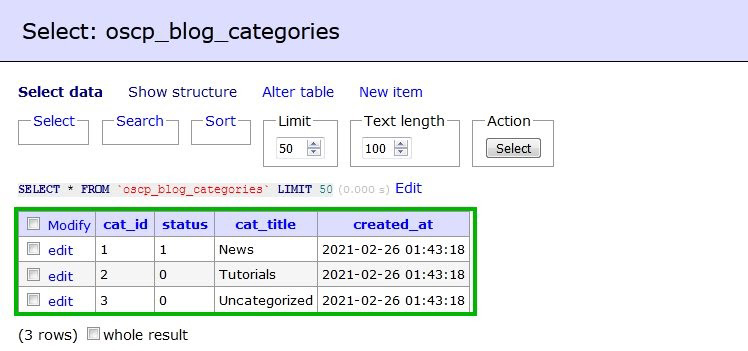
We will insert data for the oscp_blog_categories table.
//Check for the existence of the table
if ($setup->getConnection()->isTableExists($tableName) == true) {
$data = [[
‘cat_title’ => ‘News’,
‘status’ => 1,
‘created_at’ => date(‘Y-m-d H:i:s’),
],[
‘cat_title’ => ‘Tutorials’,
‘status’ => 0,
‘created_at’ => date(‘Y-m-d H:i:s’),
],[
‘cat_title’ => ‘Uncategorized’,
‘status’ => 0,
‘created_at’ => date(‘Y-m-d H:i:s’),
] ];
foreach ($data as $item) {
//Insert data
$setup->getConnection()->insert($tableName, $item);
}
}
}
$setup->endSetup();
}
}
Do not forget to increase the version in module.xml!.
Finally, run the two commands above and enjoy the result.
Please check on the database and You will see your accomplishment.
Finally, run the two commands above and enjoy the result.
Please check on the database and You will see your accomplishment.
I hope through this series you can create your own complete module. Good luck!


