 Skip to content
How To Add More Buttons To Your Website Header In osCommerce
How To Add More Buttons To Your Website Header In osCommerce?We can easily customize our osCommerce header, add as many buttons required in header. This is quite simple but still, some people find difficult to execute. For them, let’s make simple so that they can easily understand. How to add more buttons of your choice like existing “checkout”, “cart content” and “my account” buttons.Here we are providing the stepwise procedure to add buttons in the header:
The default osCommerce looks like this:
Step 1:
In osCommerce catalog folder to edit go to catalog/includes/header.php use a copy of a file and do modifications in it.
(Note: Keep an original file with you for backup.)
(Note: Keep an original file with you for backup.)
Step 2:
Here, this part shows how to create button.
This code refers to the cart contents button which is already added in default osCommerce looks like this.

Write the above code for creating button.

The role of tep_draw_button() function is it draws a button with a link and make it look like a simple button which can be clicked and used.
Step 3:
To create a new button.
A button created should consists of button text, a link to a page like suppose if it belongs to cart button it should link to the shopping cart where we can see our cart contents or any sort of a link and also a symbol that a button refers to.
Suppose we require to Contact us button in header beside checkout button in our default osCommerce.
Create a new button with the help of tep_draw_button() function.
The code will look like this below.
tep_draw_button(HEADER_TITLE_CONTACT_US, ‘mail-closed’, tep_href_link(FILENAME_CONTACT_US)) Button is now created.
- The button link:
Next after creating checkout button using tep_draw_button() function. Add a link to a button created.Now to how to add a link Use tep_href_link() function to add link to a button.
tep_href_link(FILENAME_CONTACT_US)
Above button is linked to contact us page.
**You can refer the list of all files and their constants in the file
catalog/includes/filenames.php
- The button link:
This is following button code that we use as a reference:
Always use the text constants to define any text like.
HEADER_TITLE_CONTACT_US for contact us
catalog/includes/languages/english.php open it.
define(‘HEADER_TITLE_CONTACT_US’, ‘Contact us’);
We can use different languages for our store and use defined constants anywhere in our store.
- The button icon:
- We can use icons for buttons.You have to follow the below reference for some jquery icons.Click on this link.
https://jqueryui.com/themeroller
There are a couple of icons that we may need for our use for the contact us button, we want the envelope type icon and for that, we have ìui-icon-mail-closedî in jquery.
In short we will reqiure:
- button_text
- button_link
- button_symbol
Step 4:
How to place button to the header?
You can place that button to anywhere you like. Now, we want it in the header. Let’s add it to there.
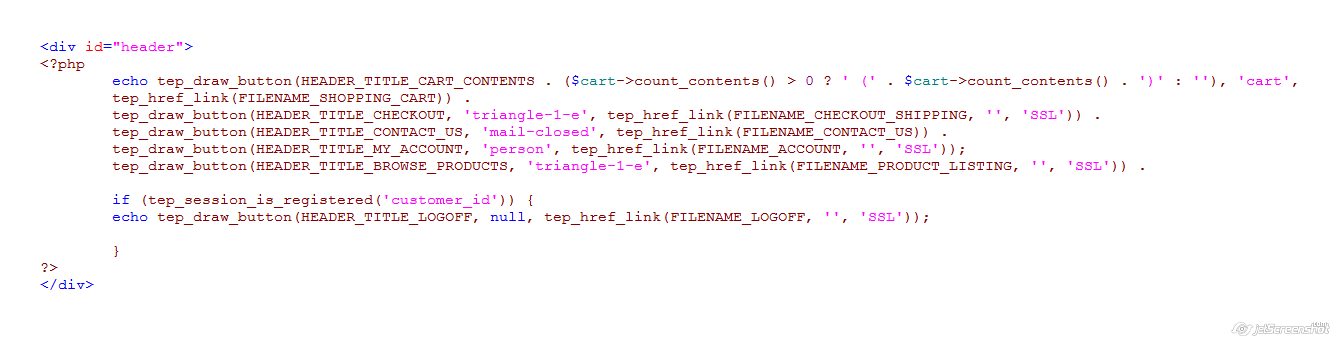
Or else if you want the contact us button after my account use the below code.
For code: Customized code for the header(b)
Some more examples you can refer as:
You can add login logoff button and many more buttons of your wish and requirement.
To access products in our store we can use button named browse products:
Well, we are ready with our creative header. You can go for a change in searching for more ideas and customize it to look better.


