 Skip to content
How can we manage Customer Configuration in Magento ?
Customer Configuration is helpful to manage the whole information regarding customer account. That is setting related to apply new customer account confirmation, Email template setting, Checkout, Customer Registration Process.
Setting of Customer Configuration:
Step 1. Go to Admin -> System -> Configuration -> Customers -> Customer Configuration
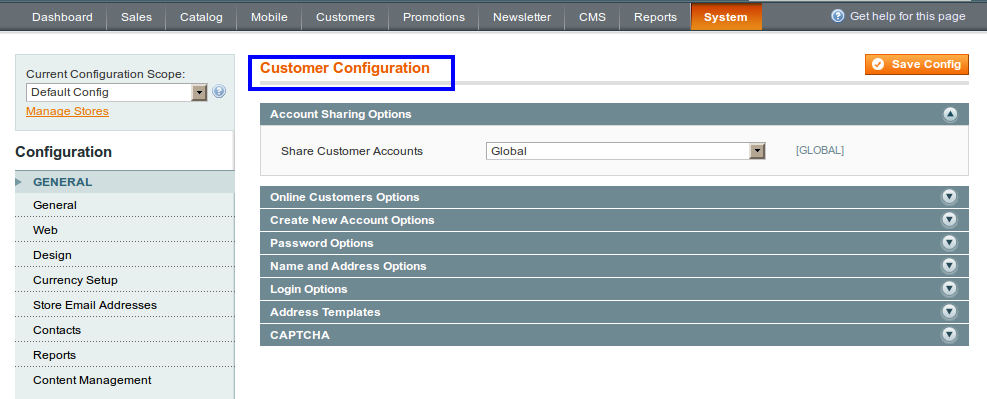
Step 2. Account Sharing Options:
Share Customer Accounts:
- Per Website: By default it is set as per website. Customer can share with only on this website, or with all stores of this website.
- Global: Account will share with multiple websites.
Step 3. Online Customers Option:
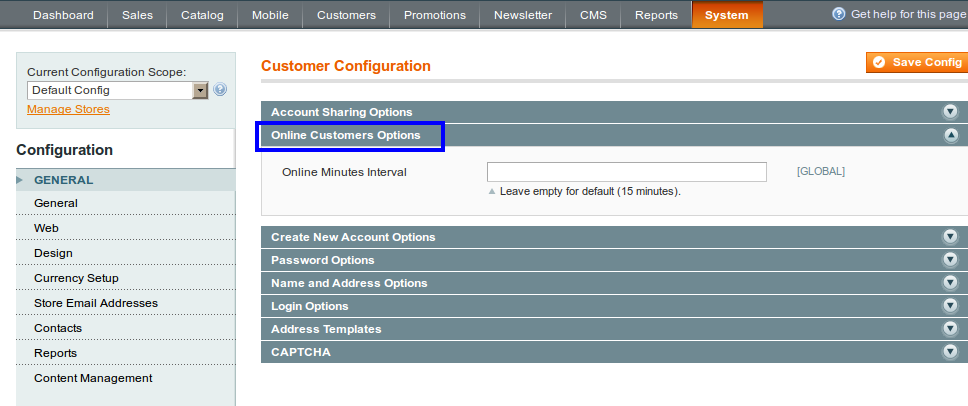
- Online minute interval: This is the time interval for refreshing online customer. By default this field is set to empty for 15 minutes.
If you want to set time interval of 30 minutes then just put in the field Online minute interval is 30
Step 4. Create New Account Options:
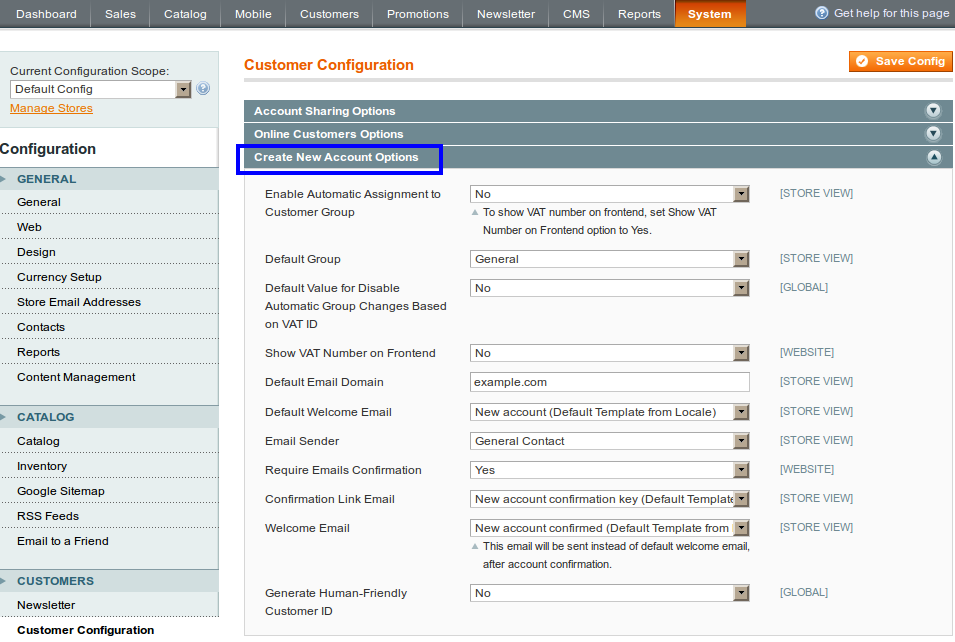
- Enable Automatic Assignment to Customer Group: Set Yes or No. By default it sets to No. If You set it to Yes, it will display setting related VAT.
- Default Group: Select from dropdown customer group. That will assign to customer by default when customer create an account.
- Default Value for Disable Automatic Group changes based on VAT id: Do VAT related setting.
- Show VAT number on frontend: Set yes or No from dropdown. By default it set to No.
- Default Email Domain: example.com is the default domain. You can set other domain for your store.
- Default Welcome Email: Select Email template, that will send a welcome email to newly registered customer.
- Email Sender: Select from dropdown a store address that will receive by customer with Welcome email.
- Require Email Confirmation: By default it set to No.
- Confirmation Link Email: Select template for confirmation email.
- Welcome Email: Select template to send welcome email. This email only send when Email confirmation is enabled.
Step 5. Setting related Password Options
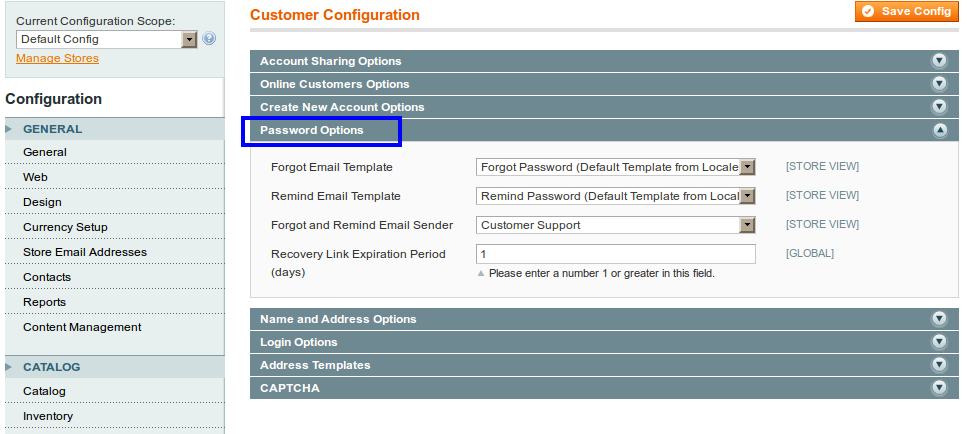
- Forgot Email Template: Select the email template to use for the email sent to customers, when customer wants to reset their password because of they forgotten it.
- Remind Email Template: Select email template, for remind password function.
- Forgot and Remind Email Sender: Select which store email account is used to send reset password emails.
6. Set Name and Address Option:
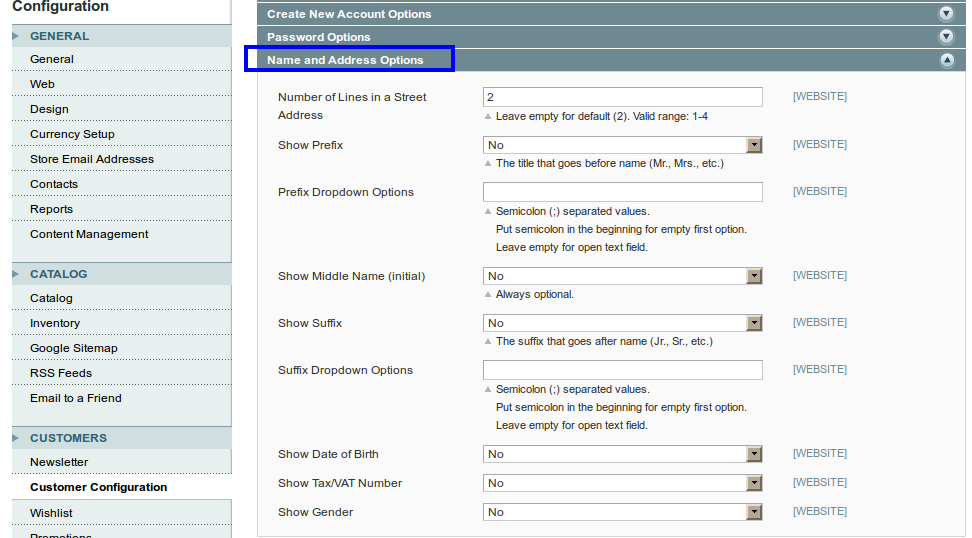
-
- Do setting related customer registration. This setting will display while Customer registration.
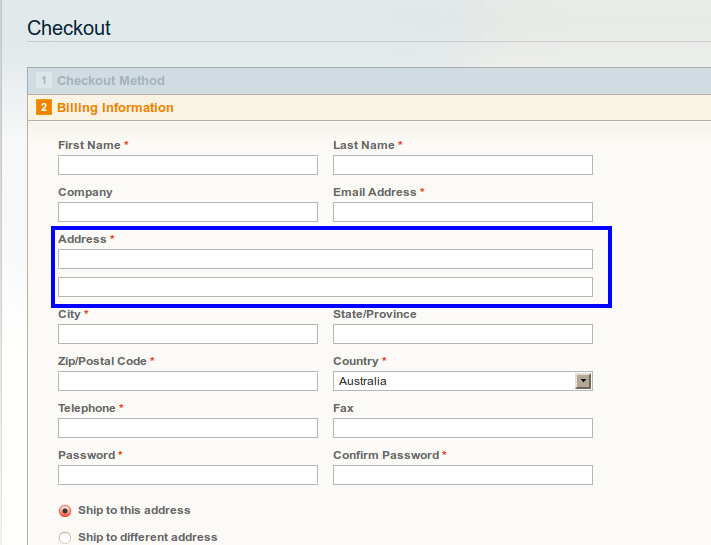
Number of lines in a Street Address is 2.
Step 7. Login Options:
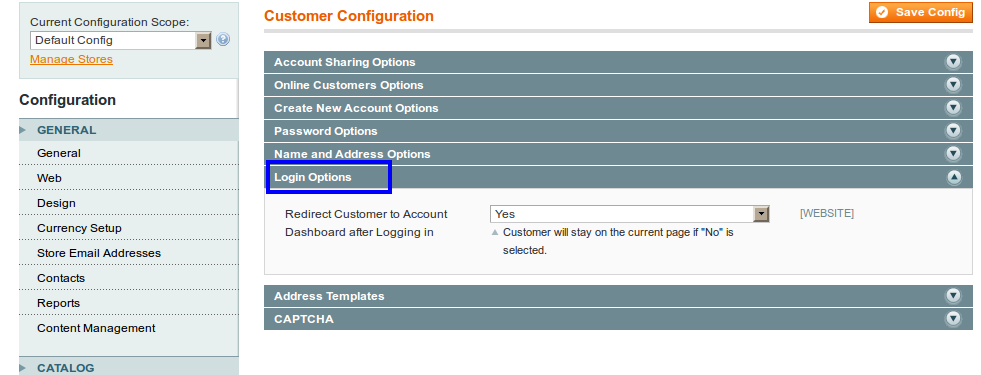
- Redirect Customer to Account Dashboard after Logging in: Set Yes or No from drop-down. Customer will stay on the current page if No is selected.
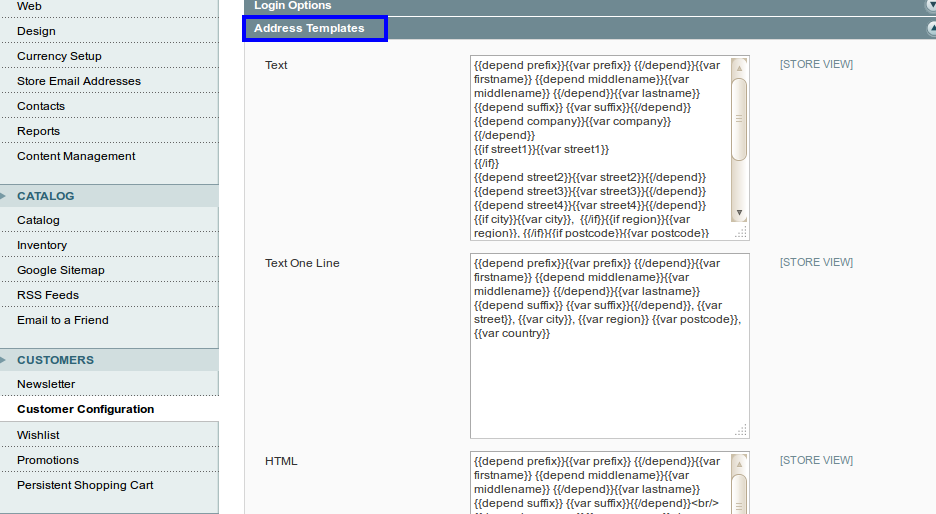
Step 8. Set Address templates:
Step 9. Save Configuration:

